Boy’s Bow Tie Tutorial
Disclosure: This post may contain affiliate links. As an Amazon Associate, I earn from qualifying purchases.

Super Easy Boy’s Bow Tie Tutorial. You can easily make 2 sizes, either with a machine or sewing by hand!

Easy Boy’s Bow Tie Pattern and Tutorial
Last week, I made my daughter a knot dress for Valentine’s Day. I also wanted to make my son something to wear for his Valentine’s party. (He likes to dress in a “preppy” style- he’s only in 2nd grade, but he already knows what the little girls like!)
I asked him if he wanted to wear a bow tie to school on Valentine’s Day. I told him it would have Velcro on the back so it could be easily removed. He liked the idea, so I got to work…
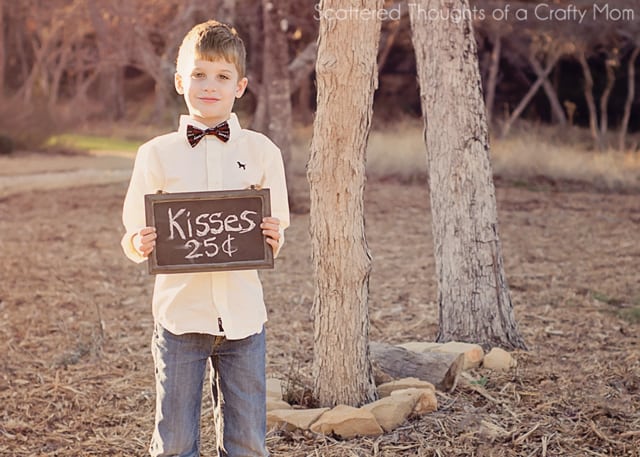
The original version I made, was a little small in my opinion, so I remade it in a slightly larger version better suited for a 6 to 13 year old. (The smaller version is the one he wore in our Valentine’s day pictures, the main photo above is the larger version.)
I have included the measurements for both sizes for those who want to make a bow tie for a smaller child.
The great thing about this project is that it is simple enough to hand sew if you don’t have a sewing machine.
The instructions are exactly the same no matter how you make it, but a sewing machine will take this 40 minute project down to about 10 or
15 minutes…
Our Valentine’s Day Pictures really turned out cute!

If you are interested in making the knot dress in the pictures below, you can find the tutorial and a free printable pattern here: Knot Dress Tutorial.

How to Make an Easy Boy’s Bow Tie:
Materials:
- Scrap fabric (a fat quarter would be great)
- Ruler
- Scissors
- needle and thread (I also used a bit of glue, but glue is optional)
- Velcro
Instructions to sew the bow tie:
Step 1: Cut fabric for size needed according to list below:
Toddler size:
- Bow tie: 8.5 inches wide by 5.5 inches tall
- Center loop: 2 inches wide by 2.75 inches tall
- Neck band: 16 inches wide by 2 inches tall
Elementary age:
- Bow tie: 10.5 inches wide by 7.5 inches tall
- Center loop: 2 inches wide by 2.75 inches tall
- Neck Band: 18 inches wide by 2 inches tall
(Photo below includes cut dimensions for the larger size)

Step 2: Make the bow.
Fold the bow fabric in half, longways, right sides together and sew a seam along the edge:

Flip the fabric right side out, and move the seam to the middle, as shown. Use your fingers to “finger press” the sides flat.

Fold the bow fabric in half again, seam side out, and sew another seam along the edge:

Flip the bow fabric around again, so the seam is on the inside, and finger press the edges flat.

Find the middle of the bow fabric and scrunch it into a bow shape. Add a few stitches to the middle to hold the bow’s shape in place.

Step 3: Make the center loop.
Grab the loop fabric, fold in half longways, right sides together and sew a seam along the edge.

Flip the loop fabric right side out, moving the seam to the center and finger press the edges flat.
Fold in half again, seam side out, and sew along the edge. Flip the loop right side out, so the seam is on the inside.
Slip the bow through the loop, so the loop covers the center stitches.

Step 4: Make the strap.
Grab the neck tie strap, fold in half longways, right sides together and sew the seams marked in red below:

Flip the strap right side out and press flat with an iron.

Step 5: Put the bow tie all together.
Use a safety pin and thread the strap through the loop on the back of the bow. (It should be snug.)

Cut a your Velcro into about 3/4 to 1 inch pieces. You will want the scratchy side of the Velcro to face out.
Attach the scratchy Velcro piece to the strap on the side with the finished edge. You can hand or machine sew the Velcro in place. (I got lazy and used hot glue, it adheres very well if you don’t let it cool too much before attaching it to the fabric.)

Hold the bow tie in place and mark where to put the second piece of Velcro.

Fold the unfinished edge in where you marked it and sew along the edge to close the opening.

Attach the second piece of Velcro and you are done! Isn’t it cute?


Don't miss any more posts!


I just made the infant sized bow tie for my cat. Now he’s such a handsome boy. I’m going to have to make a few more. Thank you for the pattern!!!
Love it! If you have any photos, i would love to see them! You can share them in my private facebook group ( https://www.facebook.com/groups/Scatteredmompatterns/ ) or tag me on instagram @scattered mom .
I made the cutest bow tie for my nephew using this tutorial. Thank you so much for easy to follow instructions
So glad it worked out for you!
HUGE THANK YOU…I will be making at 2am for my 5 year old son as a birthday surprise. He is just getting into bow ties and I am not looking to remortgage our house to buy bow ties for a 5 year old. I sew and this is a simple pattern and well thought out. My husband just washed a pen with his pair of $150 paid of plaid madras shorts, and I want to salvage that fabric (that is not blotchy with rogue pen) for a super cute project….FOUND IT in a bow tie for our son.
yea, boys are so cute with bow ties!
What type of fabric did you use? Great tutorial!!
Thanks! I used regular quilting cotton.
Love this! I am DEFINITELY going to have to make this for my 9 year old son soon! Thanks for sharing 🙂