Simple Basket Weave Quilt Pattern (w/ a layer cake)
Disclosure: This post may contain affiliate links. As an Amazon Associate, I earn from qualifying purchases.
Welcome! I’m so happy to share this easy Basket Weave Quilt Pattern and Tutorial with you today. This simple pattern is perfect for a beginner quilter or someone who just likes a quick and easy project. The quilt pattern is designed for 10 inch precuts, but yardage works great too. Grab your copy today!

💌 Save this article
Quilting Confessions
I have a confession.
When it comes to quilting… I am very jealous of all the quilters that live in a climate that allows for quilt photos to be taken among snow-covered majestic landscapes and snowy mountain tops
Well – I can check “a quilt in the snow photo op” of my bucket list!

When I heard we were in for a few days of snow on the ground in mid-February, I knew it was my chance for a quilt-in-the-snow photo! (If only I had known what else was in store for us over the next few days, lol.)
Luckily, I had already begun working on the digital design for this quilt pattern, so I had a head start.
Originally, this basket weave quilt was going to be a bit more complicated, (more piecing/ smaller blocks) but, since “snow-time” was ticking away, I decided to save the complicated version for another day and work on whipping out a simplified version so I could have my own “quilt in the snow” pictures!
Turns out, during the Texas-Snowpocalypse, we went a significant amount of time without power. Hubby got my machine hooked up to our generator so I could finish my quilt for my snow pics. (Only took four extension cords to reach from the garage all the way upstairs to my sewing room. Who knew the freezing temps and snow would last a full week!!! Well ok, maybe the meteorologists knew, but they are always so doom/gloom/worst-case scenario, they are hard to trust, lol.)
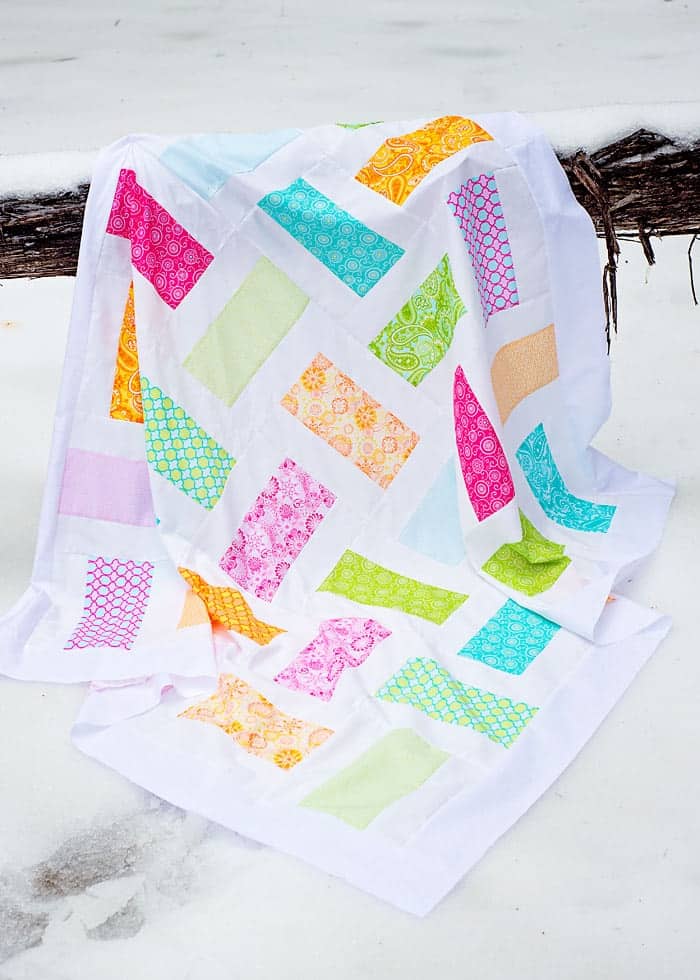
Yes, You Can Make This Quilt Top in a Day
You guessed it, the Basket Weave quilt top is a very fast sew!
- The blocks are large and require very few cuts and piecing. I managed to get the blocks cut and pieced in just a few hours. It only took another hour-ish to stitch the blocks together and another hour to add the border.
- Another reason this quilt top is so fast and perfect for beginners that there aren’t many seams/points to line up.
- The blocks are assembled, one horizontal / one vertical, so there are no seams to line up when sewing the blocks together. (You just have to take care to sew them with accurate seam allowances to keep the rows straight.) The only seam matching is when you sew the rows together. (And there are only six rows!)
Why Make the Basket Weave Quilt with a Layer Cake.
I love working with precuts when I can. Sewing time can be difficult to carve out, and using precuts cuts my cutting and prep time in half. They come in various shapes (fat quarter, layer cake, jelly roll, or charm pack) and a selection of precuts allows you to include so many different patterns of fabric that you might not have been able to afford if you were using yardage.
Although you can use yardage or fat quarters for the basket weave quilt, this particular quilt pattern was designed with a 10-inch stacker (or layer cake) in mind.
For today’s quilt, I used part of a solid layer cake and a part of a patterned layer cake.

Where to Buy Precuts?
I pick up precuts all over when I find a good sale. My favorites places to buy them are Fabric.com, Etsy, Amazon, and the Fat Quarter Shop. If you love collecting precuts, the Fat Quarter Shop has several monthly and quarterly clubs. (and yes, I may or may not be a member of a few fat quarter clubs, lol.)
Easy Basket Weave Quilt Pattern Variations
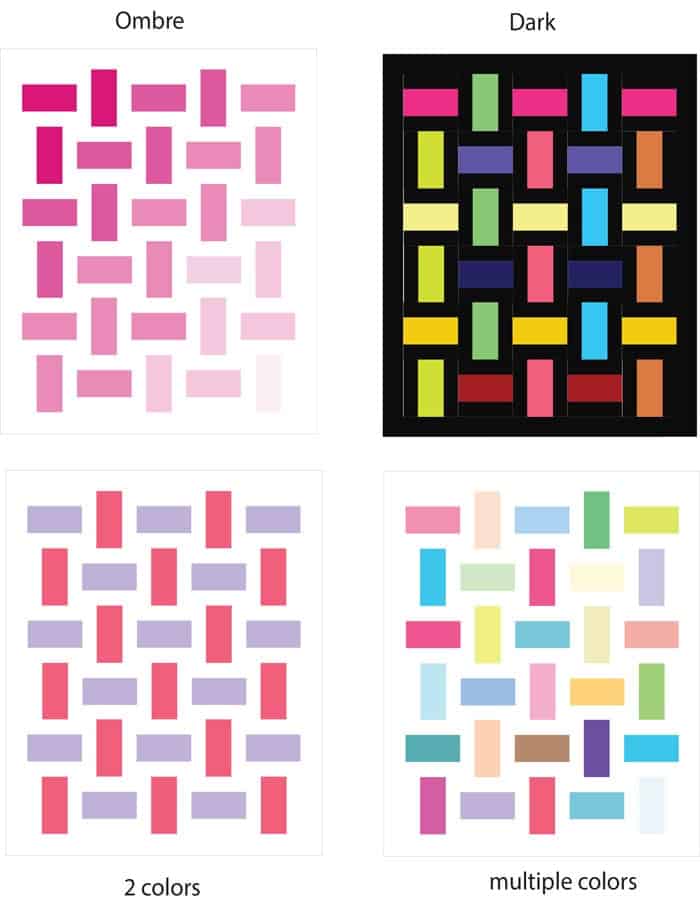
I used 15 random colors from a layer cake, but there are so many different variations for this quilt!
- Ombre
- Use a black background instead of white
- use just 2 colors
- use a charm pack instead of a 10-inch stacker for a smaller quilt project
So many ideas!
If you are thinking about an Ombre version, be sure to check out the Kona Palates. The color coordination is already done for you! (I love a good ombre, that may be my next version.)
Quick update:
I’ve bow made a 2nd, slightly different version of this quilt. The new version uses 2 strips of fabric in between the white (instead of one). The cutting dimensions are slightly different, so if you want to try this new one, be sure to check out the instructions here: (red, white, and blue basket weave quilt.)

Where Do I Get the Simple Basket Weave Quilt Pattern / Template?
The link for the pattern template is under materials needed. Click the link, add the pattern to your cart and check out. (takes about 15 seconds for the process.) A copy of the pattern will be emailed to you.
Ready to make a basket weave quilt?

Easy Basket Weave Quilt Information:
Instructions for quilt top only, quilt and bind using your preferred method.
Skill level: Beginner-friendly
Time to finish quilt top: 4 to 6 hours
Block size: 9 inches finished
Quilt finished size:
- no border 45 x 54 inches
- with border: 52 x 61 inches
Materials Needed for Quilt Top:
- Quilt Template
- 15 – 10 inch squares from the main color(s)
- 20 -10 inch Squares from the background-color
- Optional: 3/4 yard for border
- Rotary Cutter/Ruler/Cutting Mat
- Iron
- quarter-inch seam allowance foot
- Basic Sewing/quilting Supplies
Sewing Instructions
Step 1: Cut Fabric:
- Main Color: Cut 15 – 10 inch squares into 30 – 5 x 10 inch squares
- Background color: Cut 20 – 10 inch squares into 60 – 3 x 10 inch squares
- Border: (optional): Cut 6 – 4 inch by WOF from the border fabric

Step 2: Assemble the Blocks
Line up one – 5 X 10 main color and two – 3 x 10 background color in the order shown below.

Piece block together with a consistent .25 inch seam allowance.
Keep piecing all the blocks together. (Chain piecing will save a ton of time!)

Press blocks.
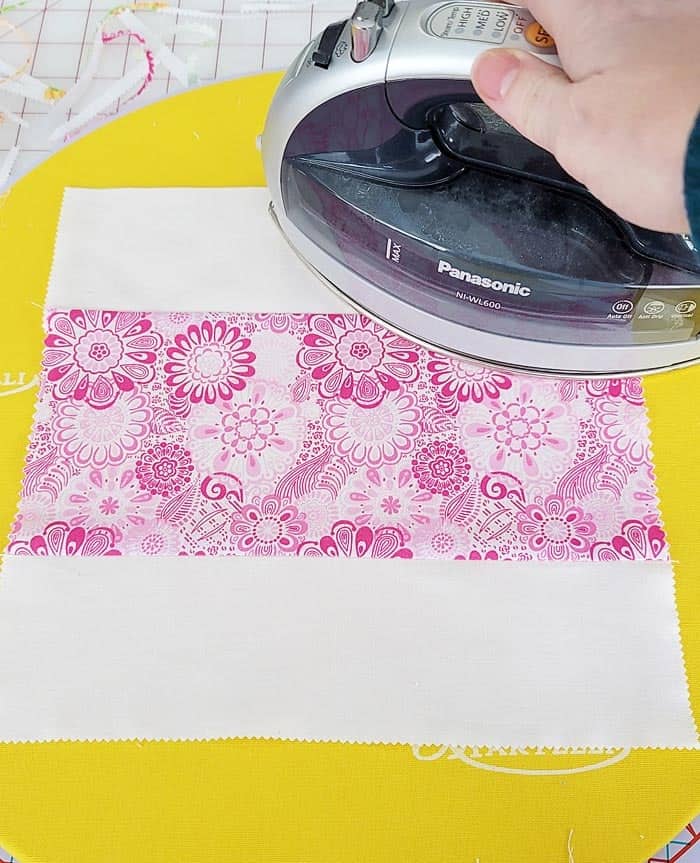
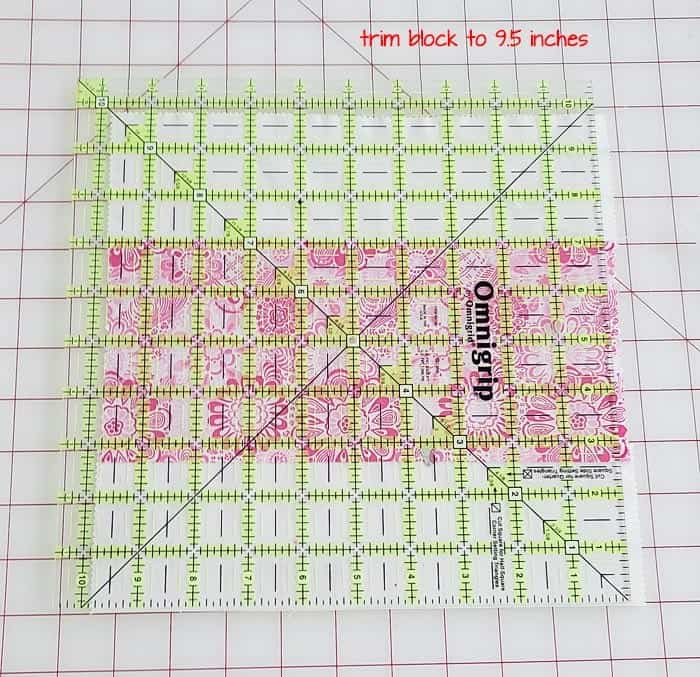
Trim blocks to 9.5 inches square.
Step 3: Assemble the Quilt
Lay out all your completed blocks according to the quilt diagram, taking the time to make any adjustments to the layout.

Start sewing the rows together one by one. Pressing each row well.
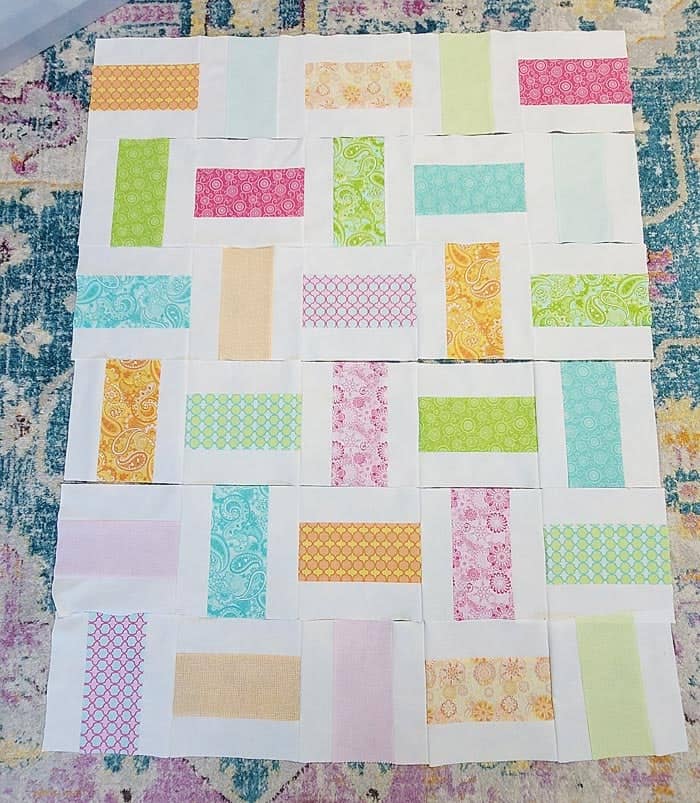
When rows are complete, sew the top three rows together and press. Sew the bottom three rows together, press, then sew the two halves together.
Step 4: Adding Optional Border.
If you choose to add a border, cut 6 – 4 inches by WOF from the border fabric.
Sew two of the strips together and press. Line strip up along the long side and sew with a quarter-inch seam allowance. Trim away extra fabric from the strip.

Repeat for the border strip/fabric on the opposite side.
Sew two more strips together and add the border strip fabric to the top of the quilt. Press and trim extra strip fabric away.
Sew the leftover strips together and add the border strip to the last side.
Press and you are ready to quilt and bind.
Step 5: Quilt and Bind as Desired.
If you end up making one of these quilts, please come back and let us know what you think!
You can share a photo to my private Facebook group or tag me on Instagram using #scatteredmompatterns.
Don't miss any more posts!


