Shabby Chic Ruffled Pillow
Disclosure: This post may contain affiliate links. As an Amazon Associate, I earn from qualifying purchases.
I love throw pillows! They’re such a quick and easy way to jazz up a boring old couch. (Our couch is going on 12 years and is starting to look a little shabby. It’s on my long list of items to replace, but for now cute new pillows will have to do the job…)

💌 Save this article

I really like how the shabby, ruffled look of these pillows contrast and complement the dark and semi-formalness of the couch.
Joann Fabric and Craft Stores had sent me a couple of yards from their new HGTV Home collection to try out.

When I saw how perfectly the fabrics they sent coordinated with my decor, I knew the top fabric would be perfect for the new pillows I wanted to make! (I would love to use the plaid/striped fabric on this pattern if I ever get my hands on it…)
At first, I thought I would go with a couple of smaller square pillows, but then decided it would be more fun to try something different. I still love the look of these pillows, so I figured a textured pillow would be the way to go.
I really like how they turned out… (so shabby chic!)

I put together a little tutorial below to show you how these are made, though I should probably mention, if you have little (or big) kids or who are rough with your throw pillows, this method might not be the best choice. The ruffle edges are frayed and need to be treated with care so they will hold up over time. (I’ve got my kids trained not to mess with mommy’s fancy pillows – they just move them out of the way and are not allowed to lay on them…)
Materials needed
- for the ruffles: +/- 3/4 yard of 60-inch wide fabric (depends on the size of your pillow)
- fabric for the pillow form
- polyfill
- scissors
- fabric marker
- basic sewing supplies
Instructions:
Decide how big you want your pillow and cut out 2 equal-sized pieces of fabric. (I just used a pillow I already had as a guide.)
To create the ruffles, we will use the “snip and rip” method. It is just like it sounds.
Snip:

And rip. (Snip through the selvage and rip all the way to the other selvage. Upholstery weight fabrics are slightly harder to rip, but still doable.)

Make your ruffles as wide as you want. (Mine varied from 1.75 to 2 inches wide.) Just remember the narrower the strip, the more ruffles you will have to sew on… Also, the first strip you rip will likely not be even, due to the original cut on the fabric rarely being straight. What’s great about this method is that it will rip the fabric in straight strips, so once you remove the first strip everything else will be even.
After you rip your strips, pull off a few threads of the fabric to get the frayed look and trim off any crazy long threads.

The width of the ruffle strips needs to be double the width of your pillow. Trim if needed, (if you are making a huge pillow, you may need to sew your strips together to get the width needed.)
To help you keep the strips out out the pillow seams, use a ruler and fabric marker and measure 1/2 inch from the edge and draw guideline all the way around the front pillow fabric piece.

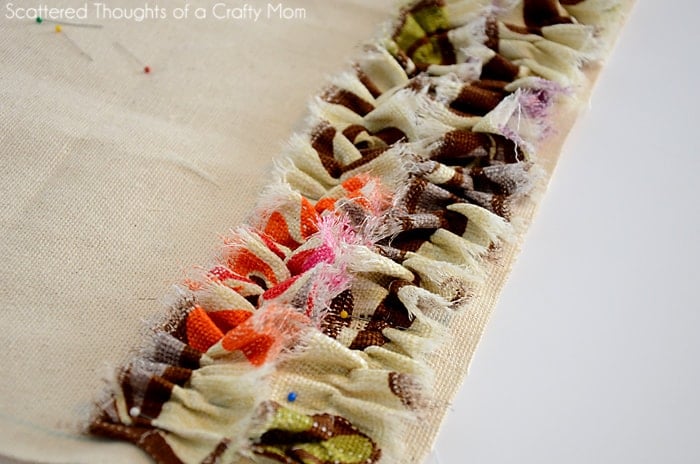
To ruffle the strips, set your machine to the longest stitch length and sew a basting stitch right down the middle of the strip (no backstitching). Then hold the bobbin thread as you slide the fabric down to create a ruffle. (For a more in-depth tutorial of this method, see my Ruffled Beanie Hat Tutorial.)
Begin lining up the ruffle strips on your pillow fabric and pin them in place. You want the strips to overlap the line you drew, but keep the area where you will be sewing inside the lines.

For the edges, I folded the strap over about half an inch and pinned it right at the edge of the line.

Begin sewing on your strips by sewing right over the basting strip. Keep going until all your ruffles are attached.

Place the front and back pillow piece right sides together and sew 3/8 inch from the edge. Take care to push the ruffle strips out to the seam line as you go. Leave a 4 inch opening at the bottom.

Turn the pillow right side out and stuff it with pillow stuffing. (get it nice and full.) Then hand sew the pillow closed.

And you’re done!
I love how it looks on this leather chair in my bedroom, I may have to make just one more…


Don't miss any more posts!


