| | |

Reversible Apron Top using Fat Quarters

Disclosure: This post may contain affiliate links. As an Amazon Associate, I earn from qualifying purchases.

(Looking for more free patterns? Be sure to check out my free patterns and tutorials page here.)

I’ve always wanted to sew something reversible for my little Missy.  The idea of a reversible top or dress is so fun, plus everything I see always looks adorable.  Unfortunately, it’s just too hot where we live to wear anything double layered. (My daughter is just like me, always running hot…)

I figured we could my Apron Top Pattern would be the perfect way to go reversible.  The top is halter style and open in the back.  (That way she would get a little “breeze” and not get too hot.)

Make this adorable Reversible Apron Top with the linked free pdf pattern.


Make this adorable Reversible Apron Top with the linked free pdf pattern.


It was a good call- this top is adorable!

Pink and purple or blue and yellow…  However you are feeling that day (or especially helpful if you ha you happen to dribble a bit of lunch down your front.)

I made this top using my Apron Top Tutorial.

The reversible top is made almost the exact same way, as the original top.  (The bodice was already double layered with the facing.)  The only thing you need to do to make it reversible is to cut 2 of the bodice bottoms, put them right sides together and sew them together 1/4 inch from the edge around the sides and bottom.  Then flip it right side out, iron the edges and continued on following the tutorial.

***  Update***  I uploaded the pattern for this top.  You can find it on the Apron Top Tutorial Page.

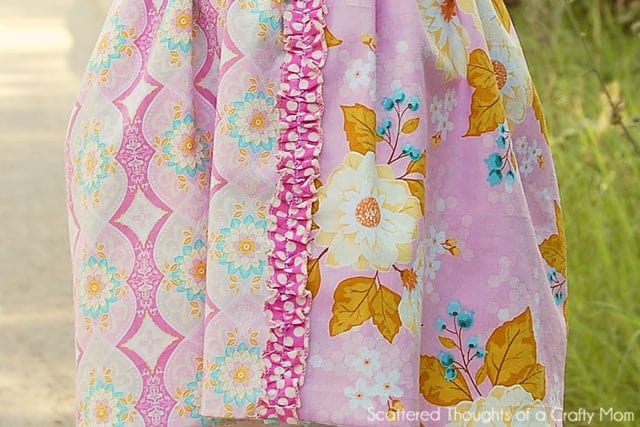
For this version, I used a fat quarter set from Riley Blake, called Promenade.  To have enough fabric for the bodice bottom, I pieced together 2 fat quarters and then hid the seam by covering it with a contrasting 1 inch ruffle strip.
Now, if only I could get my hands on more of that yellow polka dot fabric I used on the straps, I would love make a pair of coordinating shorts!

Meet Whiskers, the sweetest, most bling-ed out Fur Real kitty around!


So cute from the back!  I did add an extra set of loops for the ties, but they didn’t look how I imagined they would, so I might remove them.


Like this project? Don’t forget to pin it!

Don’t miss any more posts! You can follow along on Feedly, Bloglovin’, via blogger using the Google Friend Connect widget, your favorite feed reader, or by signing up via email. Just click on one of the icons below:

Leave a Reply

Your email address will not be published. Required fields are marked *

27 Comments

  1. tobecontinued says:

    Very cute! I have some fat quarters jut waiting for this! Come by sometime!
    Catherine

  2. So beautiful!! Oh, I will definitely have to make my daughter one as well. Thank you for sharing at Sharing Saturday!!

  3. Leslie Duran says:

    Adorable – love love love the fabric combination, and your model is beautiful too!

  4. Cameron Meerdink says:

    This is really sweet – and I have about 1.3 billion fat quarters in darling prints to use – can't wait to get started!!!

  5. Malory {Snips & Spice} says:

    I love this top! This is gorgeous! Great pictures. I would love for you to link this to my Sunday Slice party.

  6. Just adorable! Your daughter is a great model as well :o)
    Thanks for linking up this week!
    Stacey of Embracing Change

  7. Crafty Cousins says:

    Super cute. The colors and design are fabulous. Sometimes I think it would be fun to dress up a little girl. I'd love for you to link it up to our link party!

  8. Tara Knight says:

    this is so cute!!

  9. Aimee - ItsOverflowing.com says:

    SUPER CUTE! SO Precious! Crossing my fingers you'll share this at my party! Saturdays at Seven!

    XO, Aimee

  10. Pinspiring Leah says:

    So cute! The fabric choices are spot on!

  11. Having Fun says:

    How adorable! I have got to make each of my daughter one. How long did yours take to make?

    1. Scattered Thoughts of a Crafty Mom says:

      This is the second one I made, so it went much quicker. It's hard to guesstimate how long it took because I rarely make something in one sitting. I usually sew in short bursts spread over a day or two. Once you have your pattern you could finish the non-reversible top in just a few hours. I will say, that it took me several days just to make the fabric choices!
      ~
      Jamie

  12. Vanessa Barker says:

    This is beautiful. I'm thinking it would be so cute on my daughter with a little ruffled diaper cover! I'd love to have you come share at my Tutorial Tuesday at Our Thrifty Ideas

  13. Recipes We Love says:

    This is an adorable top!

  14. This is SO cute! Great job! I'm a new follower.

    Randi
    regal-rhino.blogspot.com

  15. This is adorable! I would love for you to share this at "I Made This" at Grits & Giggles going on right now!

  16. This top is gorgeous. I want to run out and buy everything for it to make one for our friends. I'd love for you to share this post at my link party. 🙂

  17. Jessica at Me Sew Crazy says:

    love it! Those fabrics together are fabulous! So so so cute 🙂

  18. I love this! It's super creative and fun, and the ties and ruffle are just adorable! I'd be thrilled if you would share this at my current link party so everyone can see how cute this is!

  19. This is so beautiful! I want to make one with matching shorts as well!

  20. That is SO cute!!!! I am definitely Pinning this! I would love to try it!
    Thank you!!!