Ruffled Beanie Hat Tutorial
Disclosure: This post may contain affiliate links. As an Amazon Associate, I earn from qualifying purchases.
Does your little girl love hats as much as mine does? If there is a hat (or crown) within sight, she will be wearing it.
I have seen these little ruffled beanie hats being used as photography props around blog-land lately. I am in love with how they look! Such a simple project for such dramatic results!
There are so many looks you could get with this hat, depending on your fabric choices, size and number of ruffled strips you use. To make mine, I just used some t-shirts and scraps from my recycle bin.
Would you like to make one too? It is so easy! Here is how to make a ruffled beanie hat from recycled knits for your little one.
What you need:
-Knit t-shirt (or several depending on the look you are going for. I used a pink tee for the base and scraps from five different shirts for the ruffles.)
-Ruler/tape measure)
-Thread
-Fabric marker
-Scissors
Instructions:
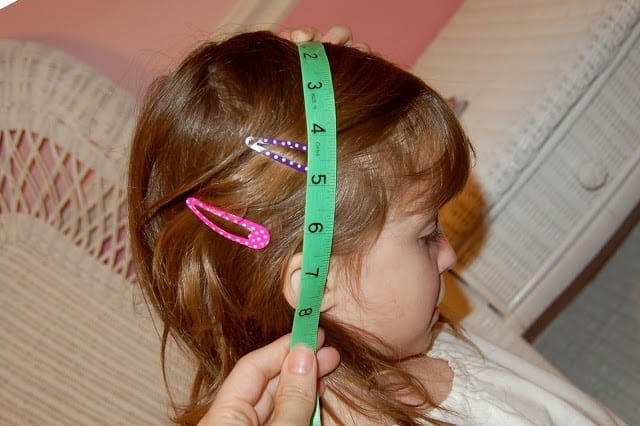
First, measure your little darling’s head circumference. Then measure from top of the head to where you want the hat to stop. Add 1/4 inch to both measurements for seam allowance, plus an additional 1/2 inch to the circumference measurement. Divide the circumference measurement in half.
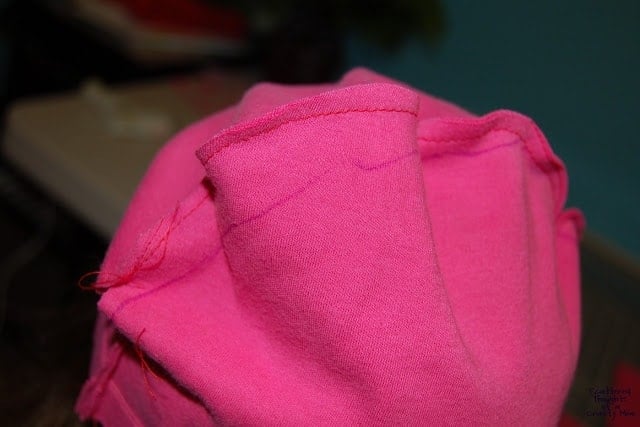
Lay out the fabric you will use for the hat base. Cut two squares to your measurement.
Draw a half circle shape at the top of your cut pieces. (I used a bowl to help get the shape.) Sew up the side seams and along the line you drew. Trim the excess fabric away.
For a more customized fit, I had my daughter try on the hat inside out. With my marker, I made some marks where the hat could be taken in just a little. I sewed a new seam along this mark.
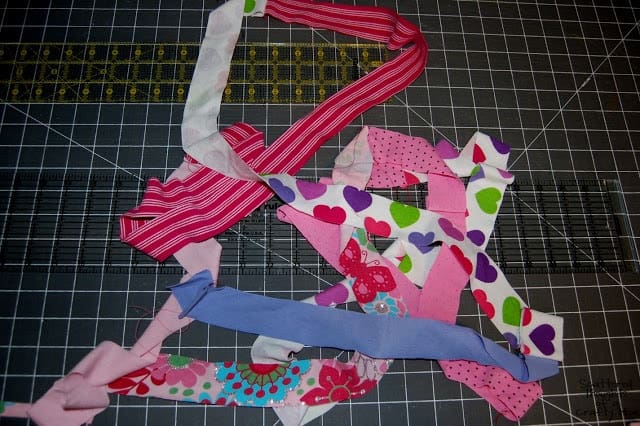
Next, cut 5 1.5 inch wide strips of fabric from the bottom of several t-shirts. You will have big circles. Cut one side of each circle open, so it is a long strip. Sew the strips end to end.
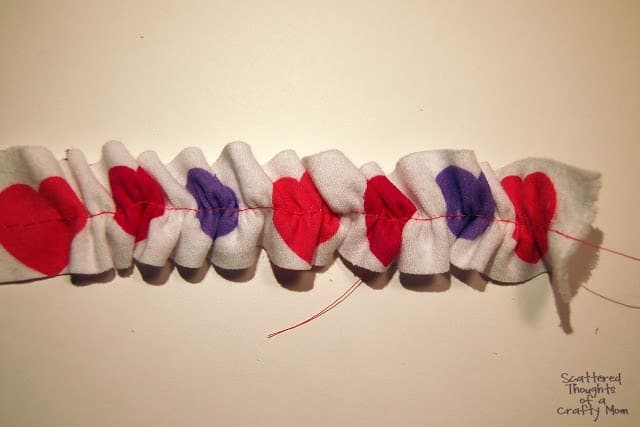
To ruffle the strips, set your sewing machine to the longest stitch length. (Mine is 7.) Sew a straight stitch all the way down the middle of your long fabric strip.
Once you have sewn the straight stich down the middle, hold the strip in one hand and pull on the top thread. Move the fabric down the tread and watch it ruffle up!
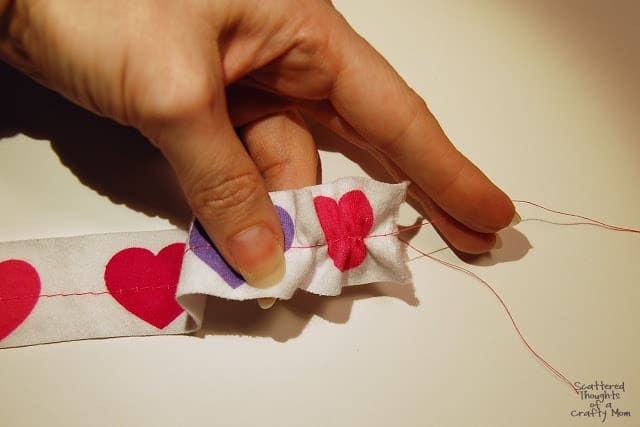
Keep ruffling until the entire strip looks like this:
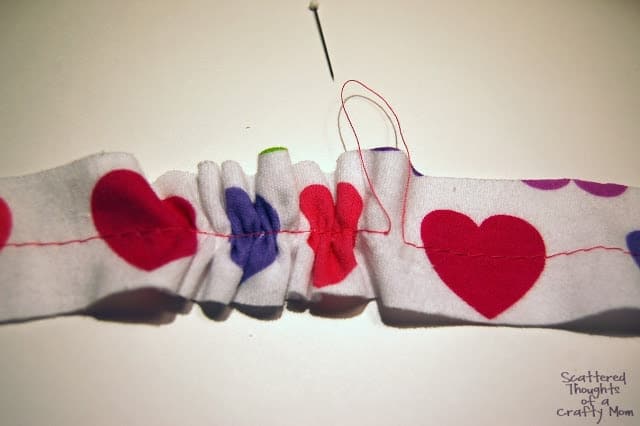
Sometimes, when I am gathering ruffles, the thread gets stuck. If this happens to you, don’t pull too hard, the thread could break. What I do, is just move past the stuck part and use a pin to pull up and grasp the top thread and keep pulling from that string Here is a picture to illustrate what I mean. See where I pulled up the thread and just kept ruffling? (To see any picture bigger, left click and open in a new tab.)
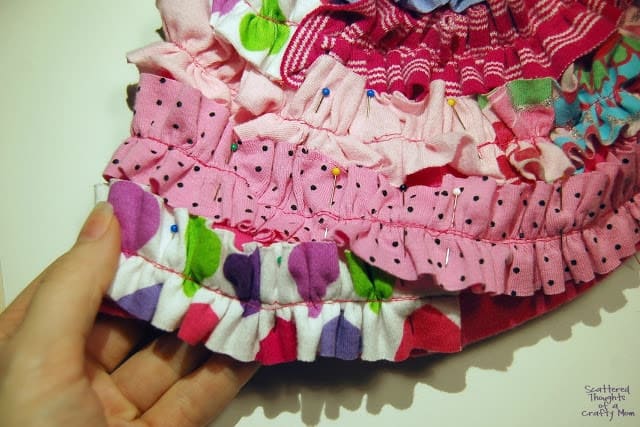
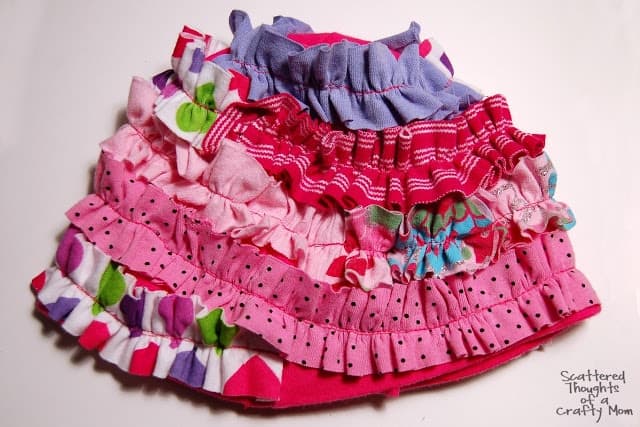
Starting at one of the bottom side seams, start pinning the ruffle around the hat, use your judgement on how you want your ruffle to look.
The length of the fabric strip should be long enough to wrap all the way around the hat to the top. Once you start pinning, you may need to adjust how tightly your strips are ruffled to make the strip fit, it is a bit of trial and error.
Once the ruffle is pinned on, sew right over the gathering stitch to attach the ruffle to the hat.
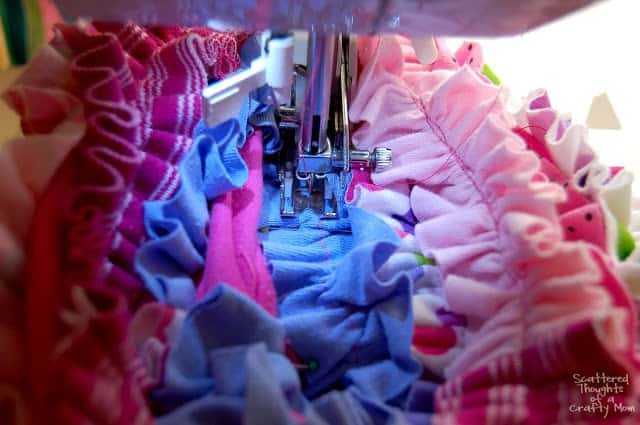
Trim your strings and you are done!
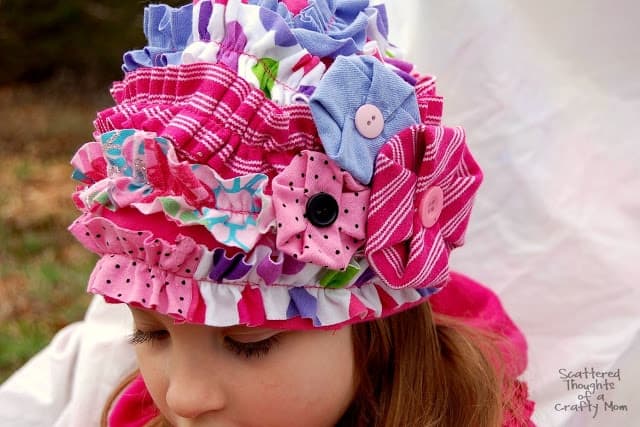
Now at this point you can start adding embellishments. I decided to add 3 different sized fabric flowers for an accent. After I made the flowers, I hot glued them to a bar pin so I could remove them if I ever needed to wash the hat. To learn how to make these flower embellishments, go here: No Sew Fabric Flowers.
Sorry, picture overload, I know. I just can’t help myself!!!
Like this tutorial? Be sure to pin it for later!
I hope this tutorial inspires someone to make a pretty little ruffle hat. I would love to see it if you do! I have created a new Flickr Group for you to share your creations. Here is the link: Creations inspired by Scattered Thoughts of a Crafty Mom. (Please share, you might get featured!)
Appreciating the time and effort you put into your site, it’s awesome to come across a blog every once in a while that isn’t the same outdated rehashed information.
I’ve saved your site and I’m adding your RSS feeds to my Google account.
Thanks!
Love the hat. so cute. How can I make something like that using cotton sheets. I have so much cotton that I would like to make a hat. I have grandsons.
I’m not sure a sheet would work unless it was a sheet made out of knit fabric. (this hat needs stretch.)
So cute! Featuring YOU today over on my blog! Thanks so much for sharing at {wow me} wednesday,
Ginger @ gingersnapcrafts.com
http://www.gingersnapcrafts.com/2012/03/take-look-at-you-my-favorites.html
Featuring you today – please come by to see! Thanks for linkming up such awesome projects!
Stacey of Embracing Change
Adorable hat and cute models as well – thanks so much for sharing at the party! Will you please come back this Thursday to link again? I love your creations!
Stacey of Embracing Change
So cute . . and you daughter is an adorable model!!! Thanks for linking to Busy Monday at A Pinch of Joy! Hope to see you again this next week!
hI! i CANT PUY PHOTOS ON TO SHOW IDEAS i HAVE??? nO CAMERA. yET!! i WILL FOLLOW THO. cANT WIN ANYTHING WITHOUT SHOWING IS THAT CORRECT??? iV'E BEEN BACK & FORTH ON YOUR BLOGS TONIGHT. iM A NEWBIE ON THIS SO AM SLOW. tHANKS FOR ALL THE FUN. hATS, QUILTS WILL BEGIN mONDAY ( 4 AT LEAST OF EACH) wow! lov
I am glad you liked it! You don't have to show anything to win a giveaway. The only give away I have going right now is for the tote supplies, which ends on 3/1/2012. To enter that giveaway, you just have to be a follower of my blog and fill out the form embedded at the end of the post. Here is the link to the giveaway: http://scatteredthoughtsofasahm.blogspot.com/2012/02/no-sew-ruffle-tote-with-tutorial-and_22.html
You are being featured @CountryMommaCooks Link & Greet Party.
Stop by and pick up a featured button:)
What a fun idea, I love all the bright colors…another darling project!
I adore this!!! Thanks for the inspiration and linking up at Create and Inspire!
Featuring this tomorrow at the TOP 10!
Thanks,
Angie from ALI
I want one for me! So darn cute. Your model is adorable too!
Wow, this is so cute! Adorable!
Thanks for linking to Take-A-Look Tuesday – you were featured today! and congrats – most viewed link
—Mandy, http://www.SugarBeeCrafts
There is never too many pictures!!! Love them all. Thanks for sharing. So adorable. I am featuring this in next weeks party!!!
what a wonderful hat.. love the colors.. 🙂
Following you to stay updated.. I saw your previous ideas, you are very creative..
Have a nice day!
This hat is super duper cute!
Great tutorial! I would love for you to link up at my Linky Party via: ourdelightfulhome.blogspot.com
Mrs. Delightful
ourdelightfulhome.blogspot.com
Ah-DOOR-AH-Bull!!
I Love this hat – thanks for sharing the tutorial! 😀
What a beautiful hat! I am the mother of 2 beautiful boys, now 20 & 12 & it's doubtful that either one would be interested in this lovely,ruffled creation. On the other hand,I would LOVE to have a ruffled hat! I own a cupcake company & unfortunately became disabled in 2010,due to a chronic illness. I can still bake, at a much slower pace & have recently began creating purses,belts,headbands & barrettes from unique materials.I received many favorable reviews about my cupcakes & enjoy making people smile with my new creations. Sitting still is not in my DNA & I'm looking forward to creating this darling cap in a much larger size. I doubt that I will do it justice as your beautiful daughter. At least your son managed to smile along! I will happily give you credit when your hat is born.
This hat is stinkin cute! Thanks for joining us on our "Strut Your Stuff Saturday." We hope you come back next Saturday. We would love to have you share more wonderful ideas! -The Sisters
Oh my goodness! So cute! Thank you for sharing this.
So cute! My daughter won't keep hats on, but we're going to have to work on that with summer coming.:) The ruffles are adorable.:)
Shiloh
everydaygameplan.net
I pinned this on Pinterest. Thank you for joining Creative Bloggers Party and Hop.
Oh my goodness, can you get any cuter?!?! If only I could sew!! I would LOVE to invite you to share this at my blog hop linky party! http://becauseithinkican.wordpress.com/2012/02/19/3rd-sleepy-sunday-linky-party/
Leanne @ Because (I think) I Can
This is just so adorable!Your daughter
looks so sweet in your beanie.
I wonder how it would look on an adult?
That is very cute….
Wow – I really love this hat! My daughters would love wearing your creation! Great job. Karima
Adorable! I am so glad I found this and not just for this wonderful hat. Love the tip about picking up the gathering thread down a ways when it gets stuck. I would love it if you would come link up with Busy Monday (open Monday through Thursdays) at A Pinch of Joy, a linky party for ideas that make life better, easier and more fun!
Don't you hate it when that happens? It took me a couple of years of ruffling to figure that one out! I'll be stopping by to link up. (I tried to email you back, but your blogger email setting is set to "no-reply". You can go here to figure out how to change that.
Parabéns! adorei, muito lindo e o pap e super facil e legivel, bjão.
Love this! We have our Kitchen Fun and Crafty Friday Link Party going on now and would love for you to share this! http://kitchenfunwithmy3sons.blogspot.com/2012/02/kitchen-fun-and-crafty-friday-link_16.html
How cute is this!
Natasha xx
http://www.serenityyou.blogspot.com
What a great way to remix and reuse t-shirts. SUPER cute and trendy! I LOVE your pictures and the tutorial looks so easy. Thank you for sharing!!
Jenny
Seamingly Smitten
This is adorable!
So, SO cute! And so is your daughter! : )
Love the ruffles!
Thanks of sharing at Feature Friday FREE-FOR-ALL!
~Abbie
What a cute hat! I saw your pic on the linky party and had to check out your hat : )
Best-
http://little-miss-aok-bowtique.blogspot.com/
How cute and adorable is that!!! I love the fabric that you have. Thanks so much for sharing this with us at Sharing Saturday. Hope to see you again next week.
~MiaB
http://www.mamamiasheart2heart.com
That is quite honestly one of the most adorable hats I have ever seen! I adore it! I'd love to have you share this with our readers for our Fun Stuff Fridays link up! http://www.toysinthedryer.com/2012/02/fun-stuff-fridays-11.html
Your daughter's hair is such a pretty color! My sister-in-law is expecting a little girl in a couple of months, and I think this would make a super cute baby beanie too! I just so happen to have a ton of scrap fabric that would work perfectly 🙂 I'll let you know if I make one.
Thank you, I would love to see it! I created a new Flickr group for readers to share their creations. You can find it here: Scattered Thoughts of a Crafty Mom Flickr Group.
By the way, your blogger settings are set to "no reply" so I couldn't email you back. If you wanted to change your settings I have an instructional post here.
~Jamie
This is adorable! I hope you'll link this up to my new linky party! I'm a new follower! Hope you'll stop by and follow along if you'd like!
Mallory @ Classy Clutter
http://classyclutter.blogspot.com/2012/02/saturday-spotlight-2.html
My goodness this is a fun creation! Maybe I will make myself one!
What a CUTE hat! I love the fun colors you chose.
Rachel
adventuresofadiymom.blogspot.com
This hat is fabulous. She is too cute.
Oh my goodness…how cute is that beanie! Super job!!
Oh my gosh!!! LOVE this!! I pinned it a few minutes ago and there are already three people that have repinned it!! Really great job!
You are pushing me to get a sewing machine…like NOW!!!!!
Thanks for the inspirations!
Isn't that sweet and so unique … love the fabrics you used. That's a very pretty model that you have. Thanks for the tute.
Oh my!!! I LOVE IT! LOVE IT LOVE IT!!!!!!!!!!
Did I mention that I LOVE IT??
I would LOVE it if you stop by my blog too 🙂
http://thediydreamer.blogspot.com/