Flower Cuff Bracelet and Tutorial
Disclosure: This post may contain affiliate links. As an Amazon Associate, I earn from qualifying purchases.


I love to browse the Gymboree website for inspiration. (Among many others of course…) A few months ago, I came across the most darling bracelet for $9. It was super cute and I might have paid $2.99 for it had I been in the store, but not $9. (I guess there were plenty out there willing to spend the $9, because the bracelets are out of stock…)
I finally got one made! The bracelet is really easy to make. I took pictures along the way so I could create a tutorial on how to make a Flower Cuff Bracelet and share it with my readers.
Materials needed to make a Flower Cuff Bracelet
- Scrap fabric (depending on who it is for, you might need a piece up to 26+ inches.)
- Felt
- Clasp for the bracelet (If the bracelet is for an adult, you could use a piece of ribbon.)
- Something to stuff into the bracelet. Ex: beads, marbles, pom poms (I used pom poms.)
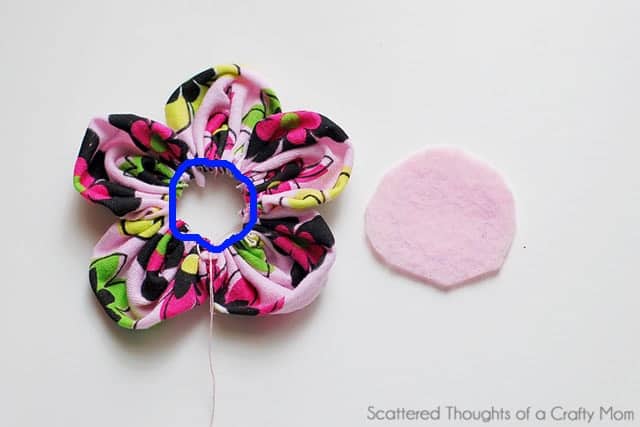
- Something for the top of the flower. Ex: buttons, another flower, felt applique or other decorative item.
- Needle, thread, scissors, ruler, glue
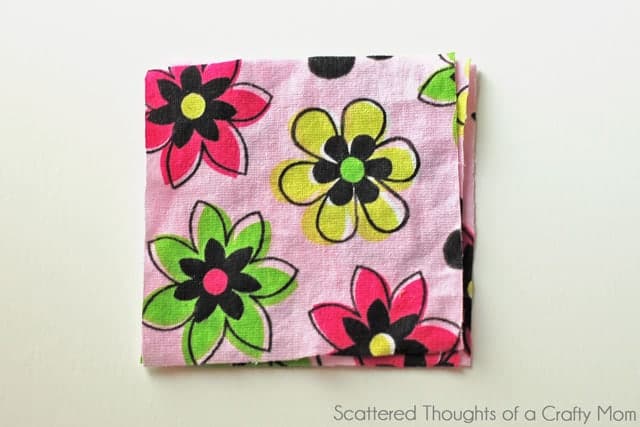
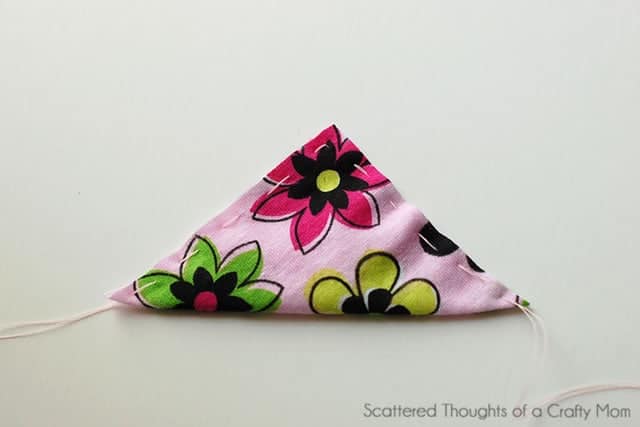

Gather up the fabric of the first square to make a petal. Grab the 2nd square and without cutting the thread, stitch it the same way. (With the with the same thread.)

Repeat until you have five petals. Gather them as tightly as you can and tie off the thread. (I should have gathered might tighter for this photo, oh well…)


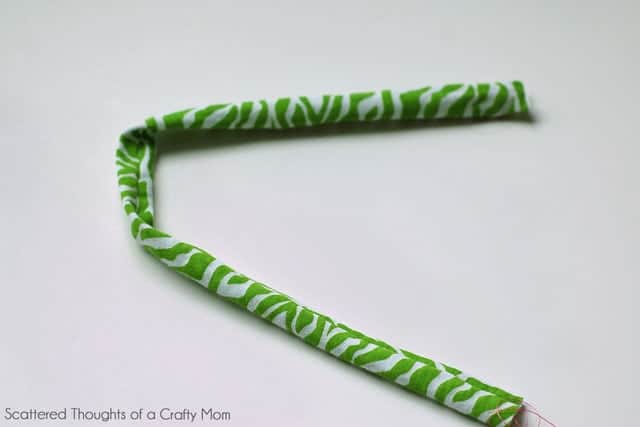
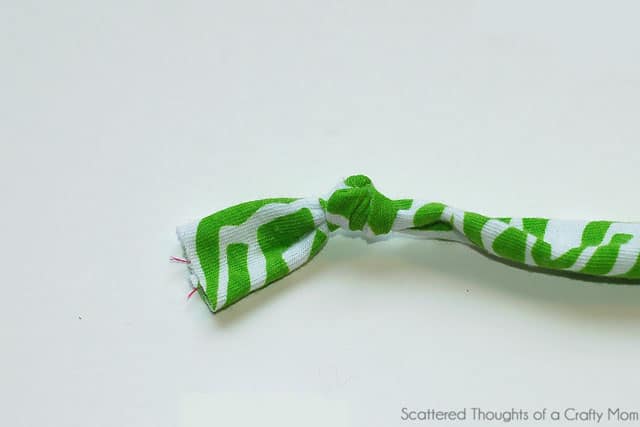
Tie a secure tight knot 1 inch from the edge.
Stuff your round object into the fabric tube.
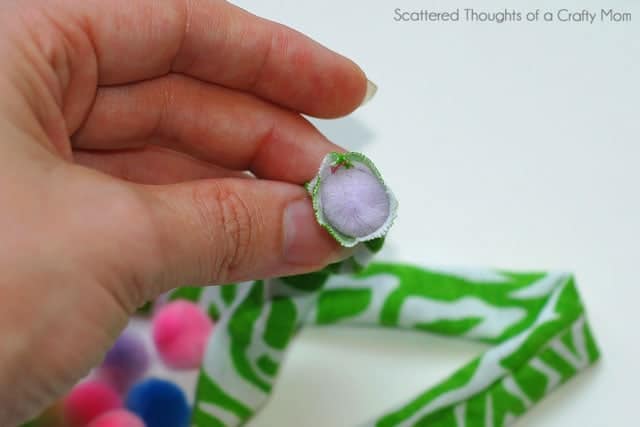
I just used a marker to push my pom pom to the end…

Tie another knot right up against your round object.

Keep going until your bracelet is the approximate length you want.

Fold in the edges and make one or two stitches to hold it in to place.

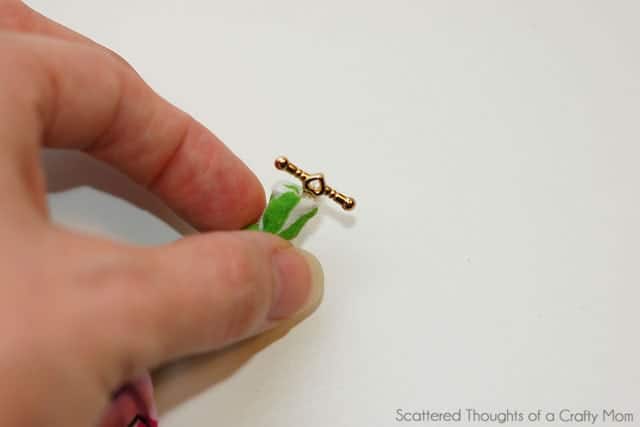
Then insert your clasp and sew it in to the edge fold as you continue to sew the end closed.


I made this bracelet to match a dress that I have nearly finished. They will be so cute together!
Leave a comment if you have any questions and I will do my best to answer them for you! Please make sure your blogger settings are set so I can reply directly to you. Don’t know what your settings are? Read about it here.
I hope you make a flower bracelet too!
Don't miss any more posts!


I love this!!! I hope you will considering uploading into the SewSet sewing directory!
http://www.sewset.com
So cute!! Thank you for sharing at Sharing Saturday!!
This is darling! Thanks for linking up to "Strut Your Stuff Saturday!" We hope to see you again! -The Sisters
Very cute, would make a cute hair clip or headband.
LOVE IT!!!!! Gosh my daughters would flip out for one of those!! GREAT tutorial Jamie!
You are planning on sharing this at The DIY Dreamer.. From Dream To Reality right? 🙂
Thank you so very much for sharing this at The DIY Dreamer.. From Dream to Reality! 🙂
Really cute–love those colors!
Super cute!
Thanks for sharing this week!
Stacey of Embracing Change
This is so adorable!!!
These look wonderful! My daughters and I are going to love making a couple for them to wear! Came by via Tatertots & Jello Linky! Have a fab weekend!
The Spangler @
The Quick Unpick
Wish my daughter was still a little girl to make one of these for. Absolutely darling!
Super Cute and great tutorial! I will be giving it a try.
Great idea!
It does look easier to make than I thought it would. Very cute!
Melissa
http://www.lovebugliving.com
So cute!
Too cute! 🙂 Thanks for linking up at friday fun party. Have a great weekend!
Very cute!
perfect 🙂
So cute! My 4 year old daughter would love this! Thanks for a great tutorial! 🙂
This is so cute! I love that you used little pom poms as your round object. 🙂
That is very cute..I bet my granddaughter would love it!