|

Hand Warming Muff Tutorial

Today, I’m sharing a quick little tutorial for a Hand-Warming Muff.

(Looking for more free patterns? Be sure to check out my free patterns and tutorials page here.)
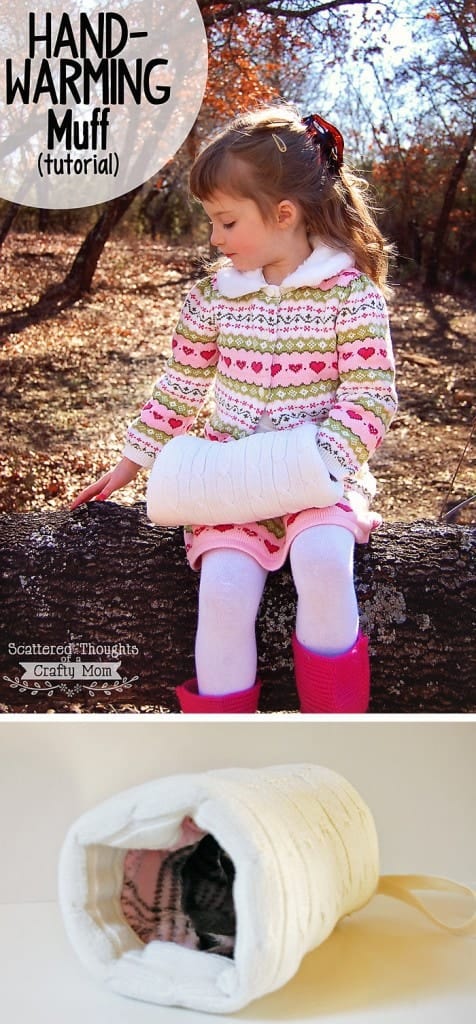
Tutorial on how to make a hand warming muff. This project is so quick and easy, plus it makes the perfect little accessory for holiday photos and events! (This version was made from an upcycled sweater.)

💌 Save this article

Enter your email and have it sent to your inbox!

Hand Warming Muff Tutorial

Last week, I finished up a pink faux fur vest for my daughter that had been in my to-do pile since November.  After the vest was done I decided to whip up a matching hand-muff for the photos. (Chopped bangs and all…)

Sewing the 1st version of the muff, I just made it up as I went along, but after looking through the pictures, I decided the muff looked a little too wide.  Rather than just taking apart the pink muff, (I am done w/ the faux

fur!) I decided to make one more to get the measurements right before posting the tutorial for the Muff.

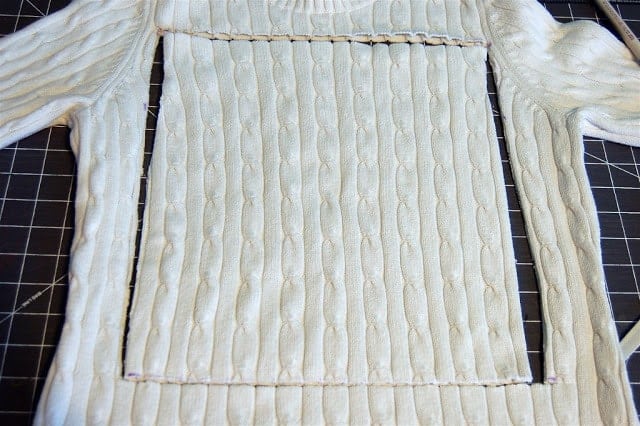
I used an old cable-knit sweater and the leftover fleece for the second muff and I just love it! (The leftover fleece came from this easy fleece hat tutorial.)

The good part is, I made two versions of this hand muff!  So a lucky reader can win one of my Hand-Warming Muff’s for their own sweet princess! (Or prince, it could go either way…)  (Giveaway has ended.)

How to make a hand Muff - tutorial

How to make a hand-warming Muff:


Materials needed:

  • 12 x 14 inch fabric for the top, (fleece, faux fur, sweater knit, flannel, etc…)
  • 8.5 x 14 inch fabric for the lining:  (I used fleece)
  • Batting (depending on the thickness you may want to double up (mine was low loft, so I did 2 pieces for extra warmth and thickness)
  • About 13 inches of coordinating ribbon or double fold bias tape.
  • ruler
  • scissors
  • coordinating thread

Instructions:

Step 1:  Cutting the fabric pieces.

  • Cut the outer/top fabric piece 12 inches wide by 14 inches long.
  • Cut the inside/lining piece 8.5 inches wide by 14 inches long.
  • Cut the batting 12 inches wide by 12.75 inches long.
Step 2: Assembly.

Lay the outer/top fabric piece right side down on your workspace.
Center the batting on top of the outer/top fabric piece, so that 1/2 inch of the top/outer fabric shows on top and bottom.

Pin the batting to the fabric securely.

Draw lines on the fabric based on the diagram below.  (This is to mark where you will “quilt” the fabric.)

Sew a straight line of stitches down the lines marked red.  This will attach the batting to the top piece.

Next lay the fabrics on your workspace in this order:

  • batting side down, top piece right side up
  • fleece right side down.

Then pin the sides of the fabric together, it will look like this:

Sew 3/8 of an inch from the edge of each side, being careful to catch all layers in the stitch line.  Flip the fabric right side out.

Then, right sides of the muff together, pin the edge closed.  Since the batting was 1.25 inches shorter, you should be able to line the edges up fairly evenly and get the pins through.

Cut your ribbon or bias tape to about 13 inches.  If you are using bias tape, just sew the open edge closed.  Pin the edges of the ribbon into the seam you just pinned.

Sew a straight stitch down the unfinished edge of the muff, right along the edge of the batting. (About 3/8 to 1/2 inch from the edge.)  You don’t want the batting sticking out of the seam, so you may need to push it back in as you sew the seam.  (You may run into this if your batting is extra thick.)

When you get to the ribbon, make sure you sew around the edge of the ribbon so it does not hang out past the seam.  (If you look closely at my muff in the picture below, you can see how I let the edge of my ribbon show.)

Flip the muff right side out and you are done!

How to make a hand Muff - tutorial

If you are inspired to create something based on this tutorial, please come back and share your version on my Facebook page.  I would love to see it!


How to make a hand Muff - tutorial

Like this project? Don’t forget to pin it!   

Don't miss any more posts!

Follow along on:

FeedlyBloglovin', your favorite feed reader, or signing up via email and have new posts delivered to your email box each week!

Leave a Reply

Your email address will not be published. Required fields are marked *

47 Comments

  1. Mary Anne says:

    Hi Jaime, I’ve been looking online at tutorials for making a hand muff for my little grand-daughter (almost 4). You show such good pictures and your explanation is very clear. I am not a novice or extremely experienced seamstress but, this ….I feel I can do and I know my little one will love it. Thank you so much for publishing this! I will look forward to your new projects!
    Mary Anne

  2. I used this pattern to make a “busy muff” for my mother-in-law, who has dementia. I made the outside with cotton fabric, and the inside out of corduroy. Inside the muff, I sewed buttons, rings, and toggles for her to feel/keep her fingers busy. Thank you for good directions!

  3. Kathy Eppley says:

    I looked at a couple sights for ideas & ended up making a fough fur outside & used an old jacket with a zip pocket for the lining. The only problem with the finished product was to make the fur go the right way the pocket was upside-down . 😀

  4. Is this large enough for an adult to use? I want to make one for a young woman.

    1. I might add a few inches to the width for an adult.

  5. Angie Ramirez says:

    Awesome.. super cute!

    Thanks for linking up at Create and Inspire Party.. Hope you can join us tomorrow for another awesome party plus a giveaway!

    Angie from A Little Inspiration

  6. Clairejustine says:

    cute idea,I remember having one of these 🙂

  7. What a great idea! Thanks for the tutorial, it would have taken me a LONG time to figure out how to do that! Enter me for the giveaway, please – my niece walks a fair distance to work downtown, and it is COLD and SUPER WINDY there, so I'd love to give her a muff!

  8. ENTER ME

    I'm a follower. I would give this to my youngest daughter. She is 7. 😉 Thanks for linking up at Trendy Treehouse. Pinning this! TOO CUTE!

    Tara
    trendytreehouse@me.com

  9. Shelley {Crazy Wonderful} says:

    Oh I love muffs! This totally reminds me of the little fur one I had as a girl 🙂 What a great tutorial too, so glad I stopped by.

    Shelley
    http://westermanfam.blogspot.com

  10. Marie {Make and Takes} says:

    How darling is this!!! My girls would go gaga over this. Now to find a sweater at the thrift store!

  11. Cathy @ My 1929 Charmer says:

    I love it, it brings back memories for me when I was young. I always felt so "special" when I add one on. Your tutorial is great! thanks for letting us know how to make, I will be making one for my granddaughter! Thanks for sharing you creative inspiration at Sunday's Best Party. I "pinned" this.

  12. The Belly Dancer says:

    I love it! I will be making some 🙂 Please enter me in your giveaway! Thank you so much for having it! Your pictures are beautiful and the model super cute. I would gift it to my cousin.

  13. Enter ME!! I would give it to my flower girl 🙂

  14. melissamo1 says:

    Please enter me! I follow you! I would LOVE to win this for my little girl! She LOVES girly stuff!

  15. Oh that is lovely! I'm sure the pictures don't do it justice 🙂

  16. Beautiful muff and a great tutorial too! Not to mention the fabulous photos! 🙂

    Thanks for linking to a Round Tuit!
    Hope you have a fabulous week!
    Jill @ Creating my way to Success
    http://www.jembellish.blogspot.com/

  17. LOVE this! It's completely impractical for where I live considering that it's currently 73 degrees outside, but it's so cute I might do it anyway! : )

    You've got quite the adorable model there as well! : )

    Great projects, as always, Jamie!

    Thanks so much for linking up your awesomeness with Feature Friday Free-for-All! : )