How to Sew a Kimono Top
Disclosure: This post may contain affiliate links. As an Amazon Associate, I earn from qualifying purchases.
I love to wear these long, flowy Kimono tops, you can learn how to sew a Kimono top with this easy sewing tutorial!
To make a kimono-style topper, all you need is a piece of lightweight fabric about 44.5 inches wide by 55.5 long and some basic sewing supplies. You could even use a scarf!

💌 Save this article
Spring Sewing
One of my favorite things about spring is that after a long winter of boots, sweaters, and jackets it always feels so good to break out my spring and summer wardrobe.
The florals and bright pretty colors of spring are my very favorite to wear! My birthday also falls in March, and I tend to do a bit of personal shopping to celebrate.
This year, I’ve seen so many pretty, flowy, and off-the-shoulder tops and dresses in the stores, I can’t wait to sew a few new items based on the latest trends.

Kimono Top Tutorial
First up is this gorgeous Kimono Top.
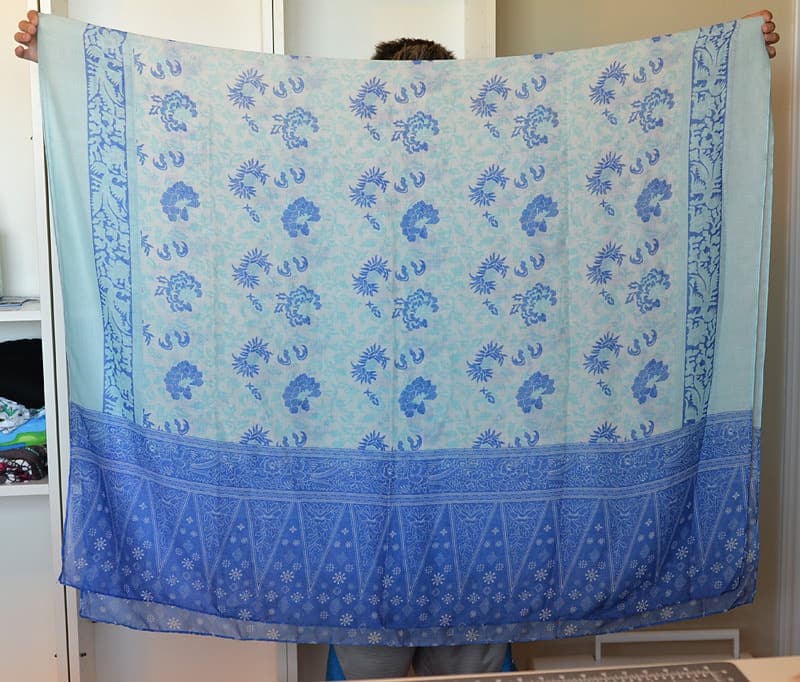
We just moved, and I’ve barely gotten my sewing machine plugged in so I definitely needed an easy project to get me back into the sewing routine. I saw this gorgeous scarf at TJ Max and I had to buy it and turn it into a Kimono.

I just love how the top turned out! (You can also see what I’ve got going on with my haircut in the above photo. I cut it short during the holidays and couldn’t be happier with the style. I’m due for a trim and am also on about day 3 of my last wash – gotta love dry shampoo, lol.)
Ready to sew yourself a Kimono Top?

How to sew a Kimono Top
Recommended Fabrics: chiffon, gauze, voile, washable rayon, lightweight knit (anything lightweight and flowy.) You can even use a scarf like I did.
Chiffon, gauze, voile, washable rayon, lightweight knit (anything lightweight and flowy.) You can even use a scarf like I did, as long as the dimensions are close.
Sizing Tips: The measurement provided below is “one size fits most.” (I’m 5′ 4”) If you are very short or very tall, adjust your length accordingly.
Materials needed:
- fabric, about 44.5 inches wide by 55.5 long
- trim if desired (about 90 inches) (I used this trim.)
- disappearing ink marker
- basic sewing supplies (perfect time to break out that rolled hem foot, though I misplaced mine during the move and had to sew the hem with a regular foot.)

Recommended Fabrics:
Chiffon, gauze, voile, washable rayon, lightweight knit (anything lightweight and flowy.) You can even use a scarf like I did.
Sizing Tips:
The measurement provided below is “one size fits most.” (I’m 5′ 4”) If you are very short or very tall, adjust your length accordingly.
Materials needed:
- fabric, about 44.5 inches wide by 55.5 long
- trim if desired (about 90 inches)
- basic sewing supplies (perfect time to break out that rolled hem foot, though I misplaced mine during the move and had to sew the hem with a regular foot.)
Sewing Instructions
Step 1:
Fold the fabric in half so the bottom ends meet.
Mark the fold with pins or a fabric marker

Step 2:
Fold fabric opposite way, (bringing the sides together) lining up the pins/marks you made. (The pins indicate the shoulder “seam.”)

Measure down 3/4 inch from pins/shoulder seam and over 4 inches from the center fold. Use a
Use a disappearing ink fabric marker and draw a rounded shape for the neckline and continue drawing the line all the way to the bottom of the fabric.

Step 3:
Cut out the neckline along the mark you drew.

The fabric looks like this when unfolded:

Step 4:
Sew a narrow hem around the neckline, bottom, and sides of the fabric.
Step 5:
To make the sleeves, fold the fabric in half at shoulder seams. With your ruler, measure down 9 inches from the top and 9 inches over from the side edge. At the intersecting point, draw a 4.5-inch line down.
Sew along the 4.5-inch line. Be sure to backstitch on both ends, and this seam will get a bit of stress and needs to be secure.
Repeat on the other side.

Step 6:
Add trim along the bottom if desired and you are done!

Try on your new top and take some pictures!
Share Your Finished Projects In My Facebook Group!
Made this pattern/project?
Please leave a star ⭐️⭐️⭐️⭐️⭐️ rating and/or a review in the comments section below. If you share an image on Instagram, be sure to tag me and use #scatteredmompatterns! You can also share an image to my private Facebook sewing group!
Don't miss any more posts!


Thank you for this pattern and tutorial! I made this from some hand-me-down sari fabric and it turned out great. The fabric piece was exactly the width needed so I didn’t have to hem the sides, and I added a bit of length to accommodate the pattern on the fabric. Instructions were easy to follow. Thank you!
Would love to see your finished topper! If interested, I do have a private sewing Facebook group where we share our finished projects: https://www.facebook.com/groups/Scatteredmompatterns/ You just have to request to join.
I love this tutorial! Ready to understand and looks great! I haven’t used sewing machine since 7th grade lol. So I made it slightly different. I made the arms a little bigger as I need a little more room lol. I measured down 10 in & over 6 in. And hand sewed down 3 in. It came out great! I also used a beautiful sheer curtain panel to make mine from. I love the flowy nylon material. All for under 4 dollars. Look forward to other tutorials. Thank you! Any advice on the best way to re introduce myself to my sewing machine? Or should I take a class?
I do recommend trying to find a class at your local sewing machine store. Nothing better than in-person hands-on teaching IMO. Otherwise, it is just practice, practice practice! I would love to see your finished result! you can share photos in my private Facebook group. You just have to request access. https://www.facebook.com/groups/Scatteredmompatterns
I’m in the process of making one right now! When you sew the you sew the 4.5 inch seams on the side for the sleeves, do you have the garment right-side out or right-side in?
right side out
Do you have a video for these instructions ?
no I don’t. (at least not yet 🙂 )
How do you hem the round cut out on the neckline. There is no fabric to roll in the „corners“.
just turn it and do the best you can. it will be a very narrow hem.
You need more pattern photos with better step by step instructions.
Has anyone made this yet? Is would love to see their photos!
I am going to try this also have so many scarfs 🙂
Is the sketch for cutting out the neck correct? Should the neck not be cut on the side of the fold instead of the side as indicated on the picture?
I don’t understand exactly what you are asking, but the sketch is how I cut the neckline. I found where the shoulder would be, marked it, folded the fabric long ways, like a hot dog,. And cut the neck like that. I am sure there are many ways to cut a neckline. Do it however feels most comfortable to you.
I see what the above poster meant. On your drawn illustration it shows cutting on the selvage instead of the center. I have mine cut out and ready to sew. Thank you for the tutorial!
thanks for pointing that out, I will get that photo edited asap.
I cannot picture what you are doing. going to try some scrap material first.
I am heading to India in late August. This it PERFECT! Thank you.
The scarf you used is lovely.
Thanks! I’ve been looking for a tutorial (I lack confidence to just cut into my beautiful voile) and this is perfect!
Your kimono top is so beautiful~~ I love the pattern! I think mo mother also have an old scarf with nice pattern, gonna try it 😀 Thank you for sharing the tutorial!
I going to try this wish me luck
Good luck, let us know how it turns out!
This is so cute and would accent almost any summer outfit.
My only concern is does it slip off the shoulders??.
thank you
No, cutting out the neckline and sewing down the side help keep it in place.
Very cute! I’ll have to keep my eyes out for a scarf. I’m pregnant, so I’m interested in making some things that are a little more flowy than what I usually wear!