DIY Bow Clips
Disclosure: This post may contain affiliate links. As an Amazon Associate, I earn from qualifying purchases.
How to Make your own set of Bow Clips. You just need a bit of ribbon, glue, and snap clips, and you with have more little bow clips than you have space for!!!

💌 Save this article
DIY Bow Clips
I bought some darling little bow clips from Gymboree a few years ago. (Similar to these.)
After hundreds of hair-dos, we have only one or two clips left. I’ve always known I should be making this type of hair bow myself. I have tons of craft supplies, so why not?
After a little bit of experimentation with different size ribbons and types of bows, I figured it out!
Aren’t they cute?

More Bow Clips than I have room for!
After finishing the pink bow clips, I raided my ribbon stash and made a bunch more!

I made all these clips from the instructions below, and just by varying the ribbon width and how I trimmed the ribbon “tail,” I got several different looks.
The clips would make a perfect gift or stocking stuffer for any little girl!
How to Make your own set of Bow Clips
You just need a bit of ribbon, glue, and snap clips, and you with have more little clips than you have space for!!!

Materials needed
- Snap clips with holes on the end (Like these) (I painted my clips with fingernail polish and spray paint)
- Grosgrain ribbon ( I preferred the 1/2 inch or 7/8 inch ribbon. The gold clip used 1/2 inch ribbon, and the pink one above it is 7/8 inch ribbon.)
- Needle and thread
- Hot glue
- Fray check or a lighter to seal the ribbon edges.
Directions:
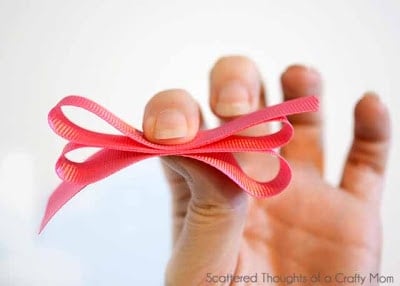
1. Cut a piece of ribbon to about 14.5 inches. Fold the ribbon as shown below.

This is how it looks from the side:

2. Pinch/scrunch the bow together at the center and securely tie it to form the bow. This is when it would help to have an extra set of hands (a toe works too, just don’t tell anyone…)

Trim the string.

3. Cut the 2nd piece of ribbon about 4 inches and tie a simple knot in the center of the ribbon.

4. Add a dot of glue to the center of the bow:

5. Press the knot into the glue.

6. Flip the bow over and add a tiny dot of glue to the backside. Fold over one edge of the ribbon, and press into the glue.
(You don’t want to use too much glue here because you still need to be able to sew through the back of the bow. I tried to make this without using glue, but it was too hard to keep the ribbon in place while sewing.)

Trim the ribbon edges on this small piece of ribbon and seal the edge with a lighter or fray check.
7. Fold the second ribbon flap over and sew in place.

8. Sew the bow onto the clip. (I don’t recommend using glue to attach the ribbon to the clip. I once bought a clip set from the dollar store that had used glue and the bow barely stayed attached through one day of school.

9. Trim the bow’s ribbon edges and seal. You can tuck the ribbon edges in:

or trim the edges in a decorative shape and pull them out.

That is it. You are done. Try them on and get some cute pics!

Have fun making your own hairbow clips!
Don't miss any more posts!


