Sew a Flutter Sleeve Peasant Top
Disclosure: This post may contain affiliate links. As an Amazon Associate, I earn from qualifying purchases.

Happy Memorial Day! Want to Sew a Flutter Sleeve Peasant Top? This pattern is perfect for summer and so easy to make!

It’s that time of year again! I’ve been working on cleaning up my craft room a bit.
I work really hard to keep my house in order, but once you step over the threshhold of my office door, all that “order” flies out the door.
I am 100% incapable of putting things away after I use them or cleaning up after myself in my office. I really don’t know why I have such a problem in here. (I did get the room pretty clean on Thursday, but as I look around my desk and work area I have no less than 5 empty cups around me. Oh well, at least you know I’m not sitting up here in my office getting dehydrated, lol!)

One of the tasks I worked on this week was to sort through my fabric scrap bin (ok- bins) and get rid of some of the stuff I have been hanging on to for several years.
At the bottom of one of the bins, I found this amazing patriotic border print fabric. I had originally used this in a coordinating fourth of July outfit set for my kids 5 years ago. (See those outfits here– so sweet!)
I had enough of this fabric leftover to squeeze out one more flutter sleeve peasant top and since Memorial Day was just a few days away, timing could not have been better.
Now we are set for all three patriotic holidays this year! (See all my red white and blue themed sewing projects here.)

This little flutter sleeve option looks so cute with with peasant style top.

To make this top, use the flutter sleeve peasant top tutorial found here.
The top uses my peasant dress pattern and the additional flutter sleeve add on, which is can be downloaded from the flutter sleeve tutorial page. (I have updated the flutter sleeve pattern for all sizes- so you may want to grab this latest flutter sleeve.)

I was in a hurry to get this top sewn, and did not use bias binding around the armholes like the tutorial shows. Instead, I just folded the fabric over twice and pressed really well before sewing.
I normally do not enjoy finishing armholes this way, as it can be so difficult to make the curve look professional. This was good quality cotton that wasn’t too thick and had the tiniest bit of give, so it turned out pretty well.
Maybe because my little miss is wearing a larger size now it’s easier, since the armholes are larger.
Definitely give your fabric a test run under the iron, and it it seems like the arm holes are folding over reasonably well, you may want to skip the binding if you are in a hurry.

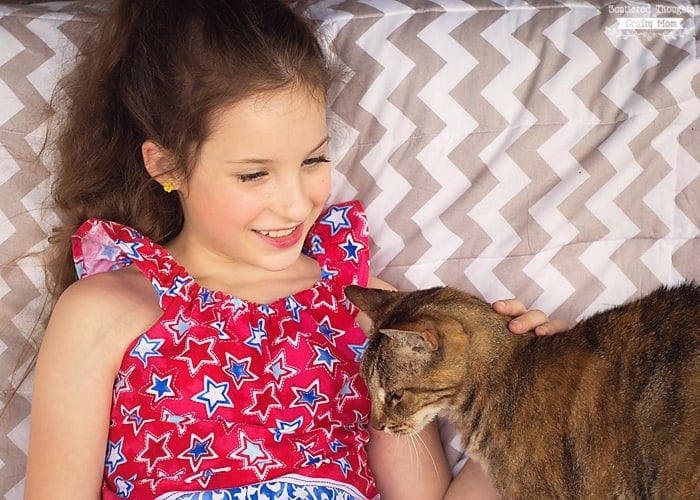
One last photo of the top with our sweet Callie-Kitty. She followed us around the entire time, patiently waiting for a few ear scratches!
If you make one of these tops, be sure to come back and show off your finished project by sharing a picture on on my Facebook page or instagram.
We all love seeing what everyone is making!
Don't miss any more posts!

