Draped Shawl Cardigan (Pattern Review and Mini Tutorial)
Disclosure: This post may contain affiliate links. As an Amazon Associate, I earn from qualifying purchases.
How to make a Drapey Cardigan:
I didn’t intend for this post to be a tutorial. I had planned on sewing up a little cardigan and just showing it off…


(Looking for more free patterns? Be sure to check out my free patterns and tutorials page here.)
Ha ha ha… That didn’t quite work out.
I picked up McCall’s pattern 5241 during one of Joann’s 99 cent pattern sale a few months ago. I finally had a break in my sewing/crafting to make something for myself. The weather is starting to get warmer and I had this pretty turquoise knit that would make a perfect light-weight cardigan for the Spring.
What a waste of time and fabric that pattern turned out to be. The design is awful! (Next time I will read the reviews before sewing a new pattern for myself.) The problem with this pattern is that the construction consists of a rectangle of fabric with holes cut near the top and sleeves attached. It’s more of a wrap, not a cardigan. There is no real neck area and the fit where the sleeves attached is weird and awkward – it kept slipping down and would not stay on my shoulders.

Thank goodness I had cut out view C (the longest cardigan) so there was plenty of fabric that could be re-worked. I ripped everything apart and used a cardigan from my closet to trace out a new pattern. I was even able to re-use the already cut sleeves.
I was worried about salvaging my fabric into a wearable cardigan, so I didn’t even think to take pictures until the very end. But my version of a Draped Shawl Cardigan is really easy, and I have recreated the steps for you here in miniature (hence… mini-tutorial).

Items needed to make your own drapey cardigan:
- 2.5 yards of 58+ inch wide knit fabric. (The prettiest most flattering fit will come from a thin drapey knit. I used a slub rayon knit from fabric.com that was 68 inches wide.)
- Measuring tape
- Thread
- Scissors
- Freezer paper or some other paper big enough to trace a pattern onto
- Marker
- Shirt or sweater that fits well to trace for the pattern
Instructions:
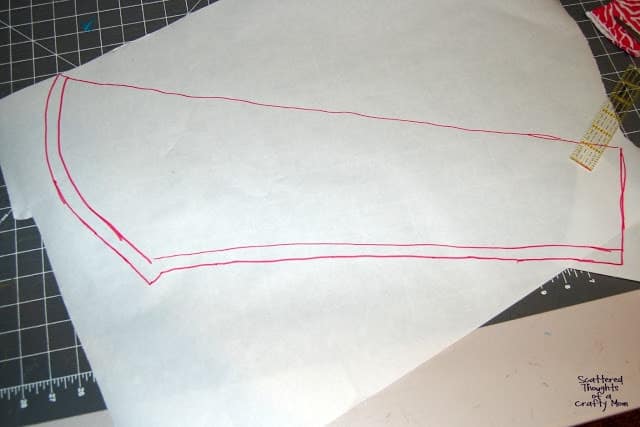
First step is to make a pattern. Using a measuring tape, measure from the top of your shoulder down to where you want the back of your cardigan to hit. Fold your shirt in half so the back is showing and trace the shape onto the freezer paper like the picture below, extending down to your back measurement. (You could trace directly onto the fabric, but I like to make patterns only once and reuse them.) Add 1/4 inch all around your pattern for the seam allowance. Cut out your pattern piece. You will use the same piece for the front and back.

My trick for tracing pattern shapes in awkward areas is to use a Tracing Wheel and Tracing Paper.

Next, trace the sleeve on to the paper for a sleeve pattern. Add 1/4 inch around the bottom and shoulder edge. Cut out your pattern piece
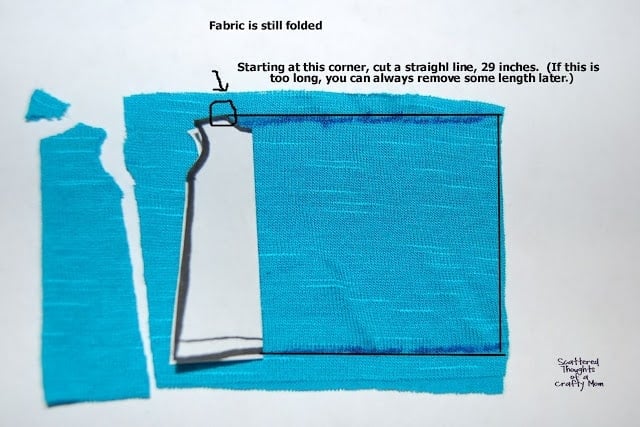
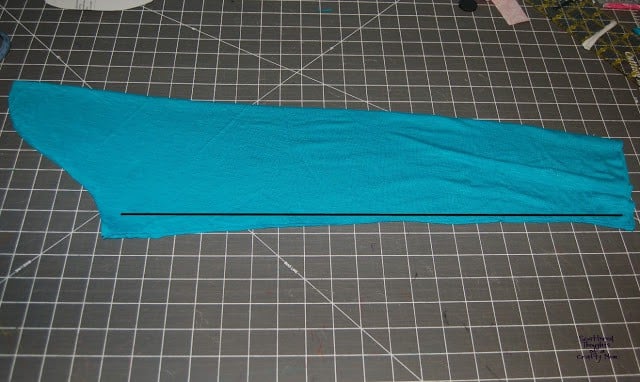
Fold your fabric in half an cut the back piece as shown.

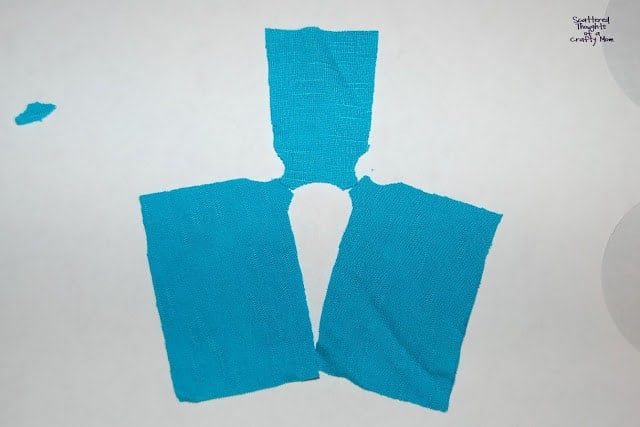
Next, using the same pattern piece, cut the 2 front pieces as shown:
Cut out your sleeve pattern.
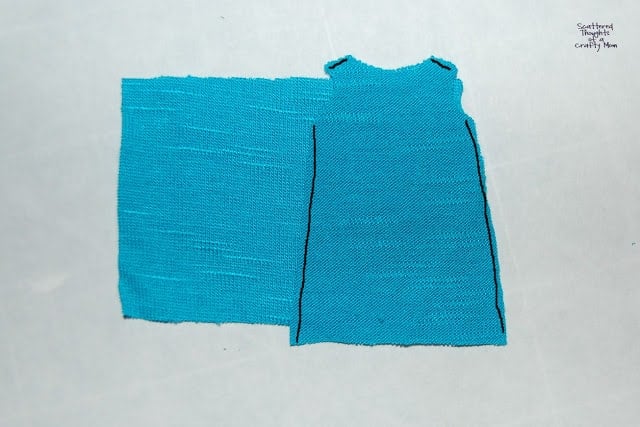
Right sides together, sew the shoulder seams, the side seams and the sleeve seams using 1/4 inch seam allowance. (See the black lines below.)
.
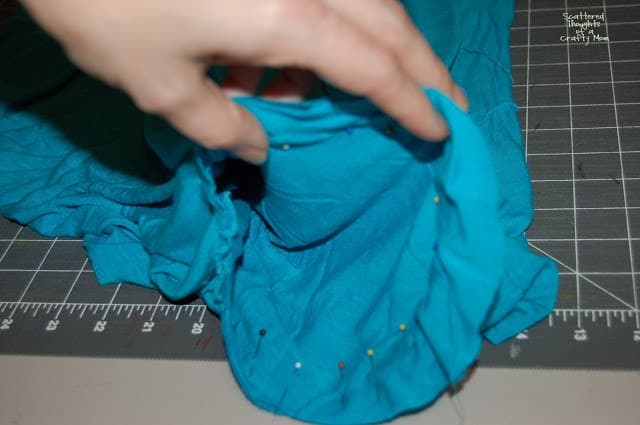
Right sides together, insert the sleeve into the arm hole and match up the bottom seam of the sleeve to the side seam of the cardigan. Pin securely and sew 1/4 inch from edge.
After studying a couple of my cardigans, I have figured out the secret to making this style of cardigan so awesome! The secret is to add an extra shawl collar.
With your leftover fabric, cut a strip 8 inches by 70 inches. (I cut 2 that were 8 x 35 1/4 and sewed them together.) 70 inches is probably too long, but you can trim the edges later. (Too long is better than too short IMO.)
Lay out your cardigan and right sides together, pin the strip all along the top of the cardigan and sew as shown below. Even up the edge of the shawl collar and cardigan if needed.
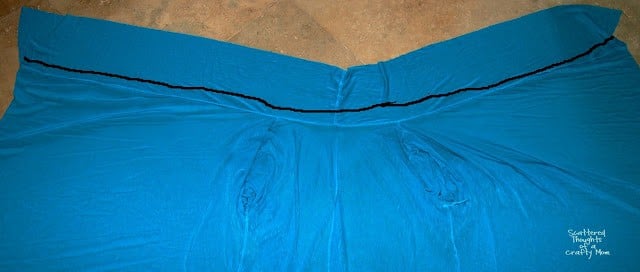 |
| To see this bigger, left click on the photo and open in a new tab. |
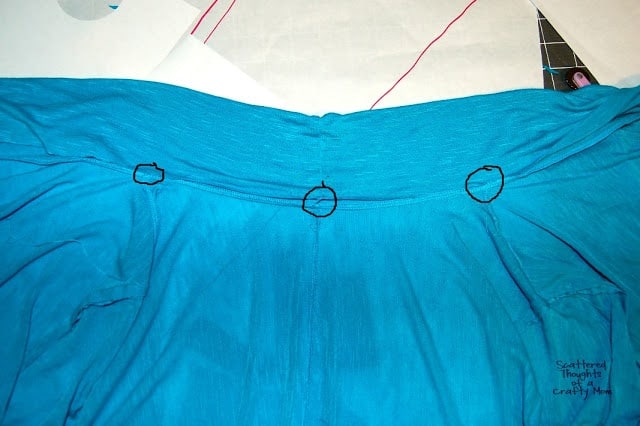
Fold over the shawl and tack the collar down in these spots.
Now try on your cardigan and trim the length if it is too long. After I tried on my cardigan, I ended up taking a little volume out of the sleeves by moving the seam in on the bottom half of the sleeve. You can also even up the bottom edge if you would prefer an even hem over a staggered hem.
You are done! I love how my cardigan fits, it is just perfect for keeping warm on a chilly day while lounging around the house or running errands.

If you are inspired to create something based on this tutorial, I would love to see it! Tag me on instagram using #scatteredmompatterns or share in my new facebook group: Scattered Thoughts of a Crafty Mom Pattern page.

I love the options with this cardigan. Have a cute outfit to show off? Tie it around your waist!

Wind picked up at the soccer game? Throw the shawl over your shoulder to keep your neck warm!
(BTW, I took all these pictures myself. I bought a magical accessory worth its weight in gold… A wireless remote for my camera! It’s awesome! If you don’t have a remote and a tripod, you need to get one!
Updated to add: I made a 2nd one of these using a fleece blanket. See the results here.
Don't miss any more posts!


Oh my gosh, I love this idea, and I love even more the idea to use a fleece blanket! I will definitely be doing this one myself… thank you for sharing it! 🙂 Lisa
This is great. Thanks for taking the time to share it. I hope you saved your mini version for a polly pocket 😉
Thank you so much for this!! I have that same pattern but have been putting off using it. I can sew a little but every time I use a pattern, the pattern just confuses me. I do so much better with a tutorial like this with lots of pictures. Glad I only paid 99 cents for mine too!
So excited to try this to add some transition pieces to my maternity wardrobe this Fall, and then nursing wardrobe in the winter! I knew it couldn't be that hard, but the pattern in my mind (do you ever do that? lol) had me sewing a square onto the front piece of a normal cardi front piece…never crossed my mind to cut it all in one piece (darn preggo brain! lol) Glad I found this so that my scattered thoughts could be brought together. 🙂
Thank you for posting this. I followed your tutorial and I'm very pleased with the results!
Great idea! Easy to make and it looks really comfy too. Love the versatility. Think I may give this one a try.
http://www.sewinginsight.com
My goodness, but you get MY seal of approval! The use of mini pieces for illustrations was genius. I had pinned this awhile back and am just looking over my boards when I came across this again. As a full figure woman, these aren't really easy to find and having Grandma wings makes finding a good fit even tougher. Thanks for the hard work!
Thanks a lot for this. Now I don't even have to figure it out myself, I have no excuse left!
wooooooooooow!!!
super!!!!!!!!!!
Best Idea Ever! A mini-tutorial. I think I can use that when i am dreaming up new ideas… make it in smaller scale first. Very clever. I have a fail cardigan too that you just might have the solution for. Let's hope it works!
AWESOME tutorial!!! Thanks for sharing it at my party!!! Hope your week ahead is GREAT!!!
XO, Aimee
LOVE it! Thanks for the tutorial! This is a great style; I have been wanting to try something just like this!
this is genious! one of these days i MUST learn to sew. 😛 we'd love to have you link to our Sunday Best party. http://griffithsrated.blogspot.com/2012/02/sunday-best-fashion-crafts.html?showComment=1329066128522#c2753041615164811058
-marie
It looks Great!