Flounce Sleeve Peasant Dress (How to add a flounce sleeve to any pattern)
Disclosure: This post may contain affiliate links. As an Amazon Associate, I earn from qualifying purchases.
Learn how to add a flounce sleeve to any top or dress pattern. (Plus be sure to download the latest version of my free peasant dree pattern, it is now available in sizes 12 mo to 14 yr.)

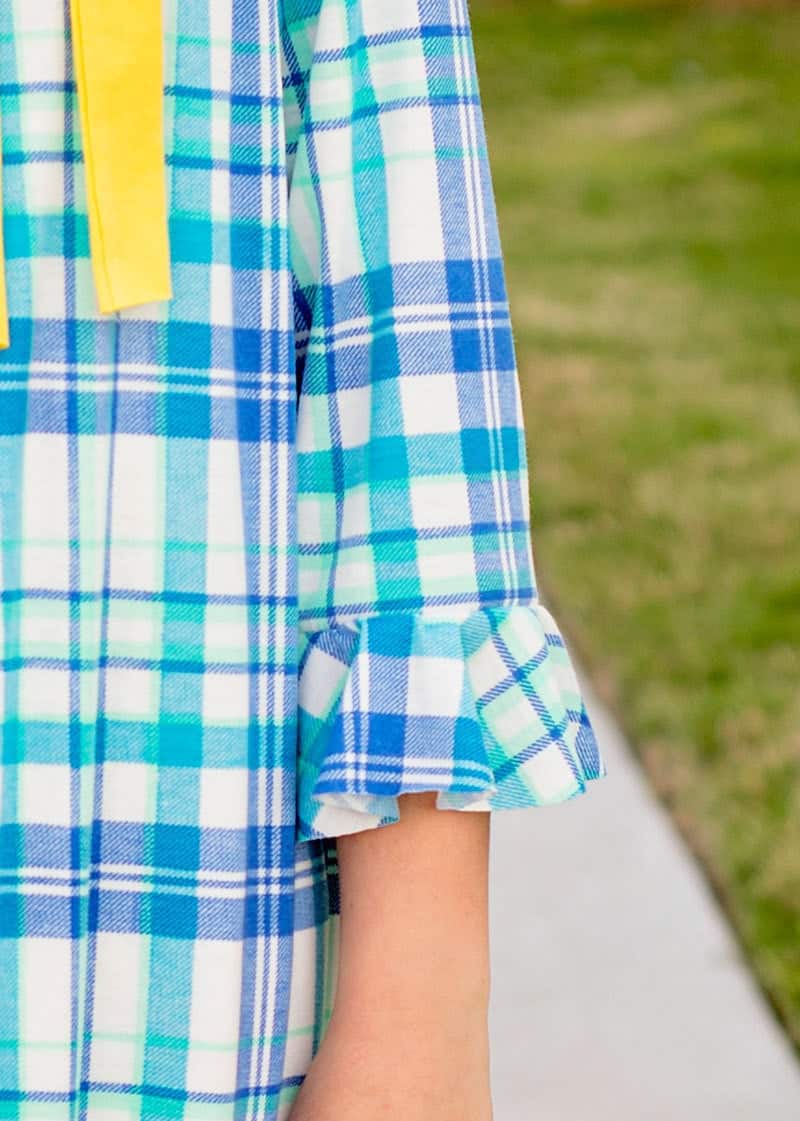
Flounce sleeve peasant dress- how to add a flounce sleeve to any pattern.
Good news everyone! I have finally done the work and added larger sizes to my free Peasant Dress Pattern!!! This free girl’s dress pattern now goes from size 12 months up to size 14 to include the older girls.
(Grab the pattern here.)
One important thing to note – this pattern is a bit different from the old pattern: I’ve taken a few polls over the last year or so to find out if you guys preferred having a full dress pattern (skirt already drawn in) or if you wanted the pattern to stay bodice only (saves printer paper, but you had to draw in the skirt yourself.)
It surprised me, but every time I asked, the only people who chimed in were the ones who wanted a full pattern. So, that is what I made. (If you are someone who liked the bodice only, <like me, lol> I will keep the original available in my private Facebook Sewing group.)

My little missy is a huge fan of flutter sleeves, so I told her I would add the sleeve to the next dress I sewed for her.
This particular dress was more of a test and I didn’t want to use up my good fabric just for testing. I don’t have many fabrics that are in a 2+ yard continuous cut – which is about what is needed for the larger sizes.

I’m actually not so crazy about how this plaid fabric looks as a dress, kind of makes me think of a nightgown. So that is probably what it will become. (We definitely need a few more nightgowns anyway…)
I was also testing out the length of the flounce. This version has a 2-inch flounce, which is what the tutorial will direct you to make, but I think a 3-inch flounce might be even better on larger sizes.

Here it is without the belt – see what I mean about nightgown? I think I will add a tutorial soon on how to add an elastic waistband to this dress.


Now… On to the tutorial:
How to make a flounce sleeve pattern:
Supplies needed:
- Dress or top pattern (I’m using my free peasant dress pattern today.)
- Ruler
- scissors, markers, paper, Wash Away Wonder Tape, plus other basic sewing supplies
Step 1. Print pattern and tape together.

Step 2. Make sleeve adjustments.
- A couple of things to consider…
- Do you want a full, 3/4 or short sleeve top.
- How long do you want the flounce to be?
- In our case, we did a 3/4 sleeve and a 2-inch flounce. Which is what today’s directions will reflect, but it is easy enough to figure out what changes to make for a different look/sleeve length.
Without cutting apart the sleeve, measure up from the 3/4 cut line 1.5 inches and mark that line.
Then measure down 2.75 inches and mark that line.

The rectangle you just drew is the starting point of the flounce pattern. If you want your flounce longer, move the bottom line down a bit. Cut the rectangle you drew from the bottom of the sleeve:

Step 3: Create the flounce pattern.
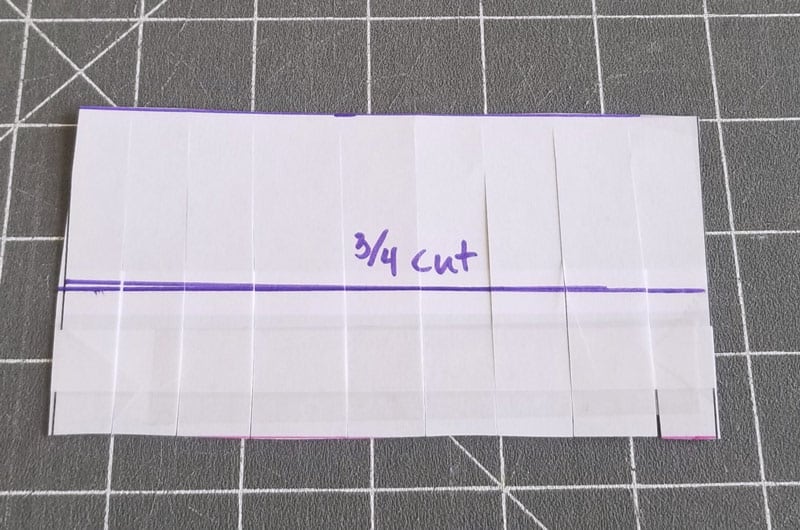
Cut strips into the bottom of your rectangle, 1/2 inch apart, all the way to the top of the rectangle. Just be careful to not cut all the way through.

Next, fan your cut strips out into a half circle, taping everything into place.

Use a pen to draw a pattern around the half circle.

Fold your half circle in half and cut it out. (This will help make it symmetrical.)

You can do a quick test to measure your pattern to make sure it will fit (Measure the top of the half circle and the bottom of the sleeve and they should be the same.)

Step 4: Sew the flounce to the sleeve.
Line your flounce pattern up on the fold of the fabric. Cut one side on the fold and the other side not on the fold. (You need the flounce to be an open strip – see 2nd photo below.)


Hem the bottom of the flounce if desired. Hemming on a circle is tricky but can be done. I love to use the Dritz Wash Away Wonder Tape for this type of application, makes it so easy.
Line up the edge of the flounce with the bottom edge of the sleeve, right sides together, pin and sew together with a 1/4 inch seam allowance.

Step 5: Continue sewing your dress/top as per the pattern instructions.
You are done – cute right?

If you end up making one of these, please tag me on Instagram with #scatteredmompatterns or share a photo on my facebook page!
Don't miss any more posts!


