

How to Make a Santa Sack (3 Sizes + 2 Closure Options)
Disclosure: This post may contain affiliate links. As an Amazon Associate, I earn from qualifying purchases.
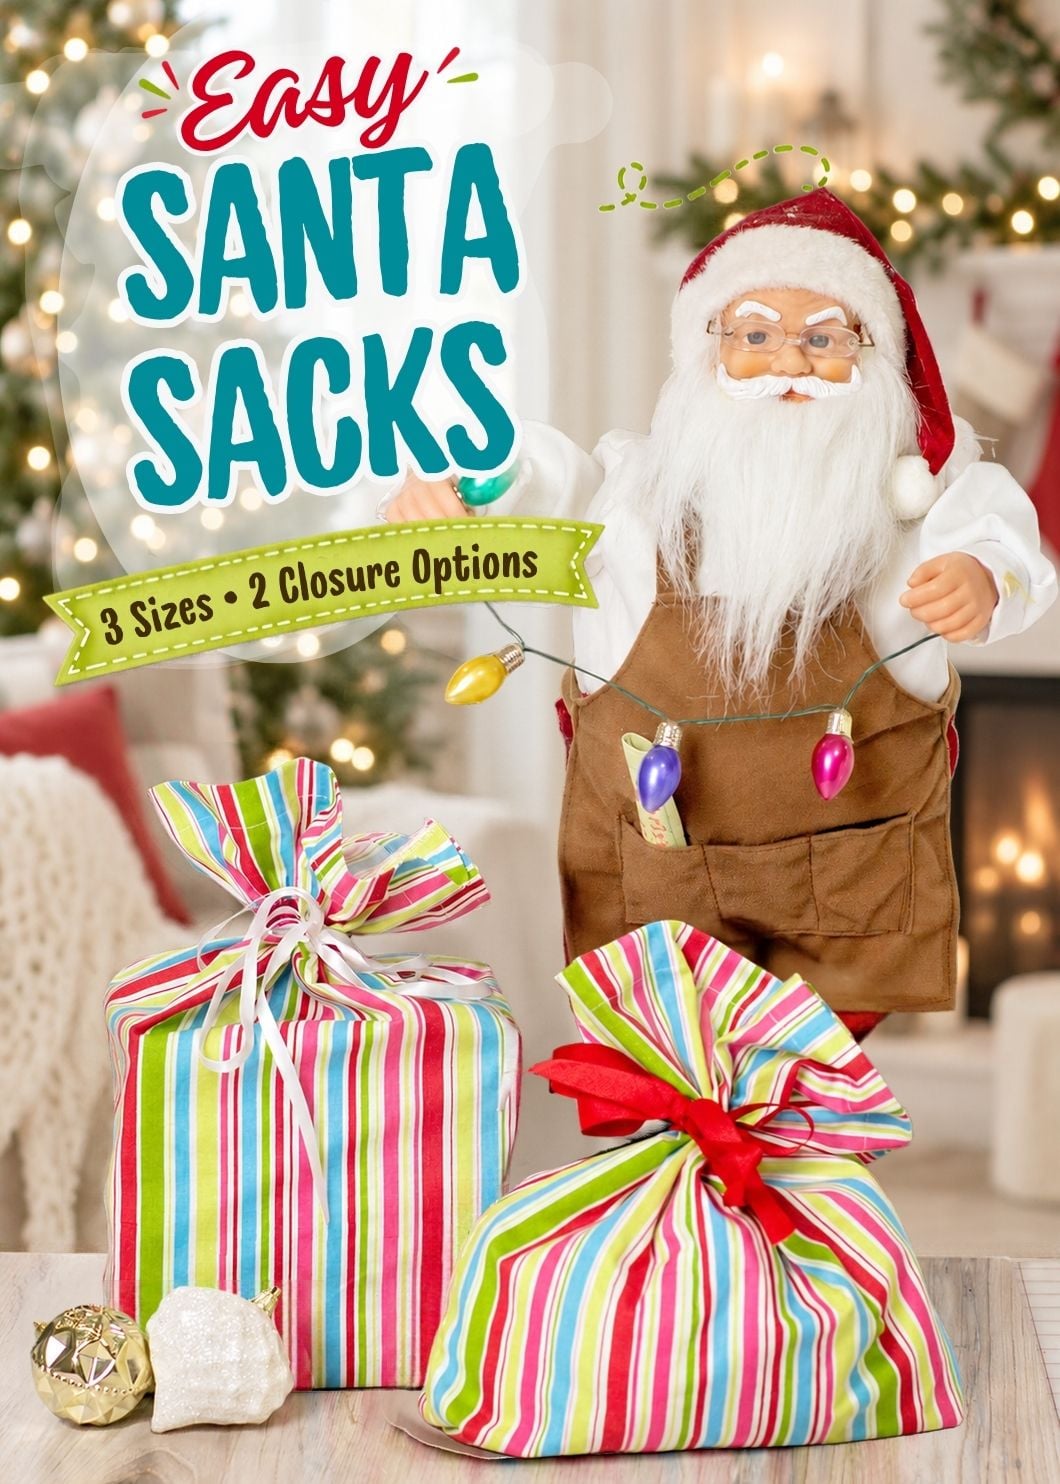
Learn how to make a Santa sack with this simple sewing tutorial. These reusable fabric gift bags have a boxed bottom, a pretty ribbon closure, and cutting measurements for three sizes.
💌 Save this article
Easy DIY Santa Sack
Some gifts just look better in a fabric sack than in wrapping paper. A handmade Santa sack is a simple way to package awkwardly shaped presents, add a special homemade touch to Christmas morning, and create something you can reuse year after year.
This beginner-friendly Santa sack tutorial starts with just one rectangle of fabric. The basic version ties closed with ribbon, but you can also add an optional drawstring casing if you want a more traditional sack-style finish.
Because these bags are unlined, they come together faster and with less fuss; no lining pieces, no turning through gaps, and no complicated construction. Just hem the top, sew the side and bottom, box the corners for depth, and finish it with a ribbon or drawstring.
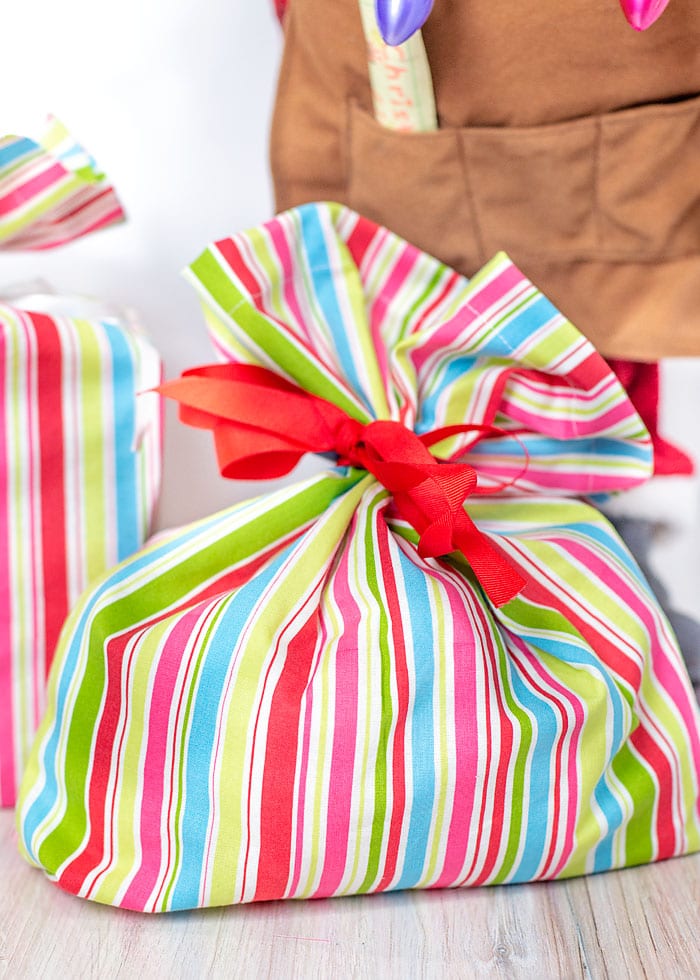
Choose a cheerful holiday print, add a pretty ribbon, and make the size that best fits your gift. Whether you sew one special sack or several to use year after year, this easy project is both festive and practical.
Why Make These Santa Sacks?
-
Reusable gift wrapping: Use them year after year instead of relying on disposable wrapping paper.
-
Beginner-friendly sewing project: These sacks are simple to make and come together with straightforward construction.
-
Three sizes: Choose a smaller gift bag or a larger sack without printing a pattern.
Your choice of closure: Keep it simple with a separate ribbon tie, or add a casing to keep the drawstring with the bag. -
Great for awkwardly shaped gifts: Soft toys, clothing, and other hard-to-wrap presents fit easily inside.
-
Easy to personalize: Add a name, gift tag, festive ribbon, or simple embellishment to make each sack feel special.
Supplies and Materials
- Woven fabric, such as quilting cotton. Cut one rectangle using the chart below.
- Coordinating thread.
- Ribbon for tying the basic sack.
- Optional ribbon or bias tape for the casing, plus a narrower ribbon or cord to thread through it.
- A bodkin, safety pin, or large-eye upholstery needle for threading the drawstring.
- Sewing machine, ruler, scissors or rotary cutter, pins or clips, and an iron.
For fabric purchasing, allow approximately ½ yard for the small, ¾ yard for the medium, or 1 yard for the large, provided the usable fabric width accommodates your rectangle.
The large sack needs at least 40½ inches of usable fabric width, excluding the selvages.
Santa Sack Sewing Pattern: Sizes and Cutting Measurements
Cut one rectangle for each sack. All measurements are in inches.
| Size | Cut fabric: width × height | Approximate finished base width × height × depth | Opening width laid flat |
|---|---|---|---|
| Small | 20½ × 15 | 7 × 12 × 3 | 10 |
| Medium | 30½ × 21½ | 11 × 18 × 4 | 15 |
| Large | 40½ × 30 | 15 × 26 × 5 | 20 |
- Finished height is measured from the boxed base to the top edge before gathering or tying. Leave room above the contents for the closure.
- Use a ¼-inch seam allowance for the side and bottom. The cutting measurements also include the top hem: a ¼-inch fold followed by a 1-inch fold.
Good to Know: What Boxing the Corners Does
Boxing the corners gives a flat bag a base with depth. Some fabric from the front and back folds underneath to form that base, so the bag becomes shorter and its base becomes narrower.
In this tutorial, the boxed-corner measurement is the length of the stitching line across the flattened triangle. It is not the distance measured down from the triangle tip.
How to Make a Santa Sack
1 Cut the fabric and hem the top. Cut your rectangle using the chart above. If you are using a directional print, make sure the design will face upward when the sack is finished. (The 20½-inch, 30½-inch, or 40½-inch edge is the top of the sack, depending on the size you are making.)
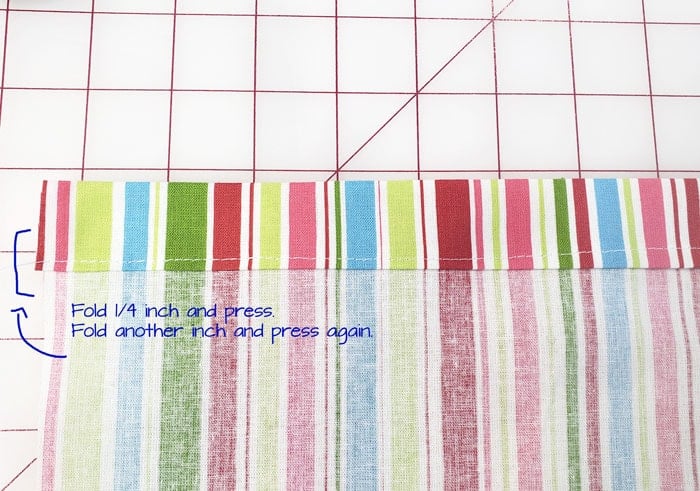
Along the top edge, fold ¼ inch toward the wrong side and press. Fold down another 1 inch and press again.
Stitch close to the lower folded edge to secure the hem.
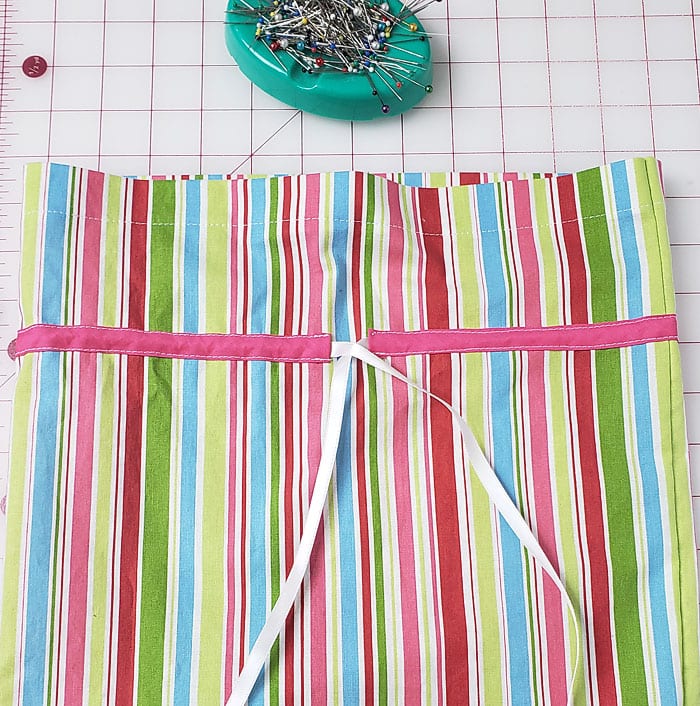
2 Optional: Add a drawstring casing. For the basic ribbon-tied sack, skip this step.
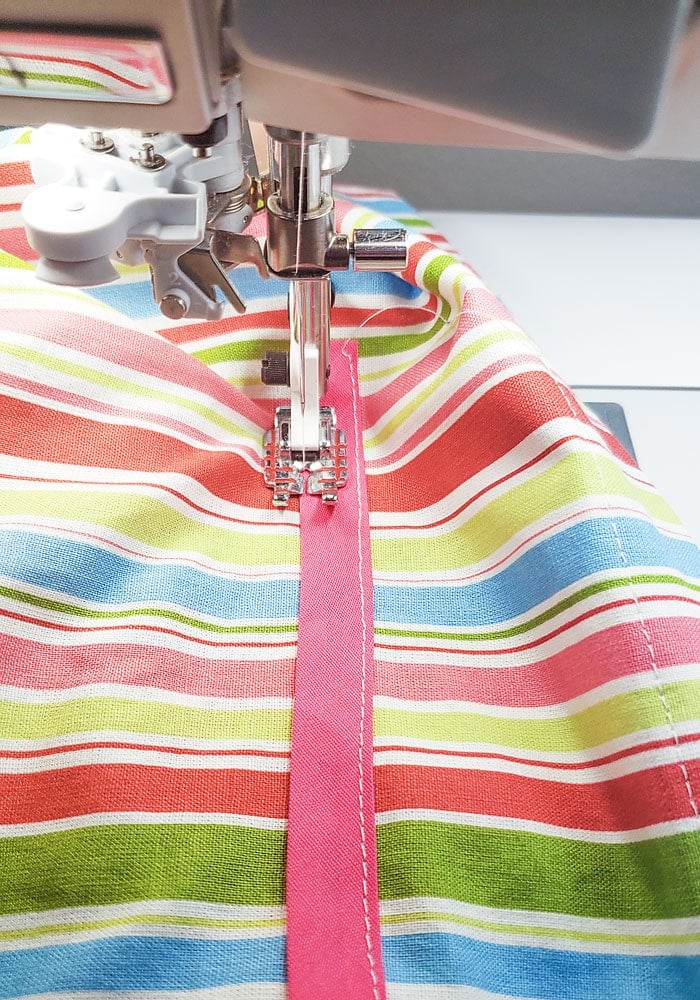
For a drawstring version, add the casing while the fabric is still flat. The casing photos show it on an assembled sack, but sewing it on before the side and bottom is sewn together is much easier.
Ribbon or bias tape can form the casing. Cut the ribbon or bias tape to about the same width as the Santa sack and line it up a few inches from the top of the sack.
Fold one edge of the casing in about ½ inch and pin in place. Keep pinning the casing to the sack, taking care to keep it straight.
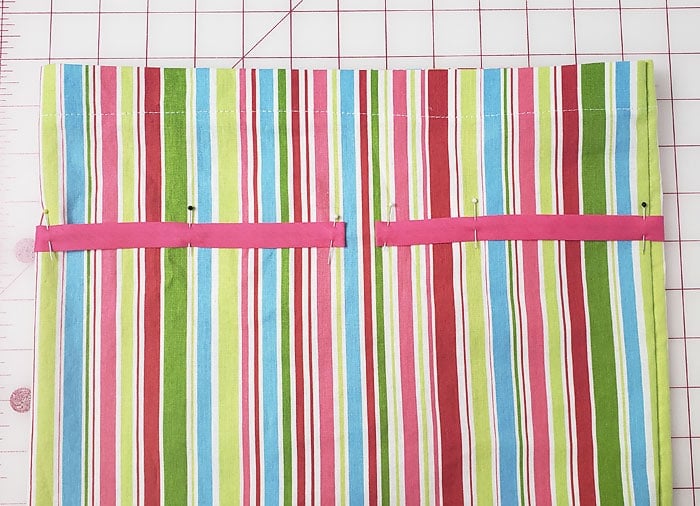
Stitch along the edge of the casing on both sides, leaving both short ends open so you can thread the drawstring through.
3 Sew the side and bottom. Fold the fabric right sides together, bringing the two short side edges together. Match the hemmed top edges and pin the side and bottom.
Sew down the side and across the bottom using a ¼-inch seam allowance. Leave the top open. Backstitch at the beginning and end.
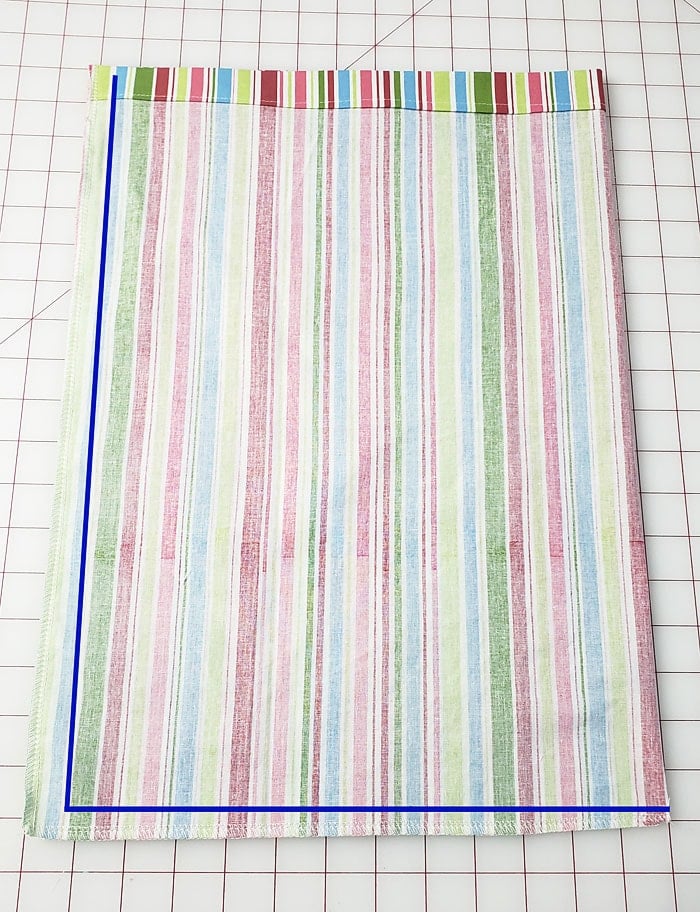
Finish the side and bottom raw edges with a zigzag stitch or serger.
4 Box the bottom corners. With the sack still wrong side out, open one bottom corner and flatten it into a triangle. Align the side seam with the bottom seam. At the opposite corner, align the side fold with the bottom seam.
Slide your ruler across the triangle until the width from folded edge to folded edge matches your chosen base depth:
- Small: 3 inches across.
- Medium: 4 inches across.
- Large: 5 inches across.
Draw a line perpendicular to the center seam. Make sure half the line lies on each side of the seam.
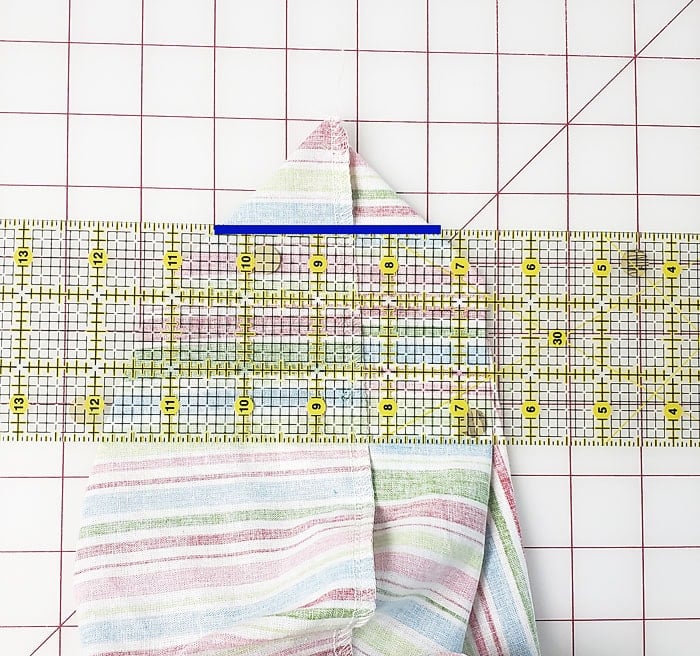
Sew across the marked line, backstitching at both ends. Repeat at the other bottom corner, using the same measurement. Then trim away each triangle tip, leaving a ¼-inch seam allowance beyond the stitching. Finish the raw edges with a zigzag stitch or serger.
💡Pro Tip:
Before trimming either boxed corner, sew both corners and turn the bag right side out to check that the base is even. If something looks crooked, you can unpick the corner stitching and adjust it while the extra fabric is still there.
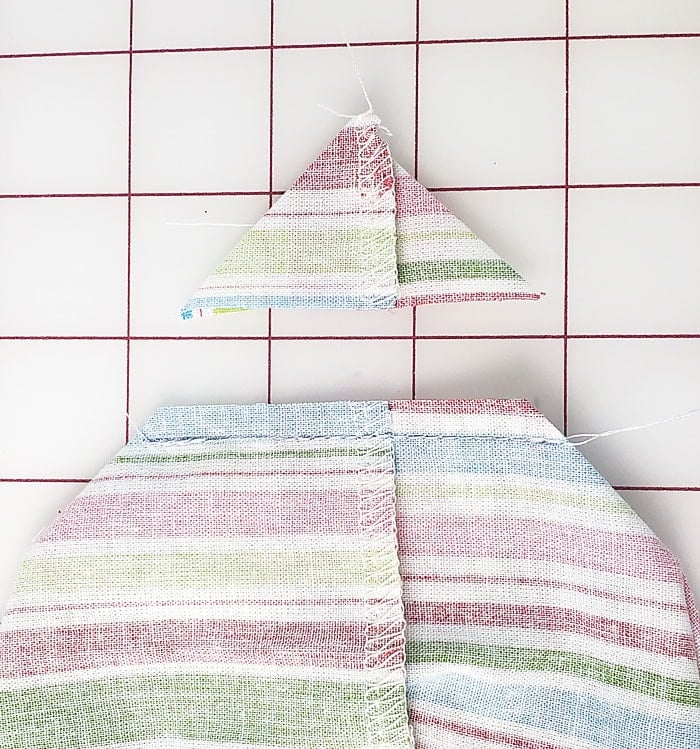
5 Turn right side out and finish the closure. Turn the sack right side out and gently shape the boxed base.
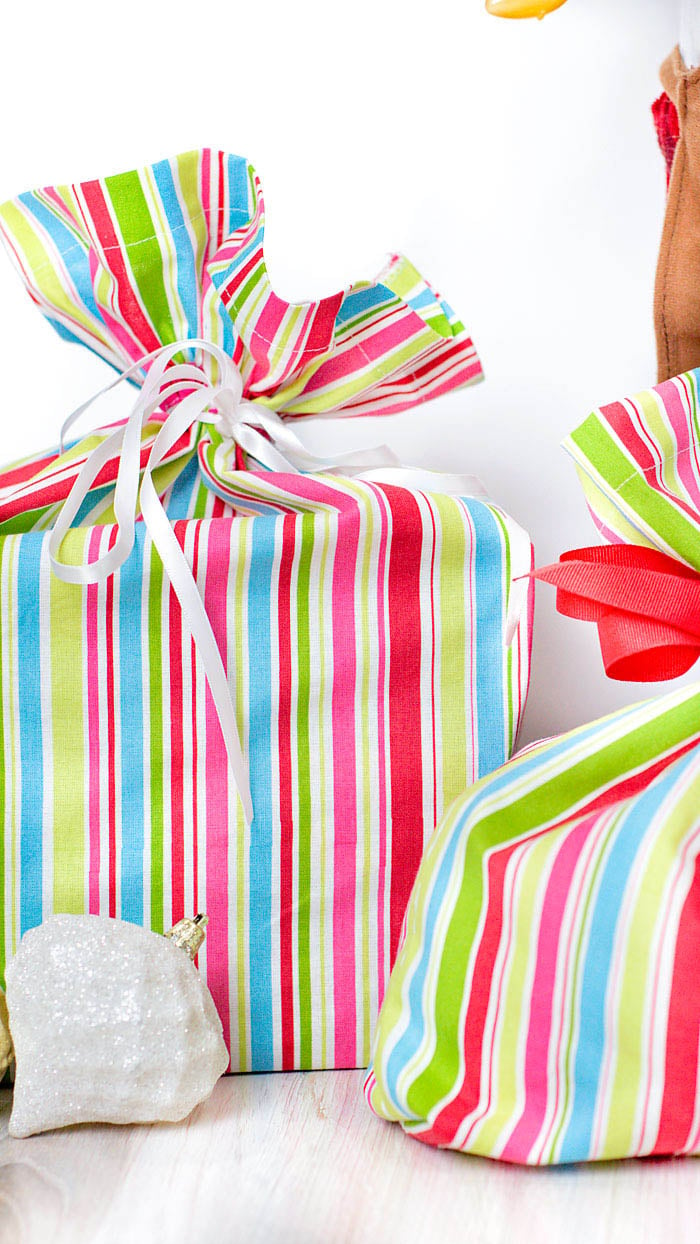
For the basic version, add your gifts, gather the fabric above them, and tie ribbon around the top in a bow.
For the drawstring version, attach your narrower ribbon or cord to a bodkin, safety pin, or large-eye needle.
Feed it into one open end of the casing and work it all the way around the sack until it emerges from the other end. Pull the ends to gather the sack and tie a bow.
Sewing Tips
- Match the top edges carefully. Uneven alignment at the side seam can leave a step in the hem.
- Check both boxed corners. Use the same stitching-line length and keep the seam centered.
- Keep casing ends out of the side seam. Accidentally catching them can close the drawstring channel.
- Give the gifts some headroom. The listed height includes the fabric that gathers above the contents.
Make It Your Own
- Use birthday fabric for a reusable birthday gift bag.
- Use plain off-white or white fabric and add heat transfer vinyl or a name to the front, or attach a handmade gift tag to the ribbon. (Add any sewn embellishments while the fabric is flat, before assembling the sack.)
- An easy fabric ornament gift topper would also look cute tied into the bow.
Still have a few questions before you sew? Here are a few helpful things to know.
Frequently Asked Questions
Do I Need a Printed Pattern?
No. Each sack is made from one rectangle, so you can measure and cut directly from the sizing chart. The boxed corners are marked after the side and bottom seams are sewn.
Does the Sack Need a Lining?
No. This version is unlined. Finish the exposed seam allowances to help prevent fraying.
What type of fabric works best for a Santa sack?
Woven cotton fabrics, such as quilting cotton, are a great choice because they are easy to sew and come in lots of festive prints. If you want a sturdier sack, you can also use a heavier woven fabric, as long as it still presses and sews well.
Can I make this Santa sack in other sizes?
Yes. The small, medium, and large sizes in this tutorial are a helpful starting point, but you can scale the rectangle up or down if you want a different finished size. Just be sure to leave enough height at the top for gathering or tying closed.
Can I personalize a Santa sack?
Yes. You can add a name, heat transfer vinyl, applique, embroidery, or a handmade tag. If you are adding sewn embellishments, it is easiest to do that while the fabric is still flat before assembling the sack.
More Christmas Sewing Projects
- Wine Bottle Gift Bag Tutorial
- Easy Fabric Ornament Gift Toppers
- Free Quilted Stocking Pattern
- Free Christmas Sewing Projects
Don't miss any more posts!

Stay connected by following along on Pinterest, Facebook, Instagram, and TikTok for more fun content, easy recipes, free sewing patterns, and creative inspiration.
