How to Make a Beaded T-Shirt, + Red, White and Yum! printable
Disclosure: This post may contain affiliate links. As an Amazon Associate, I earn from qualifying purchases.

This How to Make a Beaded T-shirt Tutorial is the perfect craft for summer!

Were you a child of the ’80’s? How many of you had one of these beaded t-shirts growing up?
I certainly did! I think someone gave it to me as a souvenir… I don’t remember what was on the shirt, but I do remember that I loved the beads!

This craft has been on my to-do list for a couple of years now. I would think about making one of these beaded t-shirts, but never really followed through on the idea. (Imagine that, lol.)
Anyway, the trifecta of motivators finally occurred all at once: Walmart had their Faded Glory plain t-shirts on sale for $2.97, I found these red, white, and blue pony beads in the craft section, and I have a bunch of this transfer paper left over! (This stuff is so cool – the kids are already planning their next t-shirts.)
Don’t forget: I also have a free girls’ t-shirt pattern available here. You can use it instead of a store-bought tee.
To make this t-shirt perfect for summer, I put together this cute red, white, and blue popsicle design in Photoshop and saved it as a PDF in case you wanted to make one for yourself. (The access link can be found under supplies needed.)

I did the transfer and cut the t-shirt myself and then set my little missy to work adding the beads.
It took her most of the day (working off and on), but when she finished and tried it on, she loved the top! (In fact, she went to work with Dad today and wore it. They texted me a picture of their lunch – chili at Chili’s – I hope she put a napkin over the t-shirt… That girl is a messy eater, lol)

So cute and perfect for summer, don’t you think?


How to Make a Beaded T-shirt
Materials needed:
- T-shirt
- Pony Beads
- Disappearing ink marker
- Ruler
- Scissors (if you do any amount of crafting, you really need this rotary cutting set – It’s good for everything!)
- Optional Image to transfer and Transfer paper
Click here to access the Red, White and Yum! image reversed. Click here for the not reversed image.
Instructions:
*If you are adding an image to the shirt, follow the manufacturer’s instructions for the transfer paper.
Step 1: Cut off the bottom band of the t-shirt.

Step 2: Measure up 3 inches from the bottom of t-shirt, Mark the 3-inch line with disappearing ink fabric marker.

Step 3: Use marker to draw 1/2 inch increments at the bottom of the t-shirt.
Step 4: Use scissors or rotary cutter to cut a fringe along the bottom, up to the 3-inch mark.

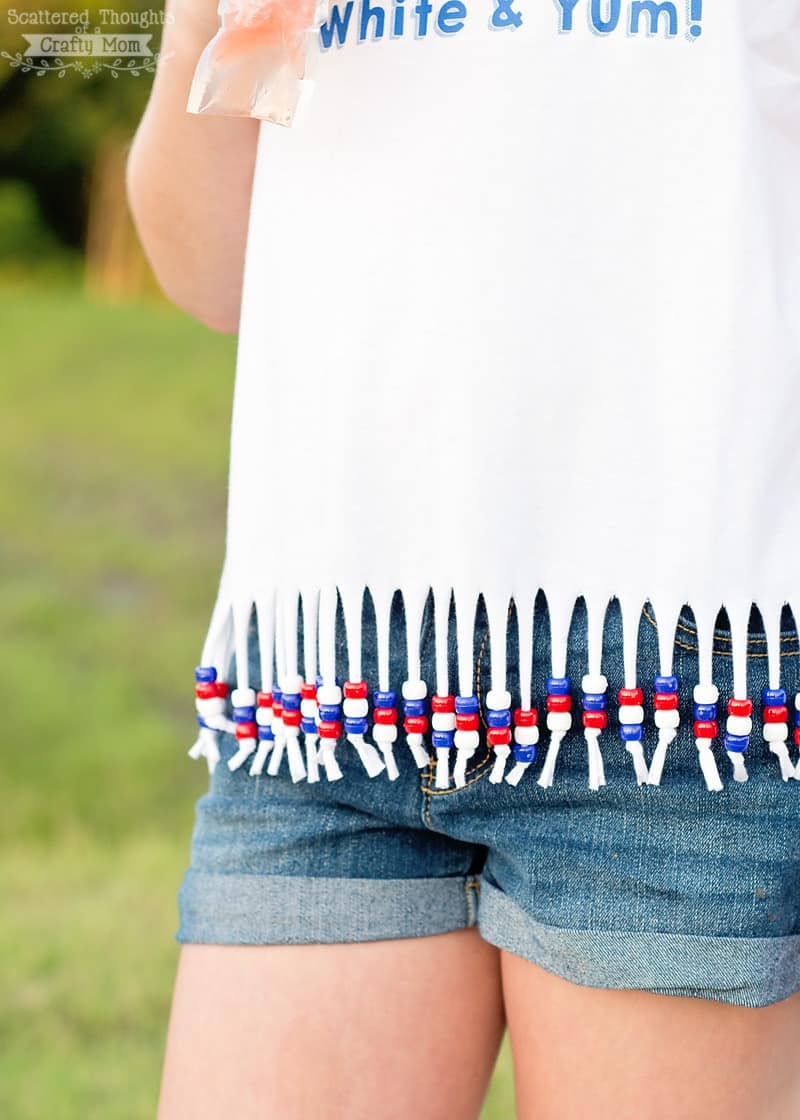
Step 5: Add 3 to 5 beads to each piece of fringe.

Step 6: Tie fringe in a knot.

Step 7: Give the fringe a little tug to help stretch the fabric (but not so hard that it makese the knot smaller thatn the pony bead opening.

You are done, now your little princess (or you) can wear your masterpiece!
Don’t you just love it? If you end up making one of these, I would love to see your finished creation. You can always share a link to an image in the comments, share an image on my Facebook page or tag me (@scatteredmom) on Instagram w/#scatteredmompatterns.
[irp posts=”25503″ name=”DIY Duck Tape Pencil Toppers”]
Don't miss any more posts!

Follow along on:
Feedly, Bloglovin', your favorite feed reader, or signing up via email and have new posts delivered to your email box each week!

I love this and so easy as I have a ruler for cutting fringe that will eliminate all the marking. My question is, can this shirt with the beads be machine wash and dried? I have a couple of shirts for my youngest granddaughters and have already picked out beads from my stash. Thank you so much for sharing all your wonderful ideas, patterns and recipes.
I like all shirt. This t-shirt is very good.