Alphabet Cookie Fun
Disclosure: This post may contain affiliate links. As an Amazon Associate, I earn from qualifying purchases.
We had so much fun with our latest baking projects!
We made Alphabet Cookies using a special cookie dough recipe that I found in an arts and crafts book for kids called “The Toddler Busy Book.” My kids are not exactly toddlers anymore, but everyone loves to make cookies! And I especially liked that this recipe is low in sugar.
💌 Save this article
How we made our cookies (scroll to the bottom for the full printable recipe):
First, we measured out our flour.


Next, I cut the butter into small pieces using a knife and added it to the bowl of flour.

We then used a pastry blender to mix the butter and flour until it resembled fine crumbs.


Next, we mixed the sugar with the hard-boiled egg yolks and then blended that into the flour. The boiled egg-sugar mixture looked like this:

Then, we mixed the raw eggs and vanilla into the dough and squeezed everything together to form a ball.
After that, I rolled out the dough onto a lightly floured surface and used my pizza cutter to cut the dough into strips.

After working with the dough a bit, we discovered it worked best to shape the letters out of strips of dough rolled with a rolling pin to about 1/3 inch thickness and cut into strips about 3/4 inch wide.
The original instructions called for rolling the dough into ropes, but our dough seemed to hold up better in the strips.


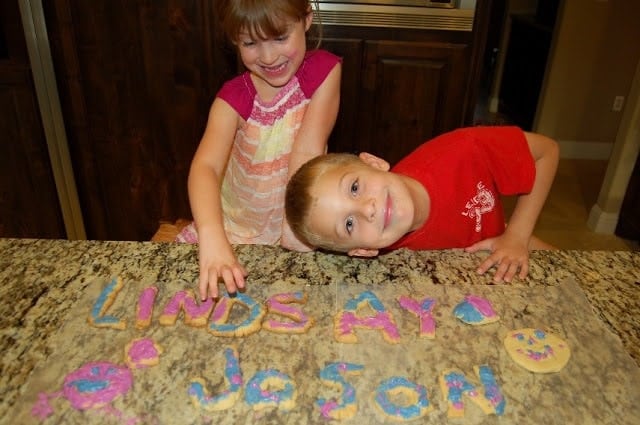
After we baked the cookies, we frosted them with a little store-bought cake icing and food coloring mixed in. We started out using popsicle sticks to apply the frosting, but in the end, we just used what worked best—our fingers!


Yum, best cookies ever!!!

Let us know if you make these cookies!
Print
Alphabet Cookie Dough Recipe:
Ingredients
- 4 1/2 cups all-purpose flour
- 1 1/2 cups butter
- 3 hard-boiled egg yolks
- 3/4 cup sugar
- 3 raw egg yolks
- 1 1/2 teaspoon vanilla extract
💌 Save this article
Instructions
- Preheat your oven to 300°F.
- Measure the flour into a large bowl. Cut the butter into small pieces and add them to the flour. Mix the flour and butter until the mixture forms fine crumbs.
- In a separate bowl, mash the hard-boiled egg yolks with the sugar. Stir this mixture into the flour mixture.
- In a separate bowl, blend the raw egg yolks with the vanilla. Stir this mixture into the flour mixture with a fork.
- Press the mixture into a firm ball.
- Roll out the dough. Cut 3- or-4-inch strips and have your child roll them with his hands to make ropes. (or skip the rolling into ropes and just use the strips- that is what we did.)
- Shape the strips/ropes into the letters of your child’s name. Flatten them slightly so they’re about 1/4 inch thick.
- Bake the letters on a baking sheet for 25–30 minutes. Remove from the oven when cookies are just starting to brown on the bottom.
- Cool cookies on the baking sheet for 2-3 minutes, then remove to a rack.
- Add icing if desired.
Don't miss any more posts!


I love this idea, getting kids in the kitchen is the best idea. So many things to learn about.
What a fun idea!! What a great idea to shape the letters without using cookie cutters! I love it!