How to Turn a Too Short Swimsuit into a Tankini
Disclosure: This post may contain affiliate links. As an Amazon Associate, I earn from qualifying purchases.
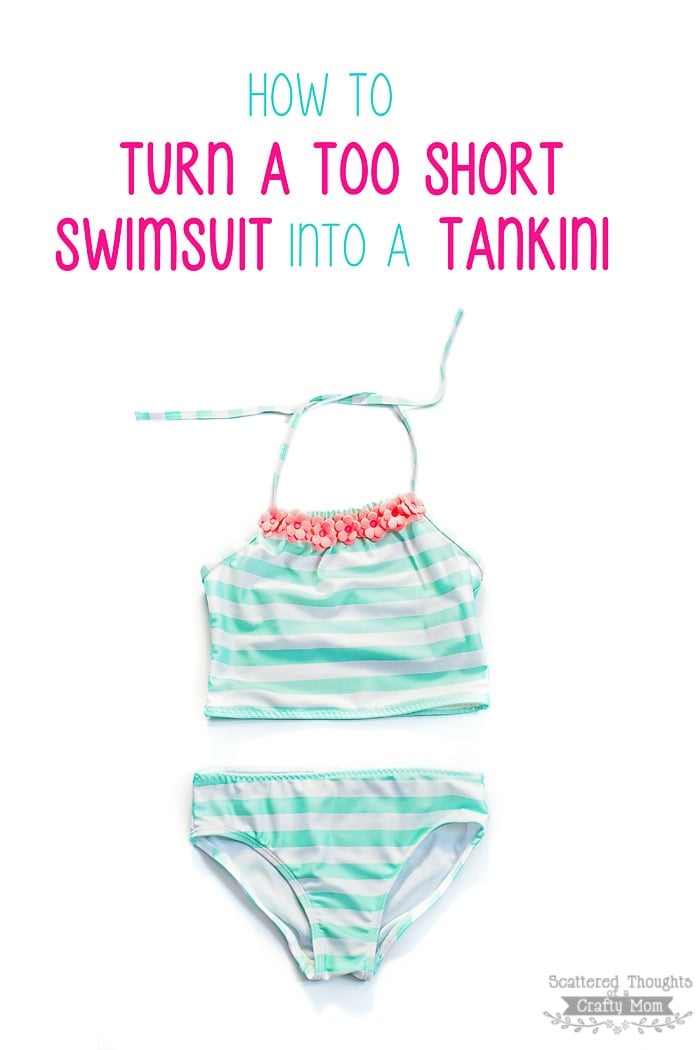
If your child’s favorite one-piece swimsuit still fits everywhere except the torso, don’t toss it. This quick sewing alteration turns a too-short swimsuit into a two-piece tankini by adding elastic waistbands to create separate top and bottom pieces.
Skill level: Beginner
Time: 20–30 minutes
Supplies needed: Minimal
Best for: Swimsuits that fit well in width but have become too short through the torso
💌 Save this article
How to Make a Swimsuit Last Another Summer
I bought a couple of really cute swimsuits for my missy this year from Gymboree. One of the suits ended up being way too short in the torso. I drove all the way to the mall to return a few items, and, of course, the swimsuit was on a different receipt from everything else.
The store would only give me store credit (and it was less than $10 for the suit), so I decided to hang on to it and either return it later with the receipt or try fixing it myself.
As usual, life happened. I never made it back to the mall; we had a vacation coming up, and my daughter needed another swimsuit. So instead of replacing it, I decided to turn the one-piece into a tankini.
It worked out so much better than I expected!

The Problem With One-Piece Swimsuits for Growing Kids
The way my daughter grows, she almost always outgrows clothing in length before width. Swimsuits are especially frustrating because sizing up often means the torso fits better, but the bottoms become saggy and awkward. I’m guessing my daughter is not the only kid with this problem.
If you’ve got a swimsuit that still fits everywhere except through the torso, this simple sewing hack can stretch another season out of it.
A Quick Sewing Fix That Saves Money
This is one of those projects that takes very little effort but feels incredibly satisfying.
There’s something nice about rescuing an item that no longer fits and turning it into something wearable again.
The whole process is simple:
Cut the swimsuit apart → add elastic → finish the edges → new tankini.
That’s basically it.
The alteration only shortened the overall length by about 3/4 to 1 inch, which tells you how ridiculously short the original swimsuit had become before I cut it apart!

My Biggest Mistake (And a Sewing Tip)
The only real mistake I made was using scissors instead of my rotary cutter.
When cutting into the swimsuit fabric, it shifted a bit, and the waistband on the bottoms ended up just a little wonky, but thankfully, it wasn’t noticeable once the suit was on.
So here’s tip #1 of the day:
If you don’t already own a rotary cutter, cutting mat, and ruler set, add them to your sewing wish list. You’ll use them constantly.
If you can afford a larger cutting mat, I recommend going bigger. You’ll get much more use out of it in the long run.
Completely Unrelated Tadpole Story
On a side note, I was walking through our normally dry creek bed recently and could not get over how many tadpoles there were! I grabbed these little nets at Walmart, and we were tadpole hunting warriors this afternoon. (My legs and back are even a little sore from all the bending over and squatting!) BTW, Walmart has all the summer stuff on markdown right now. I even found a little plastic container for the tadpoles to live in.

Tadpole tip of the day: Make sure you have fish food on hand and immediately start feeding your tadpoles. Otherwise, they will eat the only other thing in the tank… Each other!

And if you can believe it, our creek has fish!!! Where they came from, who knows, because this creek bed is normally dry as a bone! We tried to catch some, but those silly little fish would not swim into our nets! (They’re kind of hard to see, so I pointed them out in the photo below.)

(Enough about fish and tadpoles, lol, back to the tutorial.)
How to turn your swimsuit into a Tankini
Luckily, turning a one-piece into a tankini is surprisingly simple. Once you decide where to cut, the rest of the project comes together quickly.
This beginner-friendly swimsuit alteration only requires a few basic sewing supplies and works best on swimsuits that are too short through the torso but still fit well everywhere else.
Materials Needed:
- 1/4 inch swimwear elastic
- Scissors or rotary cutter
- Ballpoint needle
- Measuring tape or ruler
- Existing tankini bottom (optional for comparison)
- Basic sewing supplies
Before You Cut
Choose where to divide the swimsuit.
If you already have a bikini or tankini bottom to compare with, this will save quite a bit of guesswork.
Tip: A good starting point is about 1/3 of the way up from the crotch. Compare to an existing tankini, if possible. If you are using a tankini bottom for comparison, raise the cut line by 1/2 inch to account for the elastic.

Step 1: Cut the Swimsuit
Carefully cut the swimsuit into two pieces:
- Top section = future tankini top
- Bottom section = future swim bottoms
Cut 1/2 inch higher than the desired finished placement to allow room for elastic.
Go ahead and make your cut.

Step 2: Measure & Cut Elastic
For bottoms:
Measure around the hips where the waistband will sit.
Elastic length: Hip measurement – 1 inch
For top:
Measure around the torso where the bottom hem of the tankini top will sit.
Elastic length: Torso measurement – 1 inch
Overlap elastic edges 1/2 inch and sew closed.

Step 3: Mark Elastic & Fabric in Quarters
Divide:
- Elastic → 4 equal sections
- Swimsuit edge → 4 equal sections

Mark with pins. (Matching quarter marks prevents stretching unevenly.)
Step 4: Attach Elastic
Line up the marks and pin the elastic right along the top edge of the tankini bottom.

Using a wide zigzag stitch (less wide than the width of your elastic):
- Stretch elastic as you sew
- Take care to stretch only the elastic, not the swimsuit fabric.

Step 5: Fold Elastic Inward
Flip the elastic to the inside.
Pin in place.

Sew a long, wide zig-zag stitch right through both layers and the elastic.

Step 6: Repeat for Top Piece
Repeat the same process on the tankini top.
You’re done!


Troubleshooting
My waistband ripples: The elastic stretched too much while sewing.
The waistband feels loose: Reduce elastic length by another 1/2 inch.
Fabric skipped stitches: Make sure you are using a stretch/ballpoint needle.
FAQ
Do I need a serger to sew a swimsuit?
Absolutely not! I used a regular home sewing machine.
Will chlorine ruin the elastic?
Use swim elastic for best longevity.
Can this work for adult swimsuits?
Yes, same process, larger measurements.

This little project definitely has me wanting to try sewing an entire swimsuit from scratch next. Have you ever sewn swimwear before?
Want more sewing tutorials, patterns, and beginner-friendly projects? Browse my latest sewing posts here: Scattered Thoughts of a CraftyMom’s recent sewing projects.
Don't miss any more posts!


Your step-by-step instructions were a lifesaver. I’ve always been a fan of tankinis, but finding the perfect one can be a mission. Your tutorial not only solved that problem but also made the whole process seem way less daunting.
Oh my gosh this is so helpful. I’be recently lost a little over 30 pounds and would like to find a high waisted bikini for myself or something in a fun colorful print instead of hiding in black for once. I can’t find two pieces that I like at a good price, so I got a brand new one piece with a beautiful floral print from eBay for very cheap…but the torso is too short!! After reading this I feel like I can definitely handle cutting it in half and making a fabulous high waisted bikini. Thanks so much!
Hope this helps! Definitely consider a slightly wider elastic for adult sizes.
What a great idea! Will definitely give it a go! Thank you!
This is brilliant! I have been wanting to make myself a custom swimsuit. I'm thinking this method would apply to women who deal with summer pregnancy instead of having to pay a lot of money for a new "maternity" suit. I had never seen elastic done that way either! Loved the tutorial.
Like you, I wanted to make my daughter a custom swim suit, but haven't found the time. I did something similar for my daughter's swim suit this year (if you want to see, http://thesewspot.com/bathing-suit/), but I love the way you attached the elastic. I will definitely do it that way next time!
Smart! I've got a Craft Gossip post scheduled for later this morning that links to your tutorial: http://sewing.craftgossip.com/?p=83470 –Anne
This is such a great idea… It seems like each year the swimsuit would get too short but still fit otherwise. Perfect way to fix it. Cute pics of the kids too.
Thanks Bernie, we all had a pretty good time with this one!