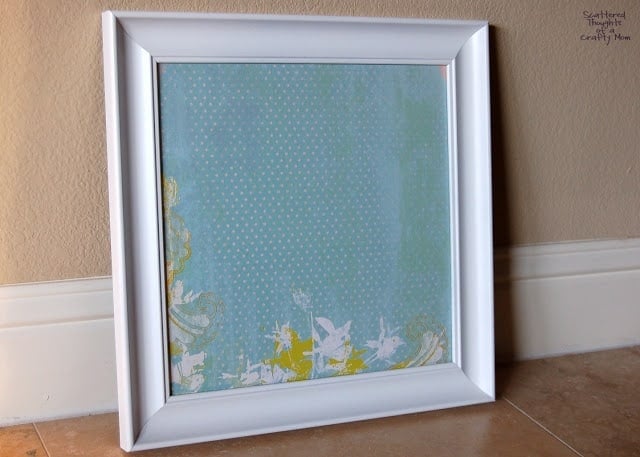
How to make a Magnet Board with an old frame:
I am so loving this magnet board! It sits right on my desk, behind my laptop. It’s where I stick all my important little scraps of paper and reminders so they don’t get lost.
It was so easy to make, anyone can make it, and you can customize the magnet board to any decor!
Here is how I made the DIY Magnet Board.
Materials needed:
- 12x 12 picture frame (My frame was black, I just gave it a coat of white spray paint.)
- If you dont have the glass to the frame you could use a 12 x 12 square of thin plywood. (It should be about the thickness of the picture frame glass, which is about 1/8 inch. I bought mine at Michaels for a couple of bucks. This place sells them individually and Amazon sells them in a pack of 6.)
- Thin scrapbook paper
- Magnetic Paint (I used the Krylon spray magnetic paint, but I next time I will try the kind you paint on with a brush. That way I can get a nice thick layer in just a couple of coats.)
- Modge Podge or some other type of glue.
- Magnets (I used these. They are so tiny and strong!- Don’t waste your time w/ the cheap magnets from the craft store.)
Instructions:
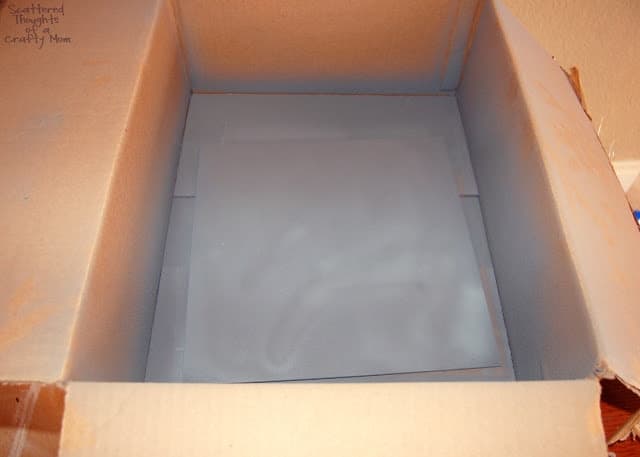
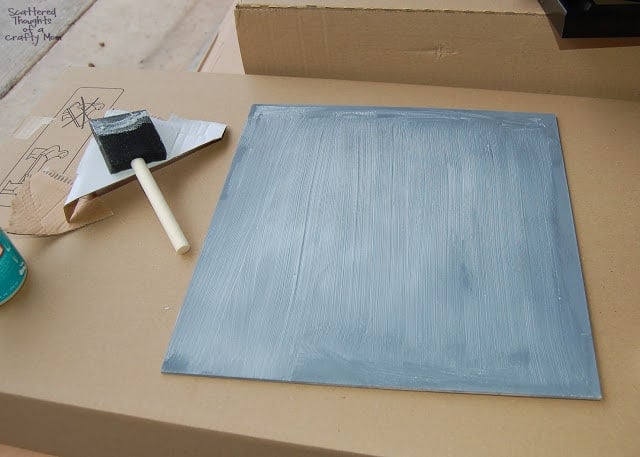
First, coat one side of your wood with a thick coat of magnetic paint and allow to dry the appropriate amount of time according to the directions. I sprayed mine in a box to help contain the mess.
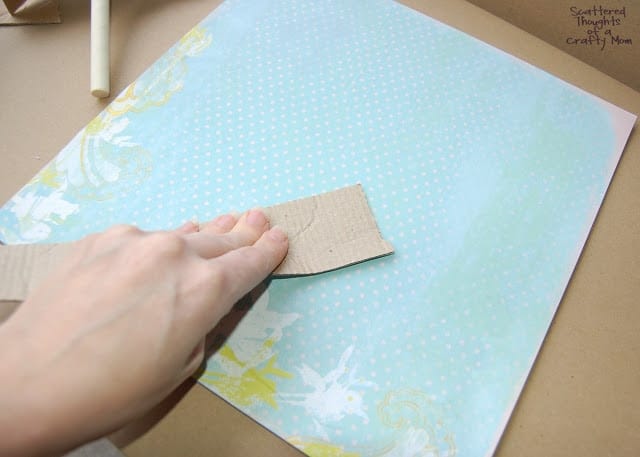
Apply a thin coat of glue, then apply the scrapbook paper.
Use a flat object to smooth out any air bubbles. As you can see, I used a very high-tech object.
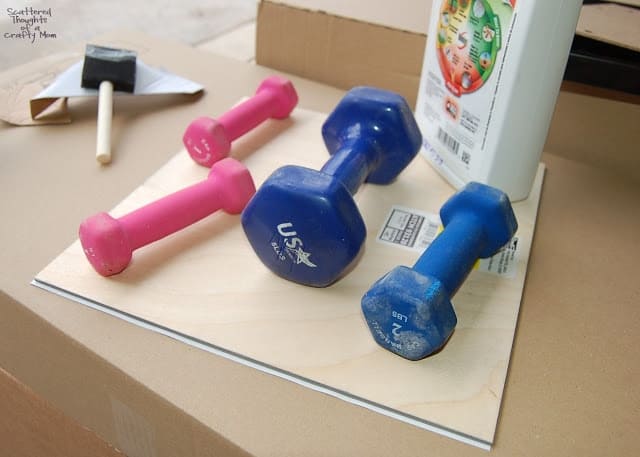
Turn the paper side face down and weigh down the wood to help the paper dry with no ripples. (This really works!)
Once dry, insert the paper covered wood/glass and you are done!
To make the magnets, I just hot glued a magnet to the back of my No Sew Fabric Flowers. Easy Peasy! (click the link to get the flower tutorial.)
Kate says
Very clever idea and would be so useful by the computer or in the sewing room … thanks for sharing!
Wanda Adams says
You are so talented. I am so happy to have found this site.
Karen says
This is such a cute idea! I love the no sew fabric flowers! So adorable:) I would love you to stop by and link up at my Friday Frolic party!!
Vanessa @ See Vanessa Craft says
Super cute! I'd love for you to link up at Do Something Crafty Friday: http://www.seevanessacraft.com
Holly says
Super cute Idea! Thanks for sharing! ; )
candy's clothes closet says
I was just looking at the magnetic spray paint. I almost bought some. I love your project. SO very cute and creative. I wondered which would be better the spray paint or the brushable. Thanks for sharing;) Stay Fashionable! Love,Candy
Megan says
Wow, that's a cute magnet board! I want one. Thanks so much for sharing
Amanda says
Very Cute! I use a box for my spraypainting too! I call it my personal spraypainting booth!
Pam says
Fabulous idea!!! Thanks for the tutorial. I'm pinning this…
Sara says
REALLY, really REALLY like this board!! And like the box idea for keeping away the mess!! Would LOVE it if you would link this up come Tuesday at my turquoise lovin' party!! 😉
Bethany @ 3SonsPlus1...and... says
That's so cute! I love it! So glad I found your blog today…I'm going to follow along for more great ideas. =)
Jessica @ Stay at Home-ista says
So cute, and I love the use of handweights, what else are they for?
Kristina says
Visiting from I Heart Nap Time's Sunday Scoop 🙂
Kristina
Theresa says
I love your project & want to make one. I have the perfect spot in our kitchen over the desk. Visiting you from blog hop inspire me Monday! I hope you get a chance to drop by. I have link ups as well. Drop your projects in anytime. PS love that high tech tool.
Theresa
Kristi says
This is so beautiful!! I love the way your rosettes look…what a cute style! And great tip with the weights. I always have bubbles…boo! Would be delighted for you to link up with us at Mop it Up Mondays:
Kristi says
Thank you so much for linking up!! I'm featuring this tomorrow at Mop It Up Mondays!! Hope you can stop by! 🙂
Banker Mom says
Such a good idea. Loved the tutorial. I just connected to you via Google Connect.
The Bold Abode says
Very cute! Magnetic paint is incredible, isn't it?
Artsy VaVa says
This is great! Pinning it.
Six Sisters says
What a great idea and the flowers look so cute on the board! We loved having you link up to our "Strut Your Stuff Saturday!" We hope to see you back next Saturday with more fun ideas! -The Sisters
[email protected] says
LOVE this! I need something like this in my kitchen! What a great way to personalize it to your taste!
4you-withlove says
How cut and nicely done! I like the no sew flowers you added as well!
Bonnie says
What a clever project! turned out soooo cute! Would love for you to link up to our Uncommonly Yours link party! 😉
Paula Parrish says
OMG, I love your magnetic board. Very creative. Smiles, Paula
~Damita's Pretty Wrap~ says
Super cute!!! Love the cute magnents too!
Lynette @ My Craft Discovery says
That turned out really cute! I love the flowers, I haven't seen ones like that before. Very pretty!
Laurel @ Ducks in a Row says
How cute is this! I love your little flowers!
Beth says
I made a very small version one a few years ago, but this one is just darling!! I haven't seen the flower magnet like yours – very cute! I'm now a follower!
Stacey says
Love this idea – and your blog title as well! Amen to that! I would love to have you stop over to link this up – I am hosting my first linky party today! Please come by!
Stacey of Embracing Change
SusieQTpies says
Whoa! Now THAT is an awesome Mommy Solution! I would LOVE for you to come share this in my Mommy Club link up
Melissa @ LoveBugLiving says
This is so cute. The paper looks great with the white frame. The magnets are really cute too.
Melissa
Jessica Kielman says
I absolutely love this! My mother-in-law made a similar one, and I have been dying to try it myself! I would love for you to link this to my party…
Jill @Two Yellow Birds Decor says
I am in love with this magnetic board!! So cute!! Those flowers are so fun! I am a new follower!
I currently have a link party going and would love for you to share this and anything else you would like!
[email protected] says
Love this idea.. The flowers look so cute.. I am loving your blog and following to keep updated.. 🙂
Love
Hani
April says
Love the bright colors and cute magnets!
Natalie Dixon says
Love the colors you picked! I've been collecting thrift store frames meaning to do something like this and just haven't gotten around to it yet! Yours turned out great, though! I'd love it if you shared it at my party!
South Bay Studio says
What a cute idea, I never heard of magnetic paint, You learn something new every day, I guess. Thanks for the tutorial. Kathi
Lindsi B says
Ah there those beautiful flowers are again! I love them so! Oh I love this! It would be great if you would share this with our readers for Fun Stuff Fridays.
Kim @ The Educators' Spin On It says
I love this idea and am thinking we're going to create this to keep our words on the week on. Who wouldn't want to look at them and learn them when you get to pin them up with adorable flowers! Can't wait. THANKS!
BottledBeauty says
Adorable! This would be great in my kitchen for meal plan or grocery list. Pinning it!
Rachel says
I've seen the magnetic paint before – now I wish I would have bought it so I could copy your idea. I love your cute magnets too! Thanks for sharing at Terrific Tuesdays.
Rachel
Polkadot-pretties says
Fabulous post,
Thank you for linking your post up! , hope you will stop by today and link up another great post!!
Andi says
I've never seen magnetic paint! I love this idea. So personalized and cute!
Erika says
I love how easy you made it look! I am in the midst of working on my daughter's room and this would be a nice touch.
I hope you can stop by and share at the
Stacey says
Love your magnetic board so much I featured it with the Inspired Creations Linky Party features! Stop by to see and grab a featured button while you are there! Thanks for linking up and please come back weekly on Thursdays to link up again!
Stacey of Embracing Change
Sarah says
Love this – very fun and easy into the bargain! 🙂
Kara at Petals to Picots says
This is so pretty! What a great idea! Thanks for linking up. Can't wait to see what you have this week 🙂
Katie's Nesting Spot says
I love seeing how you've used your no sew flowers!
DesignDazzle.blogspot.com says
Super Adorable!
Vanessa says
Wow. This is cool and cute
amy c @ thisheartofmineblog.com says
cute!! you did a great job. love the color choices.
wingsy says
Great idea! I made mine with a garage sale cookie sheet I cut to fit the frame.
A. S. says
So I do have the glass to my picture frame so how should I proceed? I may have overlooked it but I didn’t see instructions for that.
Jamie Sanders says
Then you can use the glass instead of using wood. Just paint it with magnetic paint and apply the paper on top.