Easy Elastic Headband Tutorial
Disclosure: This post may contain affiliate links. As an Amazon Associate, I earn from qualifying purchases.

Welcome, I’m so glad you’re here! I’ve got the greatest Easy Elastic Headband Tutorial to share with you today:

💌 Save this article
Easy Elastic Headband Tutorial
A girl with long hair can never have too many elastic headbands right? One to go with every outfit and that will help keep her hair out of her face on a windy or hot, sticky summer day.
(Especially a girl that keeps cutting chunks out of her hair. 😉 You can see really notice our latest adventure with scissors in this pic.)
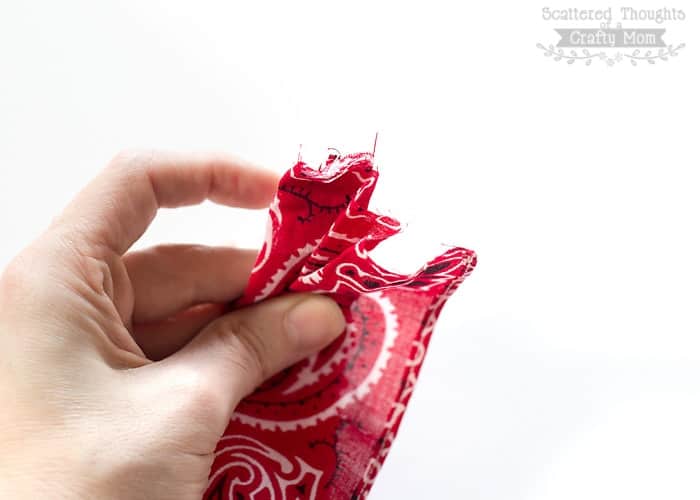
I made my missy an elastic headband out of a red bandanna to go with her red white and blue outfit for school. (They celebrated July 4th on June 4th this year.) She tried it on and loved it so much, she begged for a few more.
What she loved about this elastic headband style is that it can be scrunched up and worn skinny or spread it out and cover the whole front section of her hair. (Personally, I prefer the skinny look, but whatever, I’ll choose my battles, lol.)

These little elastic headbands are really easy to make and by the time I got to headband #5, I was whipping through the sewing and construction in a very short amount of time.
By the last headband, it was taking me just as long to hem the edges of the large piece than it was to assemble the rest of the headband!

These easy elastic headbands are cute made with a woven cotton, but I really love them in a thinner fabric. (Like a chiffon.)

Ready to make a few headbands for yourself? Read on!
How to make an Elastic Headband
All you need is a bit of fabric, elastic and a few minutes at the sewing machine!
Materials needed:
- Fabric scraps
- 3/4 inch elastic
- basic sewing supplies
Sewing Instructions:
Step 1: Cut fabric and elastic:
- Fabric piece 1: 16 inches by 6 1/4 inches
- Fabric piece 2: 10 1/2 inches by 2 3/4 inches
- Elastic: 6 inches
Step 2: Hem the Headband Edges.
Hem the edges of the long piece of fabric with a very narrow hem. I used my narrow hem foot on the chiffon, but I ironed the cotton 1/8 inch, pressed and folded another 1/8 inch. (Don’t worry if you don’t have a narrow hem foot. I made these infinity scarves without one, you can click over to that post to see how I did it.)

Step 3: Create Tube that Covers the Elastic
Fold the smaller piece of fabric in half, right sides together and sew along the edge using a scant 3/8 inch seam allowance. (Trim excess seam allowance.)

Flip the tube right side out. I used this little tube turner to help flip the fabric. I haven’t tried it, but others swear by this one.

Step 4: Add Elastic.
Use a safety pin and thread the elastic through the fabric tube. Secure each end with a pin.

Sew a quick basting stitch to hold the elastic in place. (After you have done a couple you can probably skip this step.)

Layout the larger piece of fabric, right side up. Line up the raw edges of the elastic piece and larger piece as shown below.

Fold the edge of the larger fabric piece over as shown below and pin in place.

Pleat the extra fabric on the backside so you are left with just enough on the other end to meet the ends in the middle. (See next photo for a picture of what I mean.)

Wrap the other end of the fabric around the elastic piece and pin in place.

Sew along the edge using a 3/8 inch seam allowance. Trim excess fabric.

Flip the main fabric piece around and repeat the steps to attach the elastic.

Voilà, a cute headband, perfect for summer!

If you make one of these, be sure to come back and share your finished version on my facebook page or tag me on Instagram!

Pin here to save this project ==>> ![]()
Don't miss any more posts!

Follow along on:
Feedly, Bloglovin', your favorite feed reader, or signing up via email and have new posts delivered to your email box each week!Easy Elastic Headband Tutorial
Materials
- Fabric scraps
- 3/4 inch elastic
- basic sewing supplies
Instructions
Step 1: Cut fabric and elastic:
- Fabric piece 1: 16 inches by 6 1/4 inches
- Fabric piece 2: 10 1/2 inches by 2 3/4 inches
- Elastic: 6 inches
Step 2: Hem the Headband Edges.
Hem the edges of the long piece of fabric (fabric piece 1) with a very narrow hem.
(I used my narrow hem foot on the chiffon, but I ironed the cotton 1/8 inch, pressed and folded another 1/8 inch. Don't worry if you don't have a narrow hem foot. I made these infinity scarves without one, you can click over to that post to see how I did it.)
Step 3: Create Tube that Covers the Elastic
Fold the smaller piece of fabric in half, (fabric piece 2) right sides together and sew along the edge using a scant 3/8 inch seam allowance.
Trim excess seam allowance.
Flip the tube right side out.
Step 4: Add Elastic.
Use a safety pin and thread the elastic through the fabric tube. Secure each end with a pin.
Sew a quick basting stitch to hold the elastic in place. (After you have done a couple you can probably skip this step.)
Step 5: Attach Main Headband Piece to Elastic
Layout the larger piece of fabric, right side up. Line up the raw edges of the elastic piece and larger piece.
Fold the edge of the larger fabric piece over and pin in place.
Pleat the extra fabric on the backside so you are left with just enough on the other end to meet the ends in the middle.
Wrap the other end of the fabric around the elastic piece and pin in place.
Sew along the edge using a 3/8 inch seam allowance. Trim excess fabric.
Flip the main fabric piece around and repeat the steps to attach the elastic.
(you may need to refer to the photos in the tutorial above to have a belter understanding of this process.)

How would I adjust the measurements for making an adult head band?
This headband fits me and I have an average size head. Make one, try it on and see if you think it needs adjustments, you can increase the elastic size if needed.
Any hints on sizing to make for an adult sized head? These would be perfect on summer days! Why do the kids get all the good stuff?
These are beautiful and so sew easy!
great way to use up scraps of fabric!!! now every skirt i make will have a matching headband.
I cut the big piece on the bias (plaid fabric) for a different look as well as more stretch.
thank you for the tutorial. My great, granddaughter and I help in a program geared toward the homeless and we will use your method for demonstration and to give away. I love recycling projects and this fits right in. Am also sharing on my facebook page
Darn, that is a typo, I’ll have to take a closer look and figure out what the measurements were supposed to be.
So beautiful. Thanks for sharing.
I just whipped up two of these! I never like how headbands fit or look on me, but these are great! Thanks for the tutorial.
I was just able to whip up a patriotic one. I'm ready now for my night shift at the hospital tonight! One pointer is when you sew the opposite side together, 'accordion' it so that it matches your first side. It will help lay flatter when wearing it smaller. Great quick and easy project! Thanks!
Good tip, thanks!
I was just able to whip up a patriotic one. Now I'm ready for my night shift at the hospital! Thanks!
I just made my first one – can't wait to see if it fits my daughter so I can make her ones to match her new skirts!
Those look so cute and SO easy to make!
Such a fun idea and a great way to use up some scraps of material! Thanks for sharing your great idea!
I'm getting tired of seeing my daughter's hair in a ponytail. I am going to see if she wants to make one of these!
Thank you for this tutorial!