Free Flutter Sleeve Sewing Pattern (t-shirt 3 – 10)
Disclosure: This post may contain affiliate links. As an Amazon Associate, I earn from qualifying purchases.

Warm weather is here – it’s time to start sewing lightweight T-shirts! This free flutter sleeve sewing pattern is available in girls’ sizes 3 to 10 and is perfect for the warm days ahead.

💌 Save this article
Flutter Sleeve T-shirt Pattern for Girls
It’s taken a bit of time, but I’ve just finished creating a flutter sleeve for my free t-shirt pattern.
It took several pattern drafts to get the sleeve’s “flutter” to be fluttery enough without having to add any gathering. Gathering is not wrong, of course—it just would have made binding the neckline a bit more difficult. (And if you’re anything like me, you just don’t have time for that!)

What Fabric is Best for a Flutter Sleeve Tee?
After sewing several versions, I’ve noticed the fabric thicknesses, weight, and fiber content will affect the way the flutter sleeve falls.
My very favorite fabrics to use are lightweight rayon blend knits. Though sometimes, these rayon blend fabrics might not have a lot of stretch- like this purple top. (This is something to keep in mind when using the same fabric for binding a neckline that needs to stretch over the head, lol.)
This top can also be made with heavier fabrics, and the flutter will still look pretty, especially if you cut the sleeve pattern out on the bias.

I intended to add this additional sleeve version to the original t-shirt pattern, but since I recommend cutting the sleeve fabric on the bias, I decided to release this flutter sleeve tee as its own pattern.
The actual sleeve pattern is a full sleeve (instead of a half-sleeve pattern cut on the fold), which makes it easier to line up on the bias. However, if you are running short on fabric (like I so often am), keep in mind that the sleeve is still cute cut out on the crosswise grain and that you can save quite a bit of fabric that way. (The sleeve on this purple top is not cut on the bias. The flowy nature of the fabric helps the sleeve flutter like it was.)
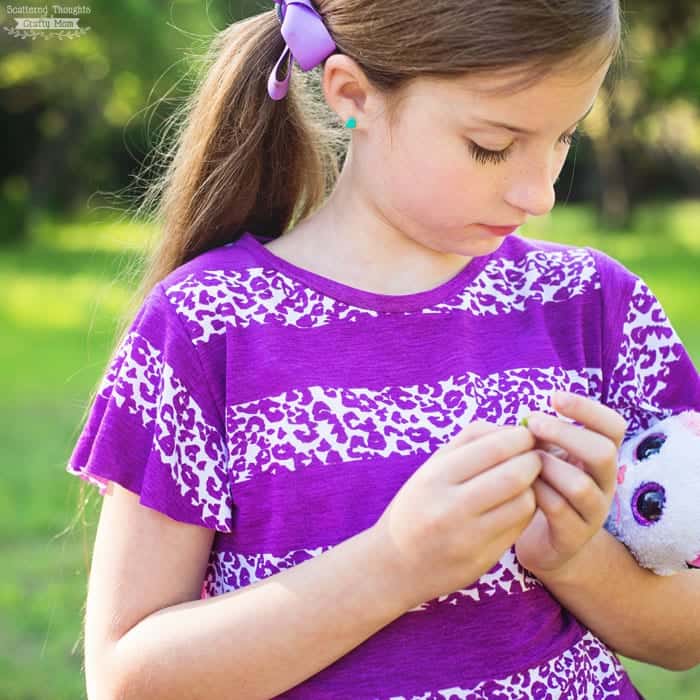
This purple fabric was so soft and flowy that I didn’t cut the sleeve on the bias, and it still looked great. This top was one of my test versions, so I didn’t bother hemming it. ( I was in too much of a rush to try it on and take some photos.)
I’m also embarrassed to say that I upgraded my coverstitch machine in early December but did not get it out of the box until after I made this top. I’ve now used it several times, and that machine sews like a dream! (You can see the cover stitch hem on the top two tops in the 2nd photo.)
The machine I had before was the Brother coverstitch– which was so finicky that it would take me an hour just to set it up and sew properly on my fabric- talk about frustrating. So if you are thinking about a coverstitch machine- I highly recommend this one!

A perfect top for summer!

Pin this project for later.
Ready to sew a flutter sleeve T-shirt with this free pattern?
Keep reading for all the pattern info and instructions…
Free Flutter Sleeve Sewing Pattern, sz 3 to 10
Pattern info:
- Where do I get the pattern? Look under the materials needed for the pattern link.
- Click the link and navigate to the pattern page in my shop. (Don’t worry – it’s free.) Enter your name and email to access the pattern. (It takes about 15 seconds for the system to process.) Save the pattern to your PC and open the PDF document in Adobe Acrobat. Don’t print from Google’s online version of Adobe. (It will sometimes cause the pattern to print too small.)
- Check out my frequently asked questions page regarding my pdf patterns here: https://www.scatteredthoughtsofacraftymom.com/frequently-asked-questions/ (If having issues, please read before contacting me.)
- The seam allowance is 3/8 inch with a 1/2 inch bottom and sleeve hem.
Binding tips:
- The pattern for the neck binding is designed for a ribbed knit with 50 to 75% stretch with good recovery (Fabric Fairy has a lot of good quality ribbed knit choices.) If using a binding fabric with less stretch, you have two choices: 1. Measure the neckline and cut a fabric strip 15% less than the measurement (multiply the neck measurement by .85) and follow the instructions in step 4. (This is the “in the round” method– and it never hurts to do the finger stretch test before sewing…) 2nd choice: The “flat” method– Sew only one shoulder closed, fold binding in half and attach the binding from one end of the neckline to the other. Trim excess binding and sew the other shoulder closed. (The only downside to this method is the seam will be on the side and slightly bulkier.) (Similar to what is done in this tutorial.)
Tips for sewing with knits:
- Use a ballpoint/stretch needle
- Sew seams with either a serger, stretch stitch, narrow zig-zag, or a straight stitch with a longer stitch length and a slightly loosened tension. (Make a couple of practice stitches on your fabric to see what works best.) I also like to use this “lightning bolt” stretch stitch on seams that need strength but a little give. (For my project, I used a combination of straight stitch and serger for seams and zig zag on the hems.)
- Use spray starch when pressing hems. Sew hems with a zig-zag, twin ball point needle, a narrow zig zag with a long stitch length, or a straight stitch with a long stitch length and a slightly loosened tension, or leave raw. (also helps to use a walking foot.)
- If you find your fabric keeps getting pulled inside the needle plate, place a small piece of tissue underneath the fabric so the feed dogs have something to grip.
Fit info:
- Size 3: Height- 38.5 inches, Weight- 32 lbs, Finished length: 16 Finished chest: 23.125 inches
- Size 4: Height- 41.5 inches, Weight- 36 lbs, Finished length: 16.85. Finished chest: 23.75
- Size 5: Height- 44.5 inches, Weight- 42 lbs, Finished length: 17.75. Finished chest: 24.375
- Size 6: Height- 46.5 inches, Weight- 48 lbs, Finished length: 18.25. Finished chest: 25.75
- Size 7: Height- 51 inches, Weight- 60 lbs, Finished length: 19. Finished chest: 27.25
- Size 8: Height- 53 inches, Weight- 66 lbs, Finished length: 19.75. Finished chest: 28.5
- Size 10: Height- 55 inches, Weight- 74 lbs, Finished length: 20.75. Finished chest: 29.5
Products used and recommended in this post:
- My favorite fabric shop for knits: Funkalicious Fabrics, Fabric.com and Girl Charlee.
- My Sewing Machine: SINGER 9960 Quantum Stylist, my coverstitch: Janome Cover Pro 1000cpx
- My Serger: Brother 1034D 3 or 4 Thread Serger or you can just use Pinking Shears
- Rotary Cutter
- I love my large ruler and large cutting mat, but you may prefer to start of with a smaller Cutting set
- Dritz Dual Purpose Marking Pen and Fray Check
- Ball Point needles
- Singer walking foot or universal walking foot
- Wonder clips (I didn’t use these in the post, but they are just awesome!
Materials needed
- Pattern
- Up to 1-yard stretch knit fabric
- Ribbed binding (usually has 50 to 70% stretch) or other stretchy knit for the neckline (you don’t want to use anything with less than 30% stretch-see notes under pattern tips and tricks)
- Ballpoint/jersey needle
- spray starch/iron
- basic sewing supplies
Sewing instructions for Free Flutter Sleeve T-Shirt Pattern
Step 1: Print and Assemble pattern, cut out pattern pieces.
Navigate to the pattern page in my shop, add the pattern to your cart and check out. (Pattern is free)
Save the pattern to your desktop and open it in the free Adobe Reader. Set the printer to print the pattern at the actual size.
This pattern has been created using layers so that you can print only the size needed. Look for the layer button on the sidebar and click the eyeball to toggle on/off the sizes you wish to print. Make sure to leave the pattern marking layer turned on.
Cut out each block around the outer gray edge. Align the gray boxes edge to edge (don’t overlap), matching up the colored circles. Tape the pattern together and cut out the size needed.

Step 2: Cut pattern pieces from fabric.
Fold the fabric so the stretch runs side to side, and the selvages meet in the middle. Line the bodice up on folds and sleeves as shown. (The Image below shows a size ten on 56-inch-wide fabric.)

Cut out a front and back bodice, two sleeves, and neck binding.

If you are using ribbed binding or fabric with 50% stretch, cut out the neck binding from the pattern. If you are using a fabric with less stretch, you’ll want to measure the neckline and cut a strip that is about 15 % shorter than the neckline.
Step 3: Assemble shirt.
With the right sides together, line up the front and back bodice. Sew together at the shoulders, using a 3/8-inch seam allowance. (Don’t forget—if you decide to use the “flat method” (see binding tips above), only sew one shoulder closed.)

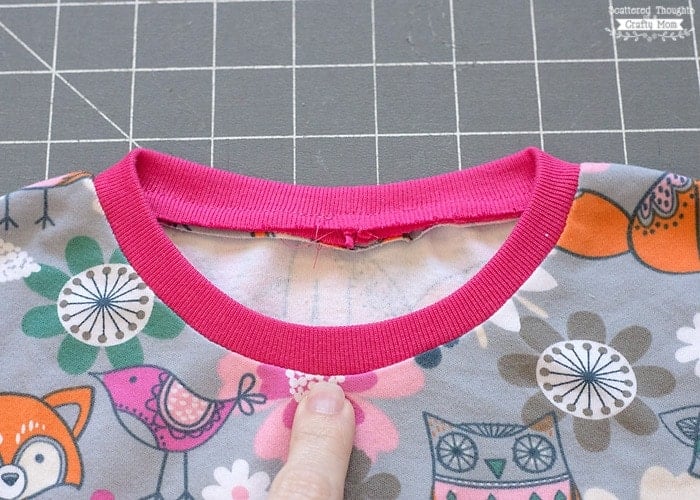
Step 4: Attaching neck binding.
Fold binding in half (as shown) press.

(“In the round” method) Unfold binding, sew with a 3/8-inch seam allowance, and trim excess seam.

Refold binding and divide into four equal sections. Mark the t-shirt neckline into four equal sections.
(Please note: I adjusted the depth of the back neckline, so your side pins may be closer to the shoulder seams.)

Line up the quarter marks as shown:

Attach the binding to the neckline with a 3/8-inch seam allowance. Stretch the binding fabric as you sew, taking care not to let the neckline fabric stretch. (Go slow, and know this may take practice.)

For a more finished look, you can topstitch along the edge of the neckline.
Step 5: Attaching sleeves.
Fold the edge of the sleeve over 1/2 inch and sew with a zig-zag or other stretch stitch. (Using spray starch will help stabilize the hem for easier sewing/hemming.)
Repeat for the other sleeve.

Right sides together, line up the top of the sleeve with the shoulder seam. Sew using a 3/8 inch seam allowance.
Repeat with the other sleeve.

Step 6: Side seams and hem.
Sew along the sleeve and down the side of the shirt. Repeat on the other side.

Hem the bottom of the tee by folding up 1/2 inch and sewing with a zig-zag or other stretch stitch.
That’s it, you’re done- now go take some pictures!
You might also like:


Don't miss any more posts!


.%20Perfect%20sewing%20project%20for%20summer!)
Is a cover stitch machine the same as a serger?
A serger is for trimming and sewing seams. A coverstitch machine is hemming and topstitching. If you look at a t-shirt. The serger sewed the seams and the coverstitch did the bottom and sleeve hems.
Please advise where I may find the corrected version of Flutter Sleeves girls pattern. Also, do you have the pattern for the blue pants in these pictures. I want to also make a pair for my granddaughter.
These pictures are gorgeous.
Thanking you in advance.
The pattern is here https://shop.scatteredthoughtsofacraftymom.com/product/free-flutter-sleeve-t-shirt-sewing-pattern-girls/
I don’t have a pattern for her pants, they were denim capris from the children’s place.
Thanks for this pattern.
My daughter is 7. Would you have a fit chart please because I’m sure which size to choose?
Thanks a lot.
Mathilde (a French fan ?)
I would like to translate this to an adult size… How do you think I would do that?
Not sure, you could google how to increase a pattern size.
Pretty!! I’ve got a Craft Gossip post scheduled for this evening that features your flutter sleeve pattern: http://sewing.craftgossip.com/?p=87755 –Anne