

3 Free Halloween Foundation Paper Piecing Patterns: Pumpkin, Ghost & Candy Corn
Disclosure: This post may contain affiliate links. As an Amazon Associate, I earn from qualifying purchases.
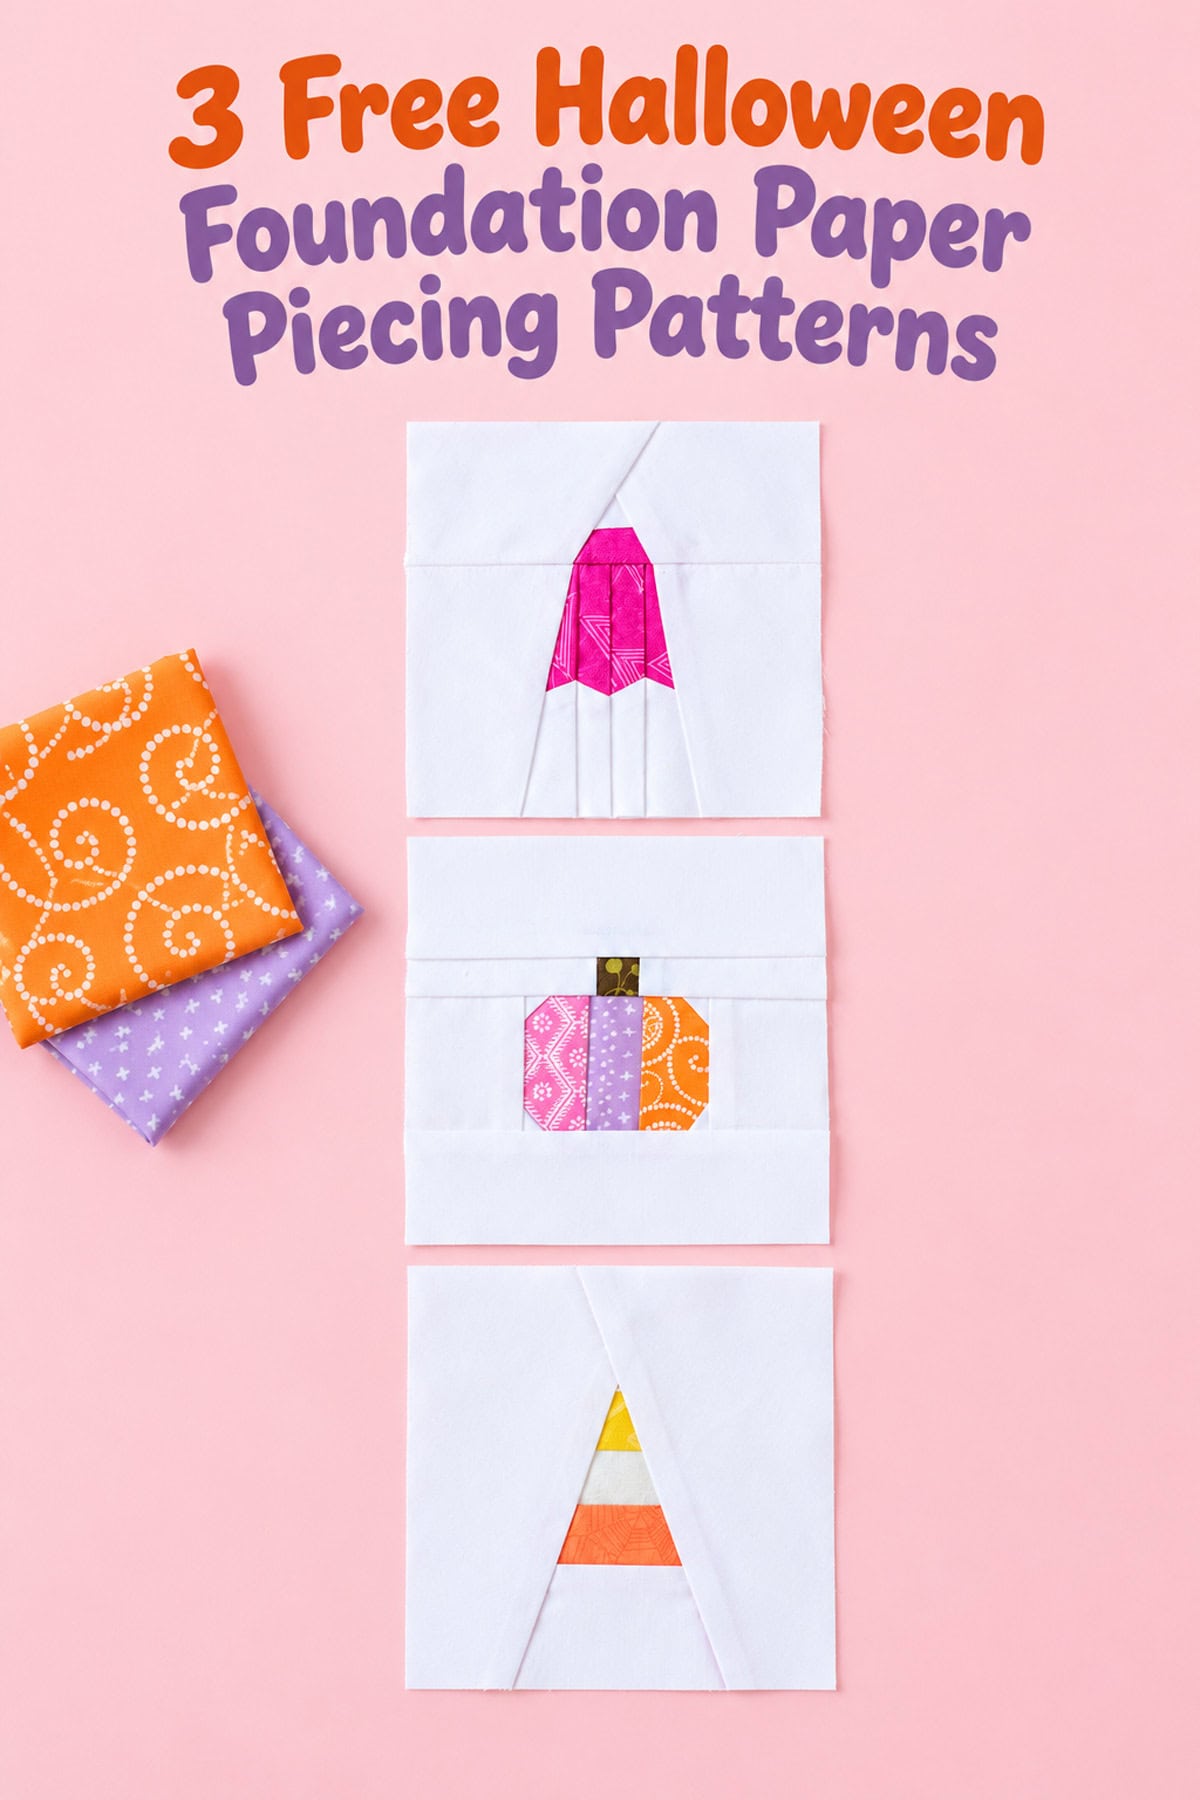
Get three free Halloween foundation paper piecing patterns featuring a mini pumpkin, ghost, and candy corn! These adorable 5-inch quilt blocks are perfect for using up fabric scraps and adding a little handmade Halloween fun to your sewing projects.
💌 Save this article
- Why Make These Mini Halloween Quilt Blocks?
- Get the Free Halloween Foundation Paper Piecing Patterns
- Understanding Your Foundation Paper Piecing Pattern
- Supplies for Foundation Paper Piecing
- How to Foundation Paper Piece the Mini Pumpkin Quilt Block
- Making the Candy Corn Foundation Paper Piecing Block
- Making the Ghost Foundation Paper Piecing Block
- Halloween Foundation Paper Piecing FAQs
- More Halloween Sewing and Quilting Projects
Free Halloween Quilt Block Patterns
These mini Halloween quilt blocks have been a labor of love, and I am so happy with how they finally turned out!
The free printable set includes a pumpkin, candy corn, and ghost. Each block measures 5 inches unfinished and 4½ inches finished, making them just the right size for mini quilts, mug rugs, zipper pouches, pillows, table runners, treat bags, or even a cute little embroidery hoop display.
I originally started designing these because I wanted some small Halloween blocks that would fit into embroidery hoops. But once I settled on the final size, I realized how many other ways I could use them.
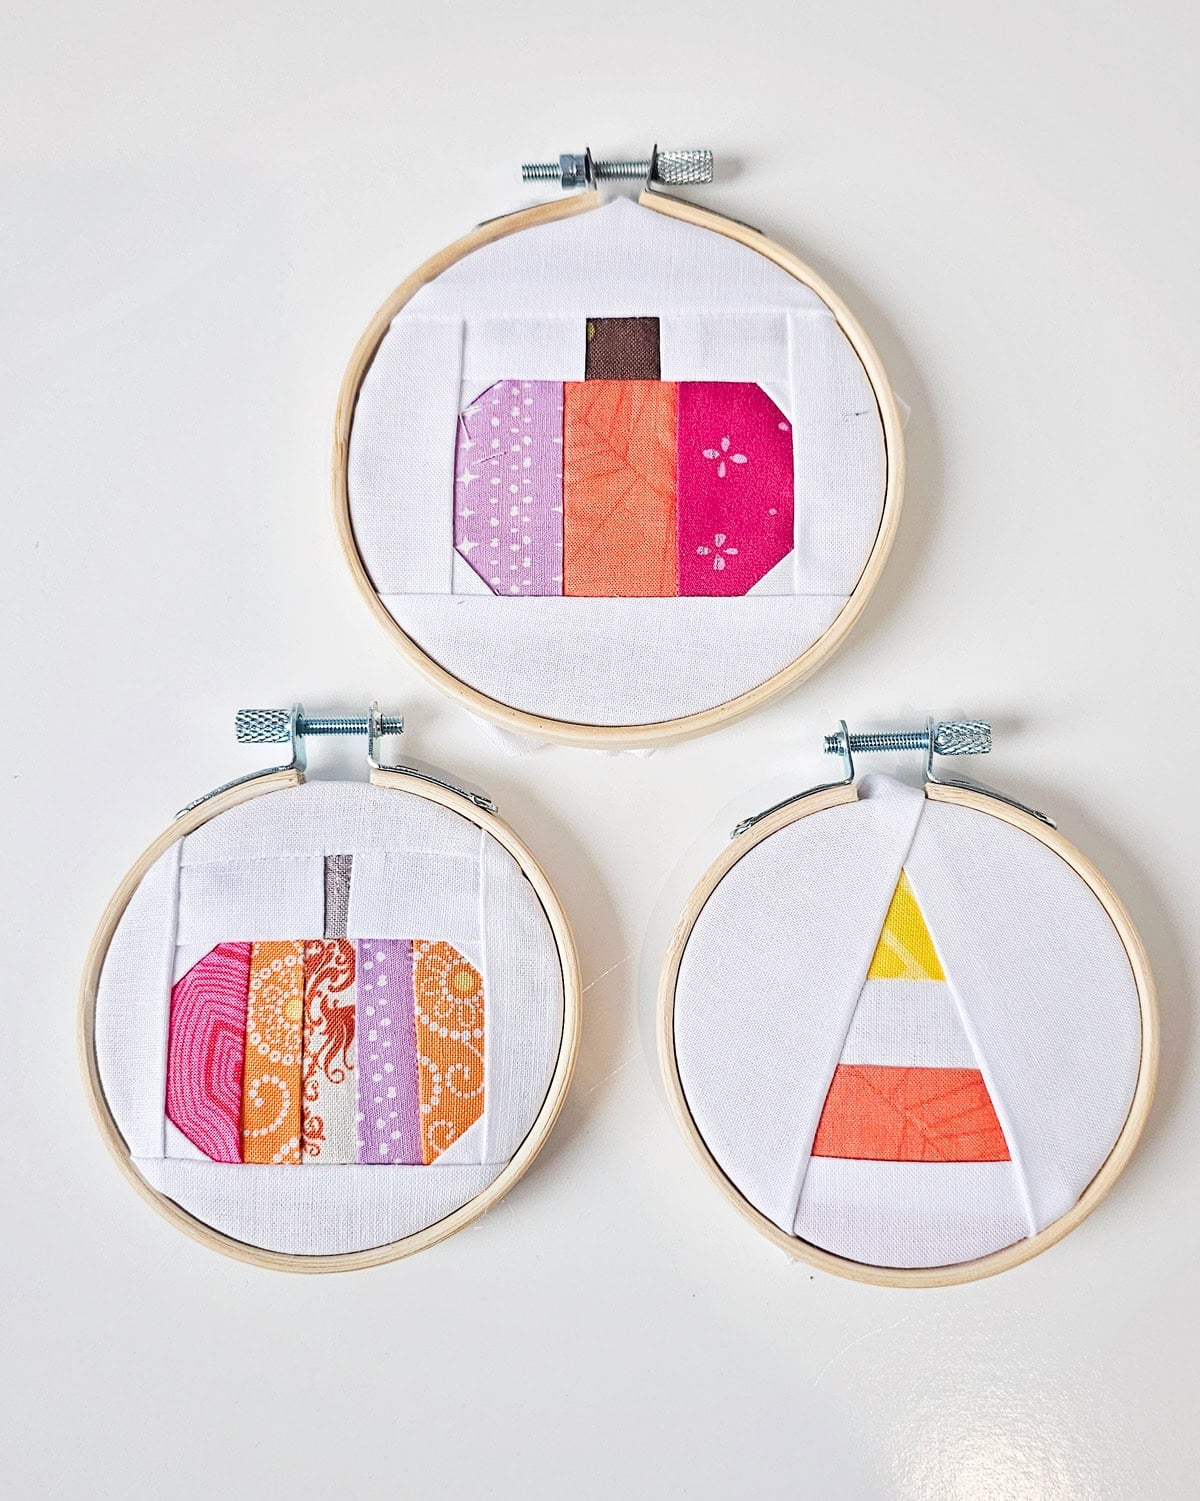
I would consider these advanced-beginner foundation paper piecing patterns. If you already understand the basic sew, flip, trim, and press process, you should be able to work your way through them. And if you’re still fairly new to FPP, I recommend starting with the pumpkin. That’s the block I’m using in the step-by-step video tutorial below.
Free Halloween Foundation Paper Piecing Patterns
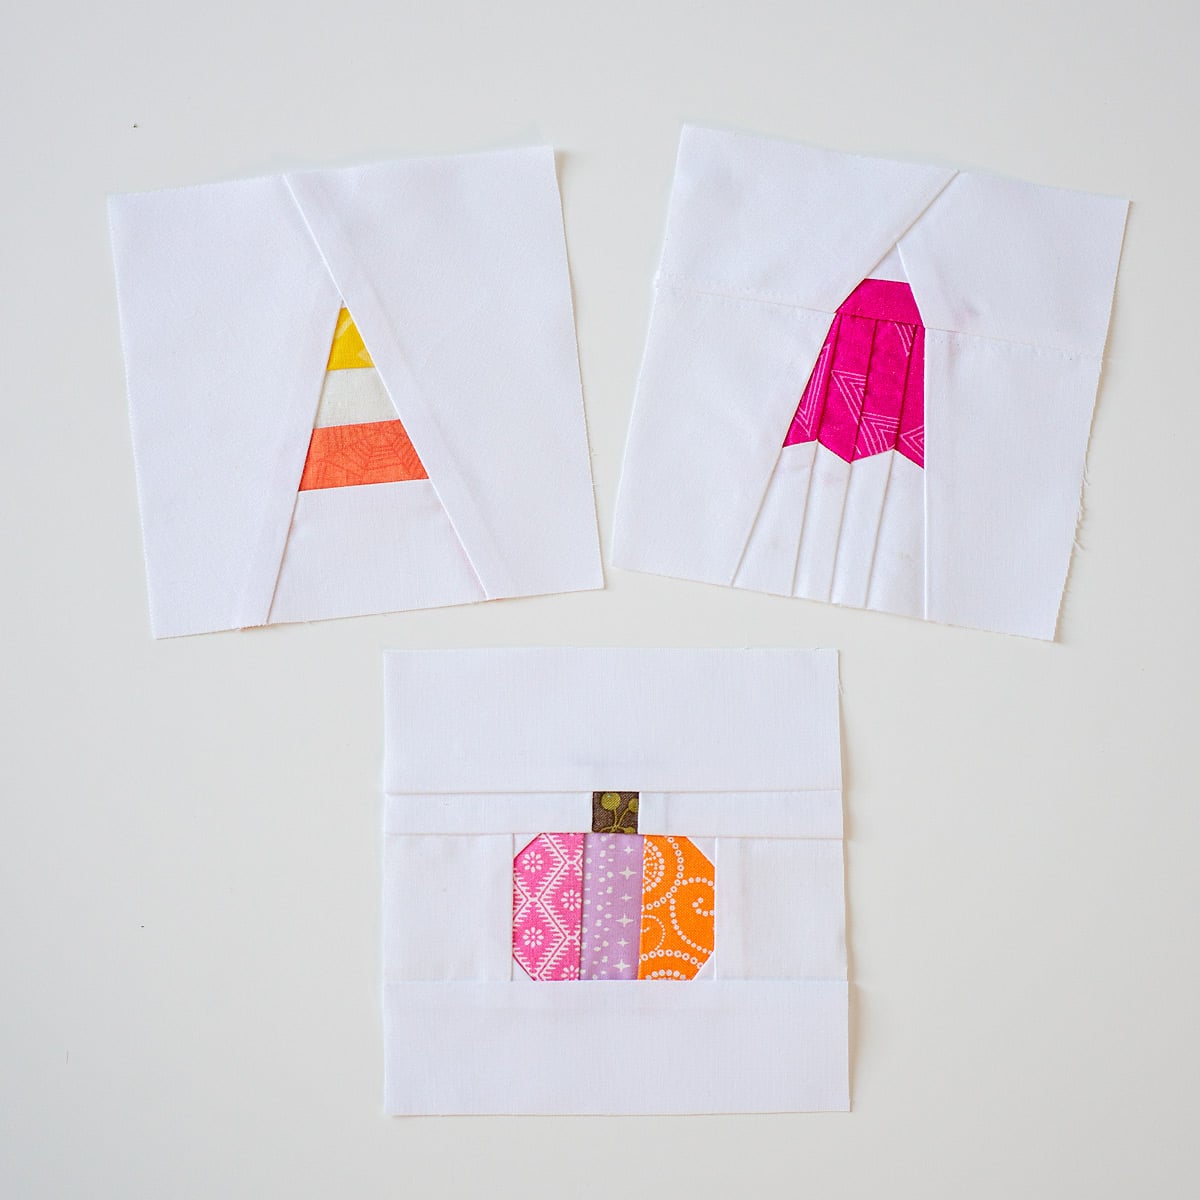
These three Halloween foundation paper piecing patterns are a fun way to use up small fabric scraps, and since they’re all the same size, you can mix and match them in all sorts of sewing projects.
I tried to simplify each design as much as possible without losing its shape. They’re a little more involved than true beginner FPP patterns, but I think they’re a fun next step once you’ve learned the basic technique.
Why Make These Mini Halloween Quilt Blocks?
-
Great for scraps. Use those little pieces of Halloween fabric you’ve been saving.
-
Three coordinating designs. The pumpkin, candy corn, and ghost can be used individually or together.
-
Lots of project possibilities. All three finish at 4½ inches, making them easy to combine in small sewing projects.
Get the Free Halloween Foundation Paper Piecing Patterns
The free printable includes all three Halloween foundation paper piecing patterns: the mini pumpkin, candy corn, and ghost.
Each completed block measures 5 inches unfinished and will finish at 4½ inches square once sewn into another project.
Print the pattern at 100% or Actual Size. Do not use Fit to Page or allow your printer to automatically resize the PDF.
Every pattern includes a 1-inch test square. Measure that square before you begin sewing. If it doesn’t measure exactly 1 inch, check your printer settings and print the page again.
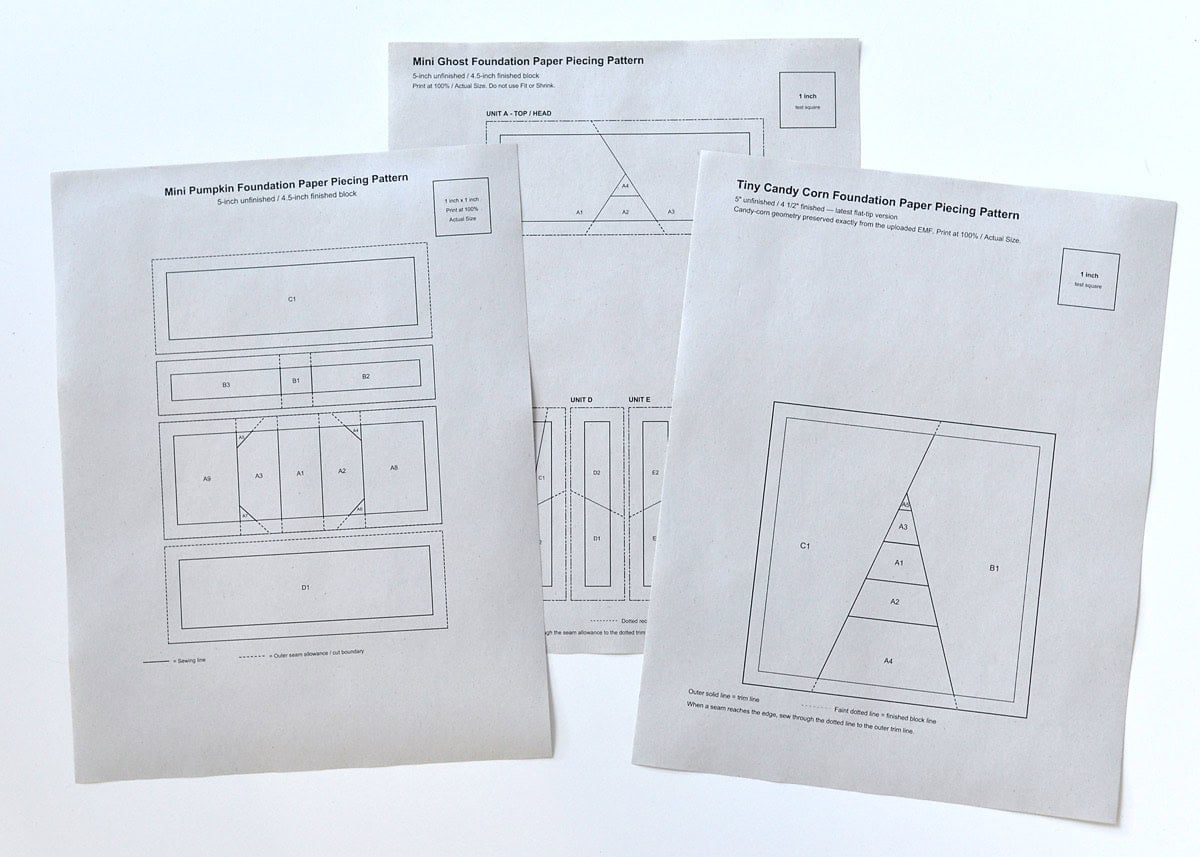
The printable includes separate foundation patterns for the pumpkin, candy corn, and ghost. Each pattern has numbered sections to guide you through the sewing process, along with a 1-inch test square to check your printer settings.
Understanding Your Foundation Paper Piecing Pattern
If you are newer to foundation paper piecing, all those solid and dotted lines can look a little confusing at first. Here’s what everything means on these particular patterns.
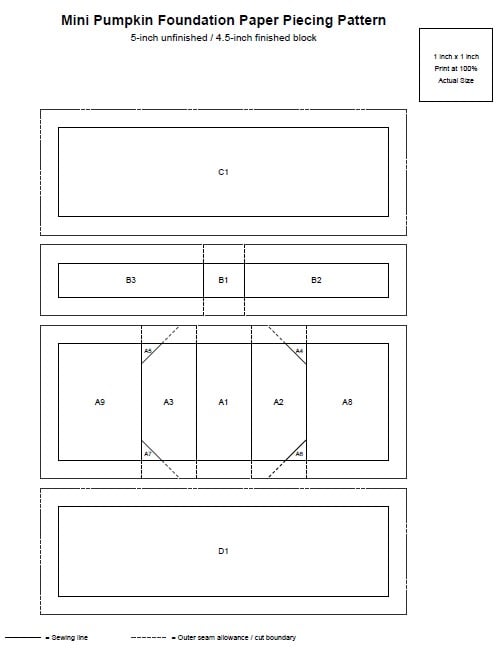
- Numbered sections: Show the order in which fabric pieces are added. Start with A1, then A2, A3, and so on. Each foundation unit has its own sewing order.
- Solid interior lines: These are the lines you’ll sew directly along.
- Solid outer rectangle: Marks the finished boundary of that individual foundation unit.
- Dotted outer line: Marks the cutting line and includes the ¼-inch seam allowance.
- Dotted sewing-line extensions: When an interior stitching line continues into the seam allowance, keep sewing along that dotted extension until you reach the outer dotted trim line.
- 1-inch test square: Confirms the printed pattern is the correct size.
Good to Know: Don’t Cut Off Your Seam Allowance!
When you’ve finished sewing an individual foundation section, always trim along the outer dotted line, not the solid finished-unit boundary.
The space between those lines is your ¼-inch seam allowance, and you’ll need it when joining the sections together.
Keep in mind that not all foundation paper piecing patterns use the same markings. This is how I’ve designed these particular patterns, so always check the instructions when working with a different FPP pattern.
Supplies for Foundation Paper Piecing
You technically can foundation paper piece with ordinary printer paper and the sewing supplies you already own.
That is exactly what I did with my first test block. It worked, but the finished block didn’t come out nearly as clean as I wanted.
Before making my next round of test blocks, I picked up a few supplies specifically for foundation paper piecing: an Add-a-Quarter ruler, foundation paper piecing paper, fresh quilting needles, and fine 50 wt cotton thread.
I really thought these made a difference, especially when working with such tiny pieces.
What You’ll Need
- Free printable Halloween FPP pattern
- Quilting cotton scraps in your favorite Halloween colors
- Background fabric
- Sewing machine
- Rotary cutter and cutting mat
- Iron
- Straight pins
- Basic sewing supplies
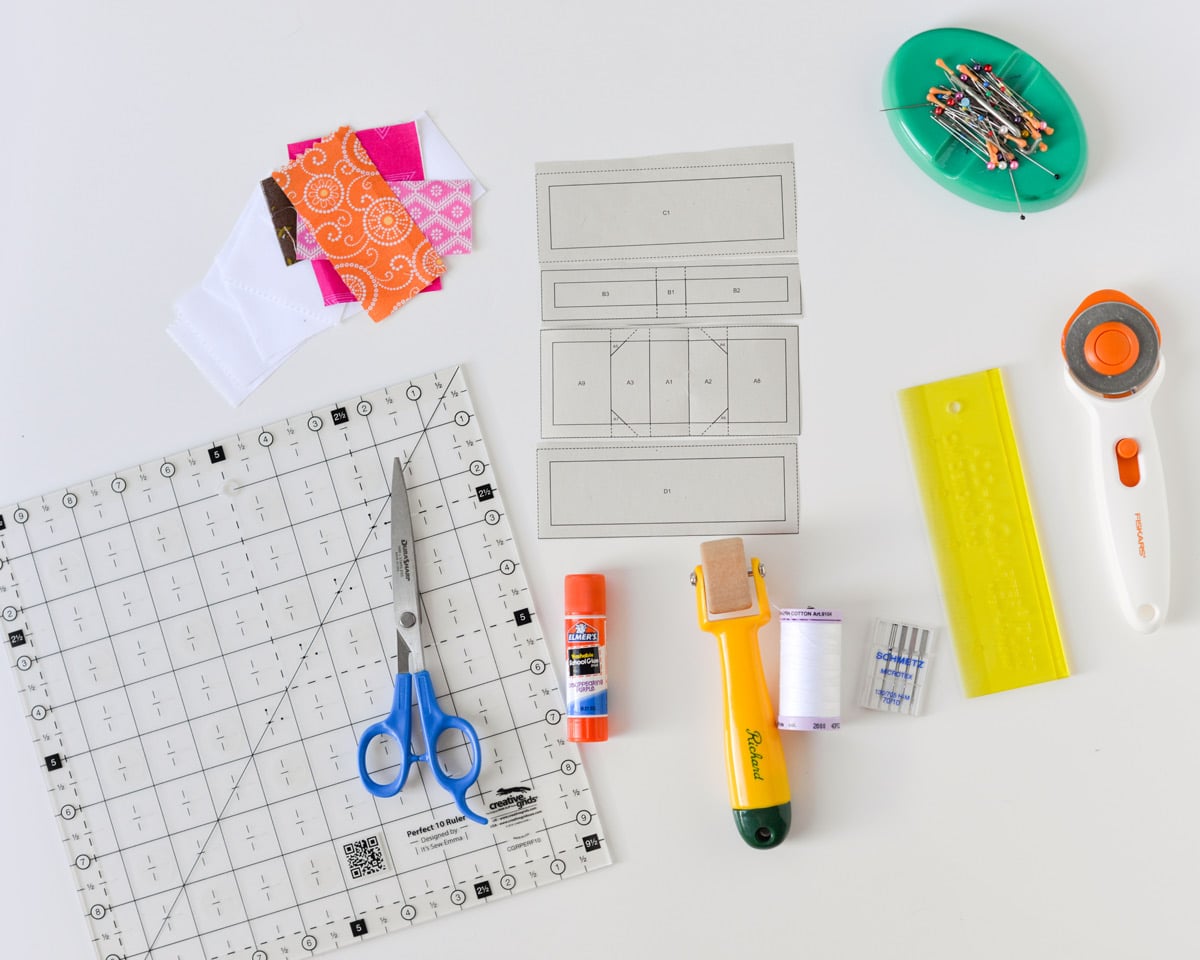
Optional Supplies I Recommend
- Foundation paper piecing paper: Regular printer paper works, but I found that specialty foundation paper folded more cleanly and was much easier to remove after sewing.
- Add-a-Quarter ruler: A regular quilting ruler works, but the specialty ruler makes it easier to trim an accurate ¼-inch seam allowance.
- SCHMETZ Microtex Sharp Sewing Machine Needles, Size 70/10: I recommend these specialty sharp needles for foundation paper piecing. Their fine, sharp point works especially well for accurate stitching through the fabric and paper, particularly on these tiny blocks.
- Fine 50 wt cotton thread: Regular sewing thread can work, but I preferred the finer cotton thread for these tiny seams.
You don’t need to buy all these extras to make the blocks. But if you’re planning to do more foundation paper piecing, I think they’re worth considering.
Good to Know: My Preferred FPP Stitch Length
I experimented with several stitch lengths while testing these patterns, and 1.5 mm worked best for me.
The very short stitches often recommended for FPP perforate the paper beautifully, but they are miserable to remove if you make a mistake. And trust me, while I was developing these little blocks, I removed plenty of stitches.
A 1.5 mm stitch was still short enough to hold the tiny seams securely and make the paper easy to remove, but I could actually get my seam ripper into the stitches when necessary.
How Large Should You Cut Your FPP Fabric Scraps?
This is probably one of the most important tips I can give you for these little blocks.
For each numbered section, choose a scrap that is at least ¼ inch larger on every side than the entire area it needs to cover.
And that includes any outside seam allowance the fabric needs to reach.
I am not talking about cutting the fabric just ¼ inch larger than the little numbered shape.
Look at the entire area the fabric will need to cover once it is flipped into position, including any outer seam allowance. Then give yourself at least another ¼ inch of wiggle room beyond that area.
For angled pieces, I usually give myself even more extra fabric.
A slightly oversized scrap is much easier to trim later than a piece that comes up ⅛ or ¼ inch too short along a corner or edge after you’ve already sewn it.
I can’t tell you how many times I thought I had plenty of fabric, only to flip it open and discover that one little corner didn’t quite reach!
How to Foundation Paper Piece the Mini Pumpkin Quilt Block
I’m demonstrating the pumpkin because I think it’s the easiest of the three patterns to start with. The candy corn and ghost use the same basic technique, so you won’t need to learn everything all over again.

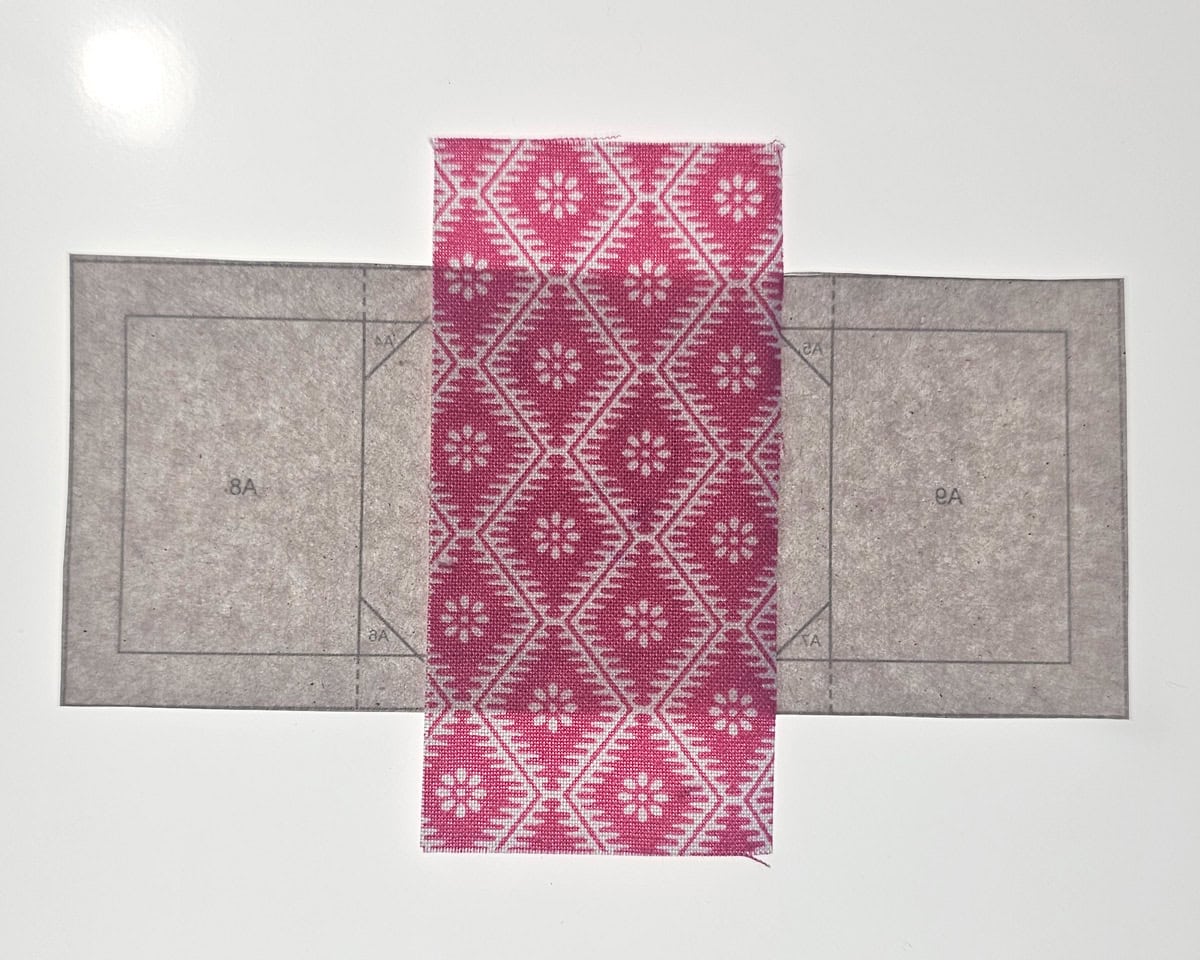
1 Prepare the Pattern and Position A1: Print the pattern at 100% or Actual Size and measure the 1-inch test square. Cut out the pumpkin body (Section A) and stem (Section B) foundations along their outer dotted lines. Leave the C1 and D1 rectangles for the final assembly.
Start with A1. Place your first fabric scrap on the unprinted side of the foundation paper, with the wrong side of the fabric against the paper.
Make sure your fabric covers the entire required area, including any outside seam allowance, plus at least another ¼ inch of extra fabric on every side.
If you’re having trouble seeing the printed lines, hold the foundation up to a window or light.
2 Position and Test-Flip the Next Fabric: Place your A2 fabric right sides together with A1, positioning it where you think it needs to go.
Before sewing, pin the new fabric and foundation together to temporarily hold everything in place.
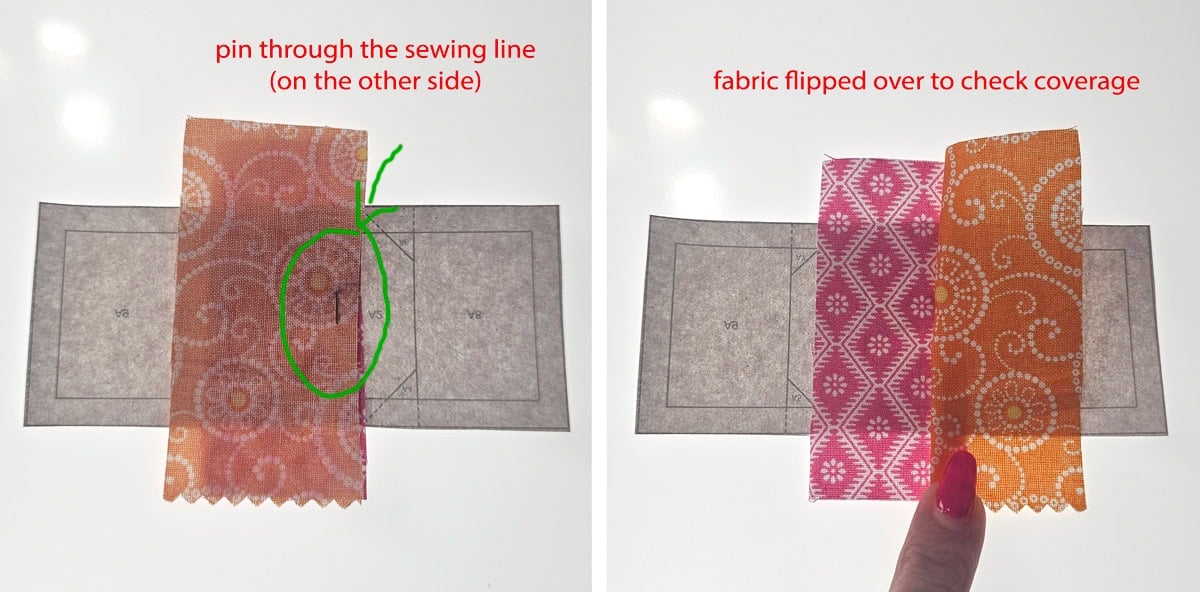
Now flip the new fabric open as though you’ve already sewn the seam. Check that it completely covers A2, including any required outside seam allowance, with extra fabric beyond that.
If it doesn’t, reposition the fabric and test it again.
I actually positioned my second piece incorrectly when filming the tutorial. Luckily, I checked before sewing and was able to correct it without ripping out any stitches!
3 Sew, Trim, and Press: Once you’re happy with the fabric placement, flip the new fabric back into position, remove the pin, and sew directly along the printed line.
If a solid sewing line continues into the seam allowance as a dotted line, keep stitching along that dotted extension until you reach the outer dotted trim line.
After sewing, fold the new fabric back out of the way. Carefully fold the paper away from the stitching line to expose the fabric seam allowance while keeping the paper out of your rotary cutter’s path.
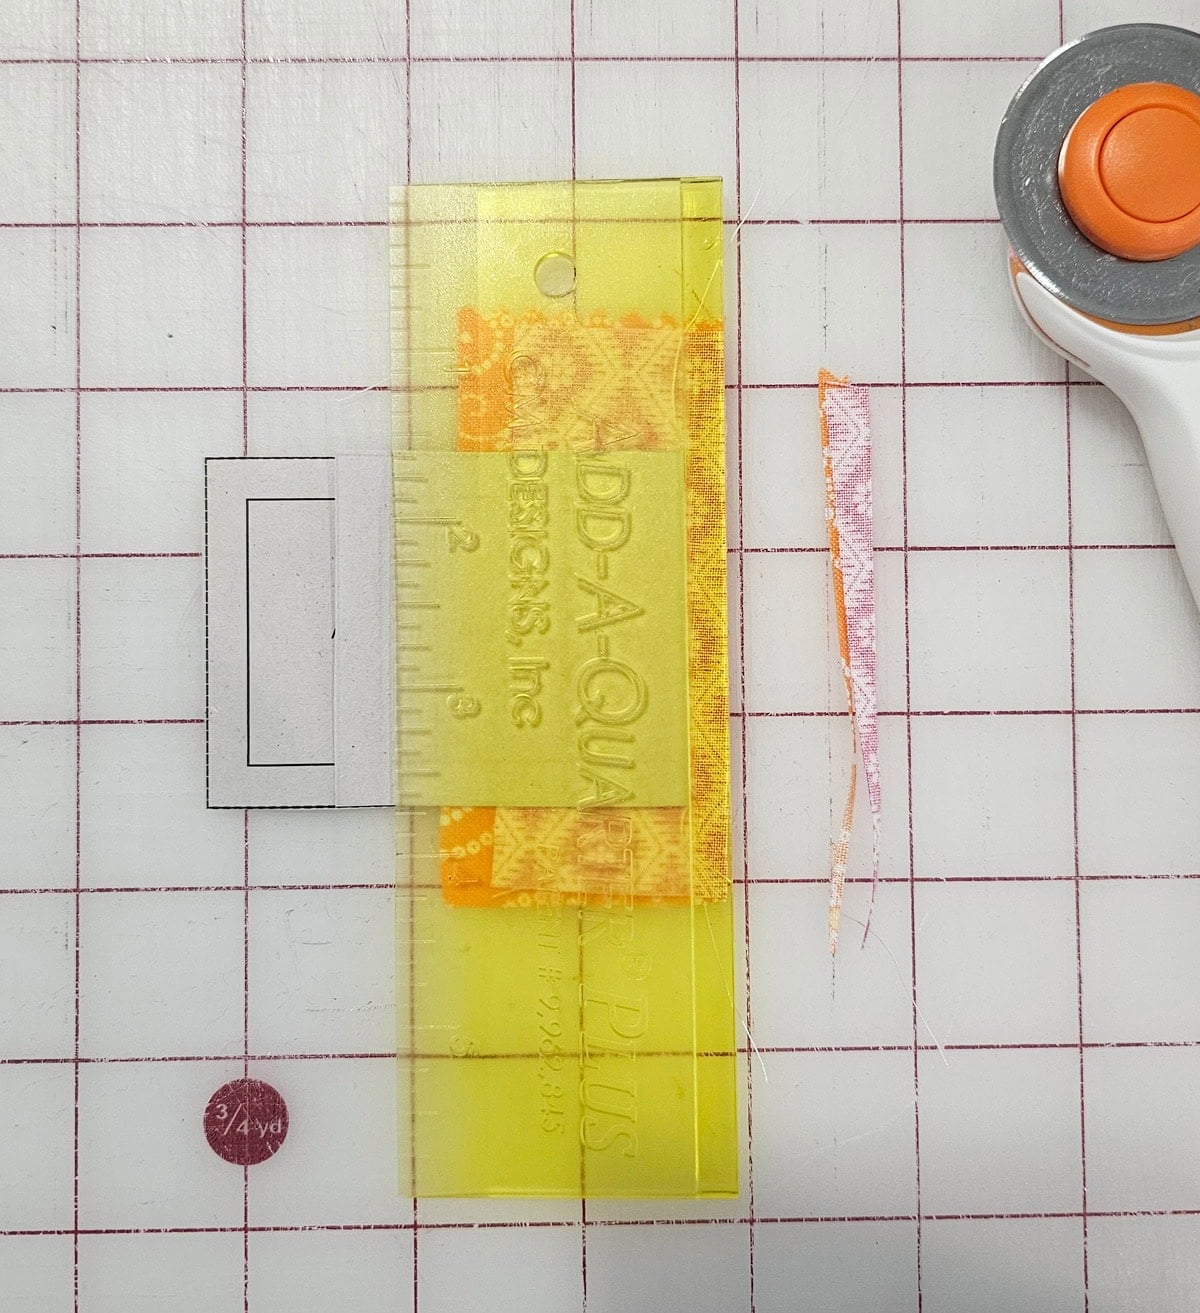
Trim the seam allowance to ¼ inch, then flip the new fabric open and press it flat.
Good to Know: Why Trim the Seam Allowance?
Trimming your seam allowance to ¼ inch removes extra bulk and keeps your seams nice and even. This makes it easier to press the fabric flat and helps prevent bulky seams as you add more pieces.
Pro Tip: Pre-Trim Before Positioning the Next Piece. You can fold the paper back along the next sewing line and trim the existing fabric to a ¼-inch seam allowance before positioning the new piece. That gives you a straight edge to line your next scrap up against, making angled pieces easier to position. This is an optional technique, not a required step in the video demonstration.
4 Finish the Pumpkin Body and Stem: Continue adding the remaining fabric pieces to Section A in numerical order, from A3 through A9.
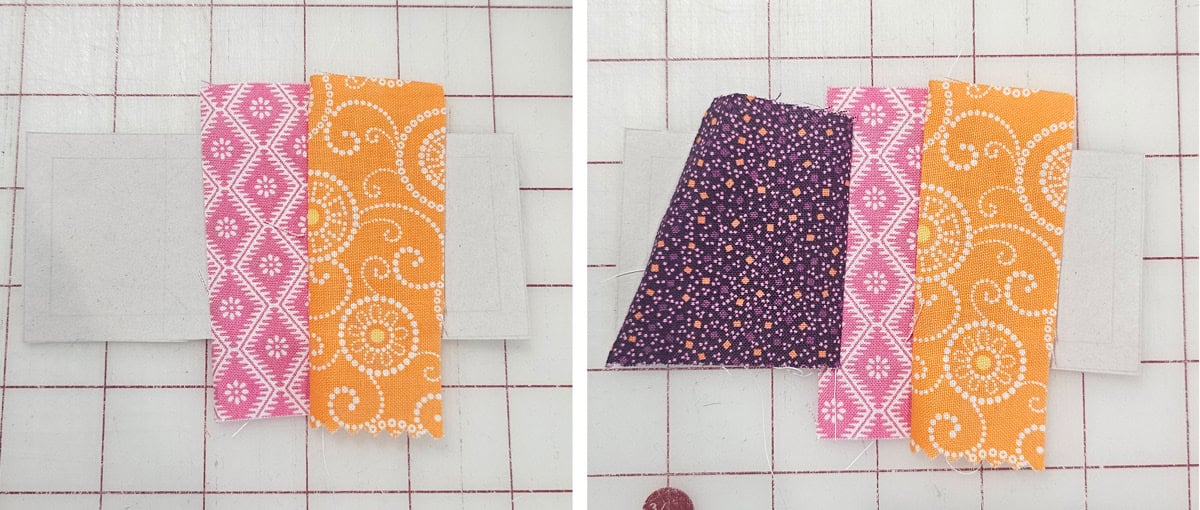
The small angled corner pieces give the pumpkin its rounded shape, so be especially careful that your background fabric extends beyond the entire area it needs to cover.
Use the same process for each piece: position, test-flip, sew, trim, and press.
Next, complete the stem foundation (Section B), starting with B1 and adding B2 and B3.
Once both units are finished, press them and trim along their outer dotted lines, keeping the ¼-inch seam allowances intact.
5 Assemble the Pumpkin Block: With right sides together, align the completed pumpkin body and stem sections and sew with a ¼-inch seam allowance. Press the joining seam.
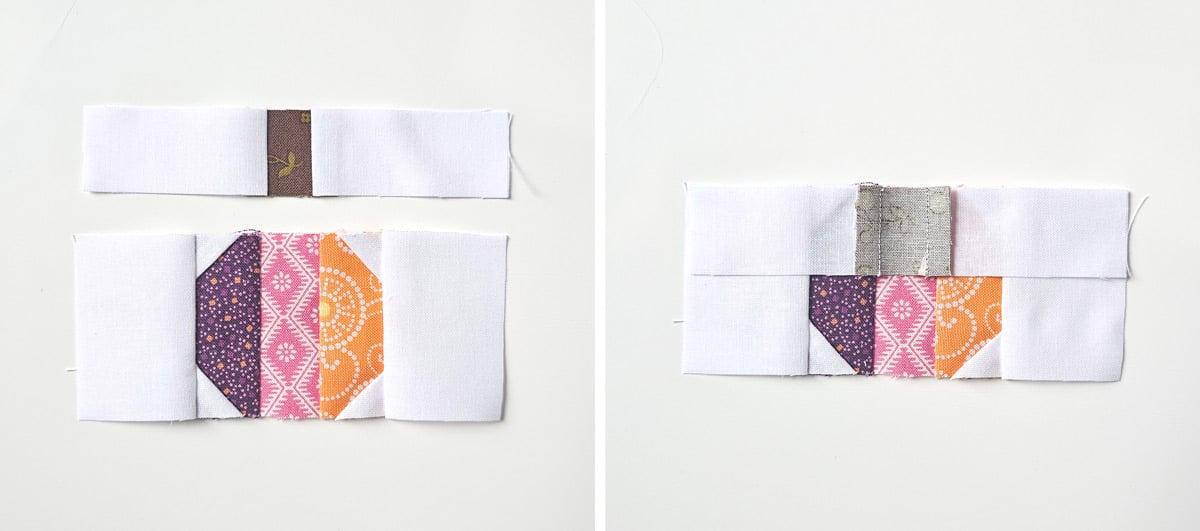
Next, add the white background rectangles, C1 and D1.
One thing I would do differently: In the video, I use oversized white fabric scraps and trim them afterward. That works, but I found the trimming unnecessarily awkward.
For an easier approach, especially if you’re newer to FPP, cut the C1 and D1 paper templates along their dotted outer lines first. Use those templates to cut matching fabric rectangles, then align the fabric right sides together with the pumpkin block and sew using a ¼-inch seam allowance.
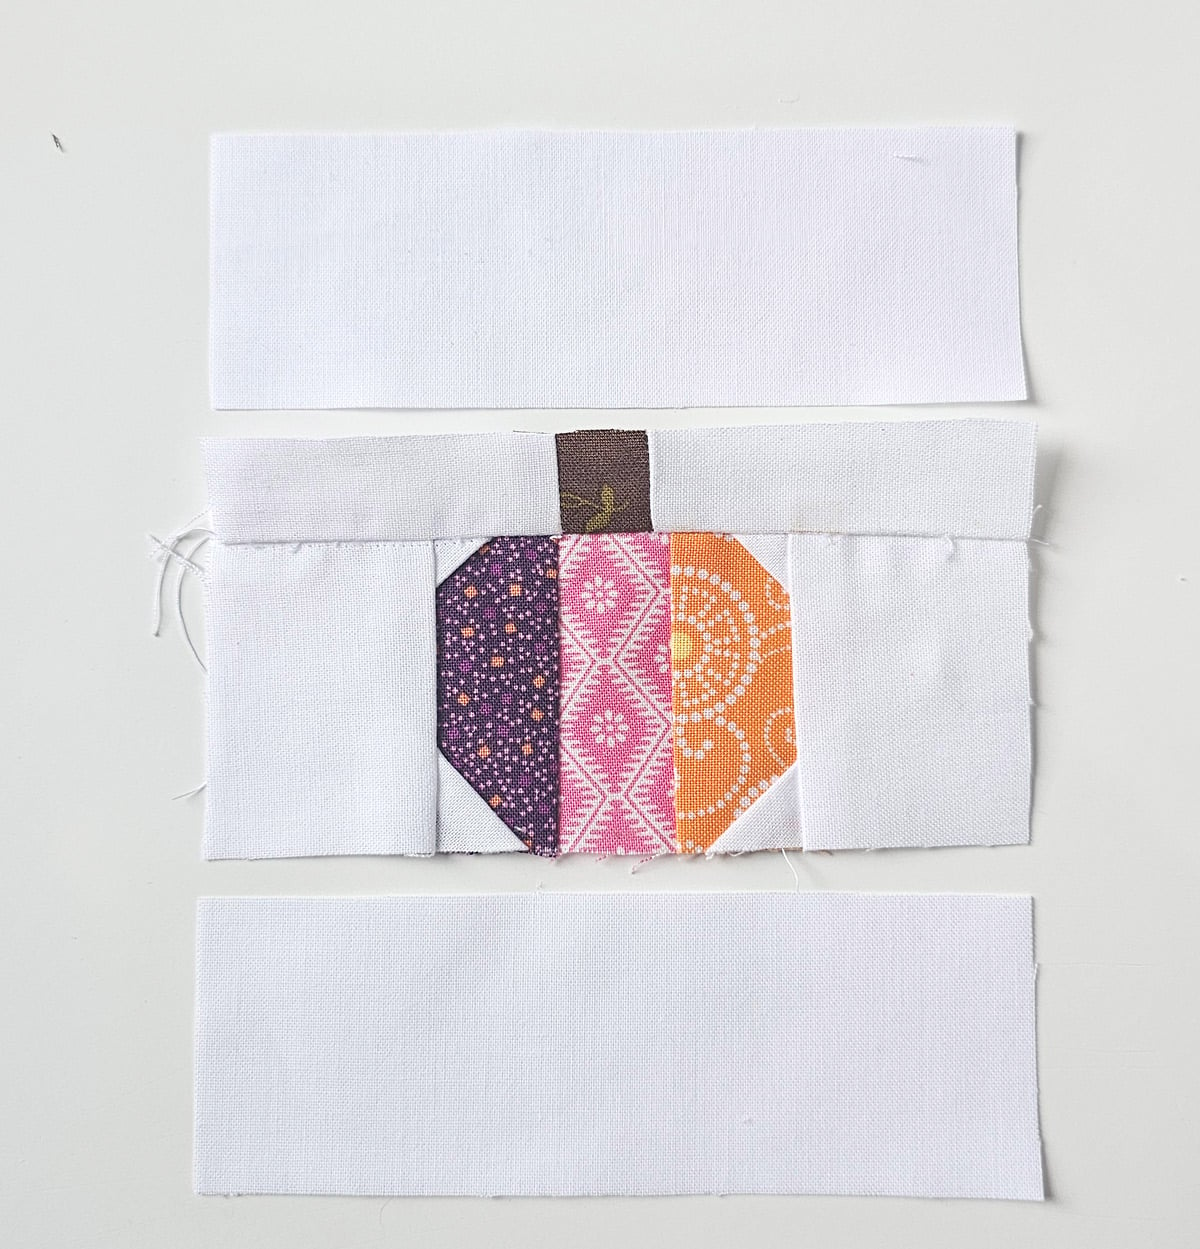
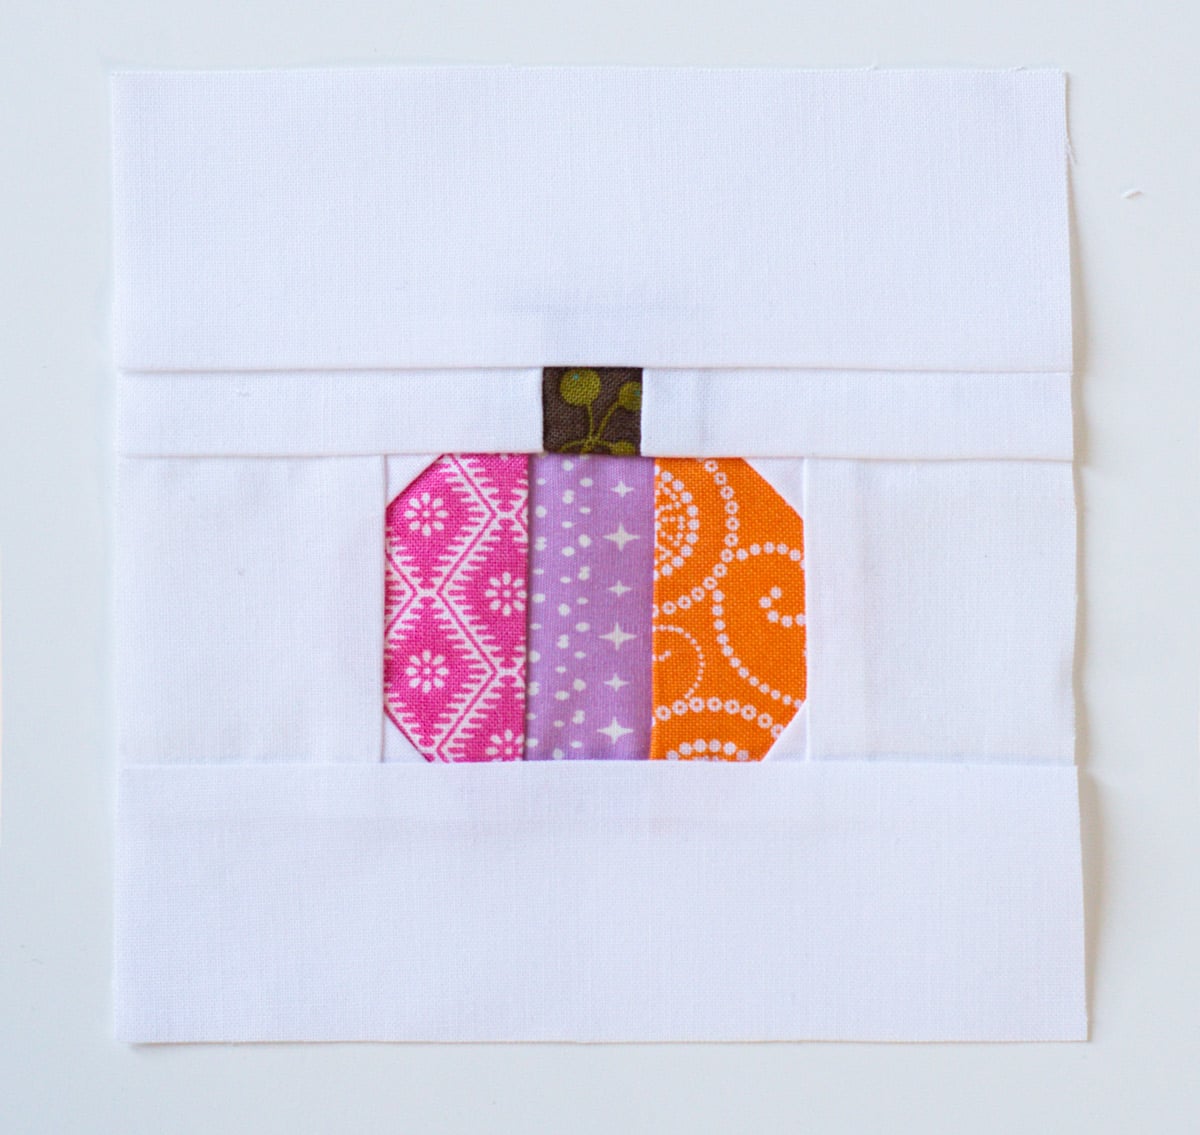
6 Finish the Block: Give the completed pumpkin a good press, then square up the edges, keeping the outside seam allowances intact.
Your block should measure 5 inches square unfinished and will finish at 4½ inches when sewn into another project.
Carefully remove the foundation paper, holding the stitches as you tear the paper away. Tweezers can help with any stubborn little pieces.
And that’s it! Your adorable mini pumpkin quilt block is finished.
A Note About Directional Background Fabric
After testing several blocks, I would definitely recommend using a solid, blender, tone-on-tone, or another nondirectional print for your background.
Directional fabric gets surprisingly tricky in foundation paper piecing because the fabric is placed on the back of the paper and then flipped into position.
I learned this the hard way while sewing one of my ghost test blocks.
Making the Candy Corn Foundation Paper Piecing Block
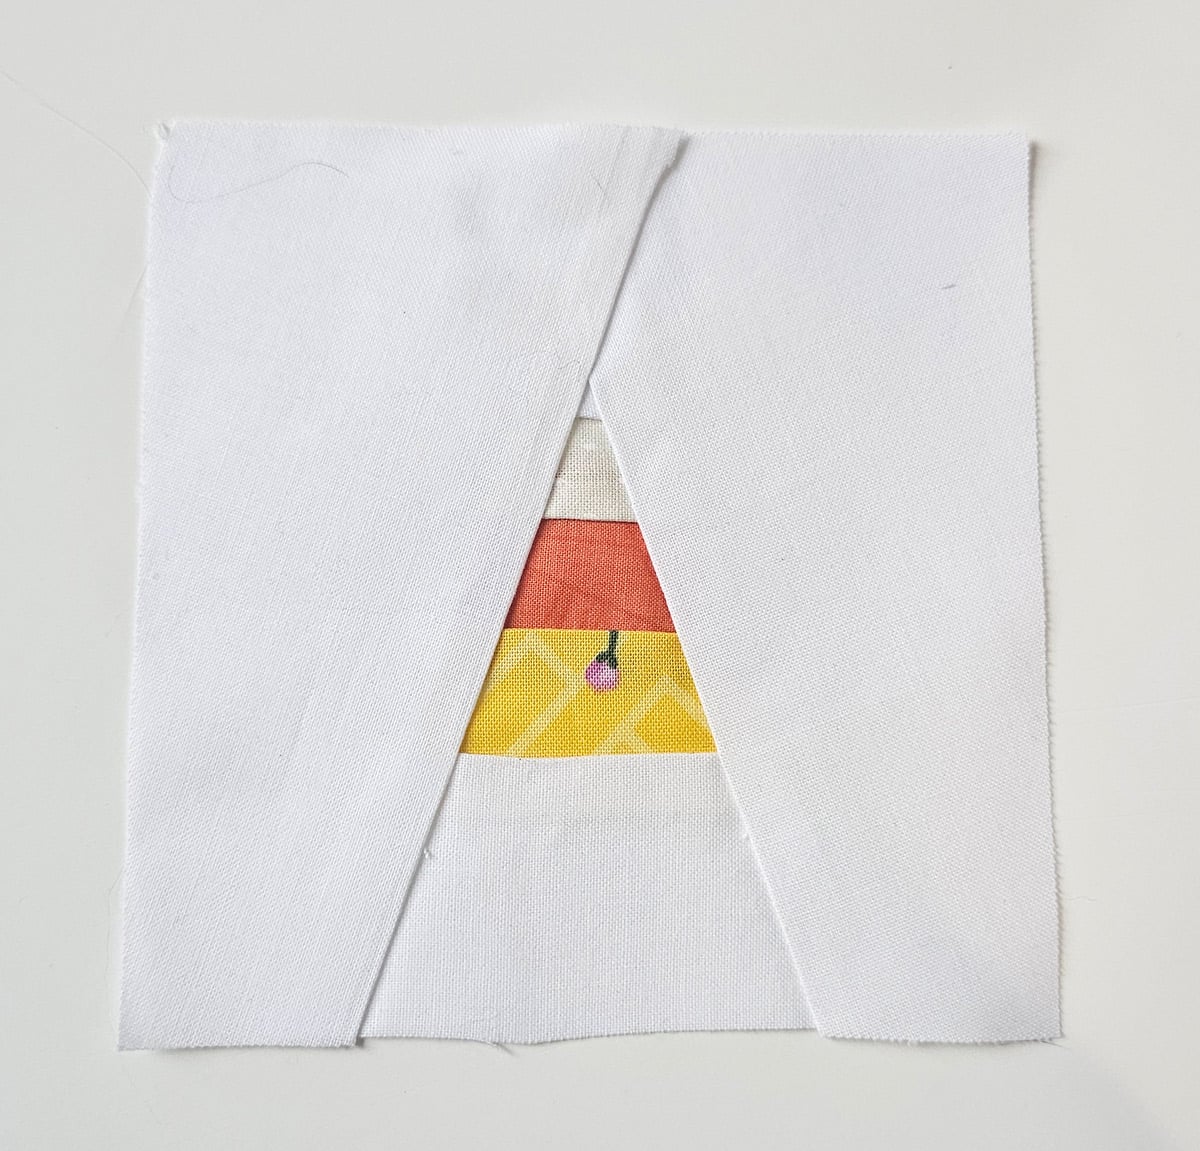
The candy corn uses the same basic foundation paper piecing method as the pumpkin.
Follow the numbers printed on the foundation and use generously sized fabric scraps for every section.
Pay extra attention to the large background pieces. These gave me the most trouble when testing the candy corn pattern because it was so easy to underestimate how much fabric I needed, especially with the angled sections.
My recommendation is to use a much larger background scrap than you think you’ll need. Pin it in position and test-flip it before sewing to make sure it covers the entire required area, including the outside seam allowance, with plenty of fabric to spare.
Remember to sew through any dotted seam-line extensions to the outer dotted trim line.
Once the block is assembled and pressed, it should measure 5 inches unfinished.
Making the Ghost Foundation Paper Piecing Block
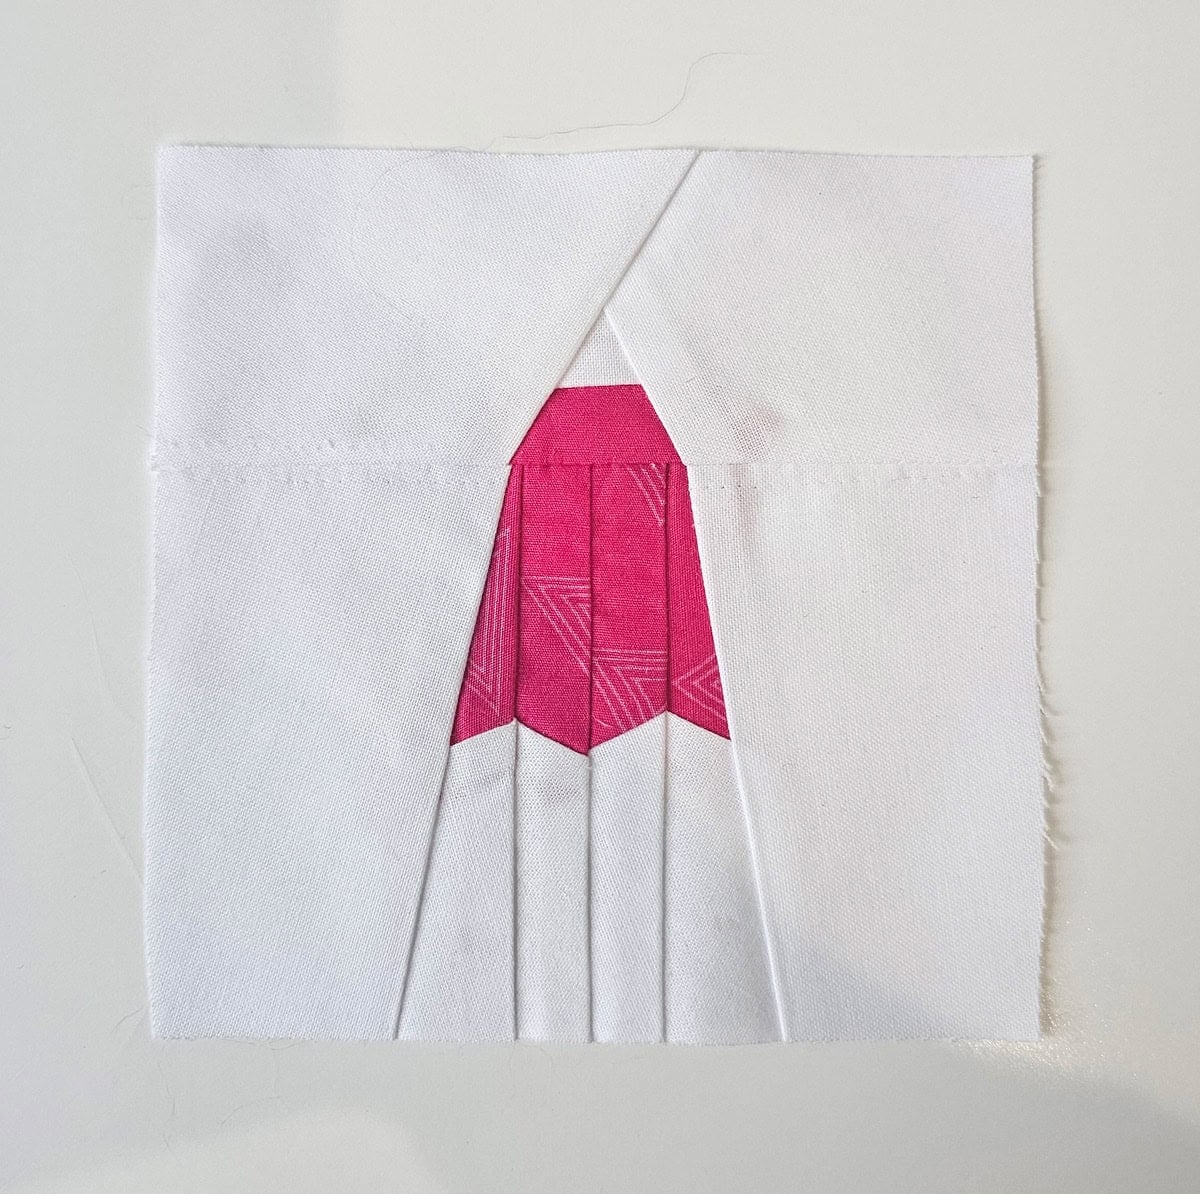
The ghost is the most involved of the three patterns, but I divided it into several smaller foundation sections to make the construction more manageable.
Piece each section separately in numerical order.
Use generously sized scraps for the angled lower sections and check the fabric coverage before every seam.
Once all the individual sections are complete, trim each one along its dotted outer line and join them with a ¼-inch seam allowance.
The completed ghost should measure 5 inches square unfinished.
You can leave the ghost plain or add two small embroidered eyes once the block is finished and the foundation paper has been removed.
What Can You Make With These Mini Halloween Quilt Blocks?
These 5-inch Halloween quilt blocks can be used individually or combined into larger sewing projects. They’re especially handy for adding a little Halloween detail without having to make an entire quilt.
- Mini quilts and mug rugs
- Zipper pouches and tote bags
- Halloween pillows and table runners
- Wall hangings and treat bags
- Quilt labels or larger Halloween quilts
- Embroidery hoop displays
Halloween Foundation Paper Piecing FAQs
Are these foundation paper piecing patterns beginner friendly?
These are advanced-beginner foundation paper piecing patterns. If you already know the basic sew-and-flip technique, you should be able to work through them. For a first-ever FPP project, I recommend practicing on a simpler block first.
How big are the Halloween quilt blocks?
Each block measures 5 inches square unfinished and finishes at 4½ inches square when sewn into another project using a ¼-inch seam allowance.
Can I use regular printer paper for foundation paper piecing?
Yes, regular printer paper works for foundation paper piecing. I preferred specialty foundation paper for these small blocks because it folded more cleanly and was easier to remove after sewing.
What stitch length should I use for these FPP patterns?
I used a 1.5 mm stitch length. It perforated the paper sufficiently for removal but was still possible to unpick when I needed to correct a seam.
How large should I cut my foundation paper piecing fabric scraps?
Choose a scrap that covers the entire area it needs to reach after flipping, including any outside seam allowance, plus at least another ¼ inch of spare fabric on every side. Angled pieces often need even more fabric.
How do I check whether my FPP fabric is positioned correctly?
Pin the new fabric temporarily where you think it belongs and flip it open as though the seam were already sewn. Make sure the fabric covers the entire required section and any outer seam allowance, with extra fabric beyond the edges. If it comes up short, reposition it before sewing.
More Halloween Sewing and Quilting Projects
If you enjoyed these mini Halloween foundation paper piecing patterns, you might also like these projects:
- 39+ Free Halloween Quilt Patterns for even more spooky sewing inspiration.
- Quilted Pumpkin Placemat Pattern for a larger pumpkin quilting project.
- Free Quilt Patterns and Tutorials for more projects to sew.
These little blocks took quite a bit of testing to get just right, but I love how the pumpkin, candy corn, and ghost turned out. Whether you use all three together or add just one to another project, they are such a fun way to add a little handmade Halloween to your sewing.
Don't miss any more posts!

Stay connected by following along on Pinterest, Facebook, Instagram, and TikTok for more fun content, easy recipes, free sewing patterns, and creative inspiration.
Mini Pumpkin Foundation Paper Piecing Quilt Block
Make an adorable mini pumpkin quilt block with this free foundation paper piecing pattern! This scrap-friendly Halloween sewing project uses small pieces of colorful fabric to create a cute patchwork pumpkin. The completed block measures 5 inches unfinished (4½ inches finished) and is perfect for mini quilts, zipper pouches, mug rugs, and other Halloween sewing projects. Best for advanced beginners familiar with basic foundation paper piecing.
Materials
- - Printed mini pumpkin foundation paper piecing pattern
- - Small scraps of quilting cotton in your favorite pumpkin colors
- - Brown fabric scrap for the stem
- - White or other nondirectional background fabric
- - 50 wt cotton thread
Tools
- - Sewing machine
- - Rotary cutter and cutting mat
- - Quilting ruler or Add-a-Quarter ruler
- - Iron
- - Straight pins
- - Fresh 70/10 Microtex Sharp needle or universal needle
- - Scissors
- - Seam ripper (optional)
Instructions
- Step 1: Prepare the Pattern
Print the pumpkin foundation paper piecing pattern at 100% or Actual Size. Check the 1-inch test square, then cut out Sections A and B along the outer dotted lines, keeping the ¼-inch seam allowances intact. - Step 2: Start With A1
Place your first pumpkin fabric scrap on the unprinted side of Section A, with the wrong side of the fabric against the paper. Make sure the fabric covers A1, including any required seam allowance, plus at least another ¼ inch of extra fabric on all sides. - Step 3: Add the Next Fabric Piece
Place the A2 fabric right sides together with A1. Pin it temporarily and test-flip it open to make sure it completely covers A2 and the required seam allowances. Reposition if necessary before sewing. - Step 4: Sew, Trim, and Press
Sew along the printed stitching line, continuing through any dotted seam-line extensions to the outer trim line. Fold the paper away from the seam and trim the fabric seam allowance to ¼ inch. Flip the new fabric open and press flat. - Step 5: Complete the Pumpkin and Stem
Continue adding fabrics to Section A in numbered order, repeating the position, test-flip, sew, trim, and press process. Complete the stem in Section B, following B1 through B3. Press both sections and trim along their outer dotted lines. - Step 6: Assemble and Finish
Join Sections A and B with a ¼-inch seam allowance. Add the white top and bottom rectangles (C1 and D1), using the paper templates to cut the fabric rectangles to size. Press, square up the block to 5 inches unfinished, and carefully remove the foundation paper.
Notes
- Print the pattern at 100% or Actual Size and verify the 1-inch test square.
- I recommend a 1.5 mm stitch length for these tiny FPP pieces.
- Use generously sized scraps, especially for angled sections. Your fabric needs to cover the entire required area, including the outer seam allowance, plus at least another ¼ inch of extra fabric on every side.
- Pin and test-flip each new fabric piece before sewing to check that it will completely cover its section.
- Trim completed foundation units along the outer dotted lines, not the solid finished-unit boundaries.
- Specialty foundation paper makes folding and paper removal easier, but regular printer paper also works.
