Easy Peasy Heart Softies
Disclosure: This post may contain affiliate links. As an Amazon Associate, I earn from qualifying purchases.
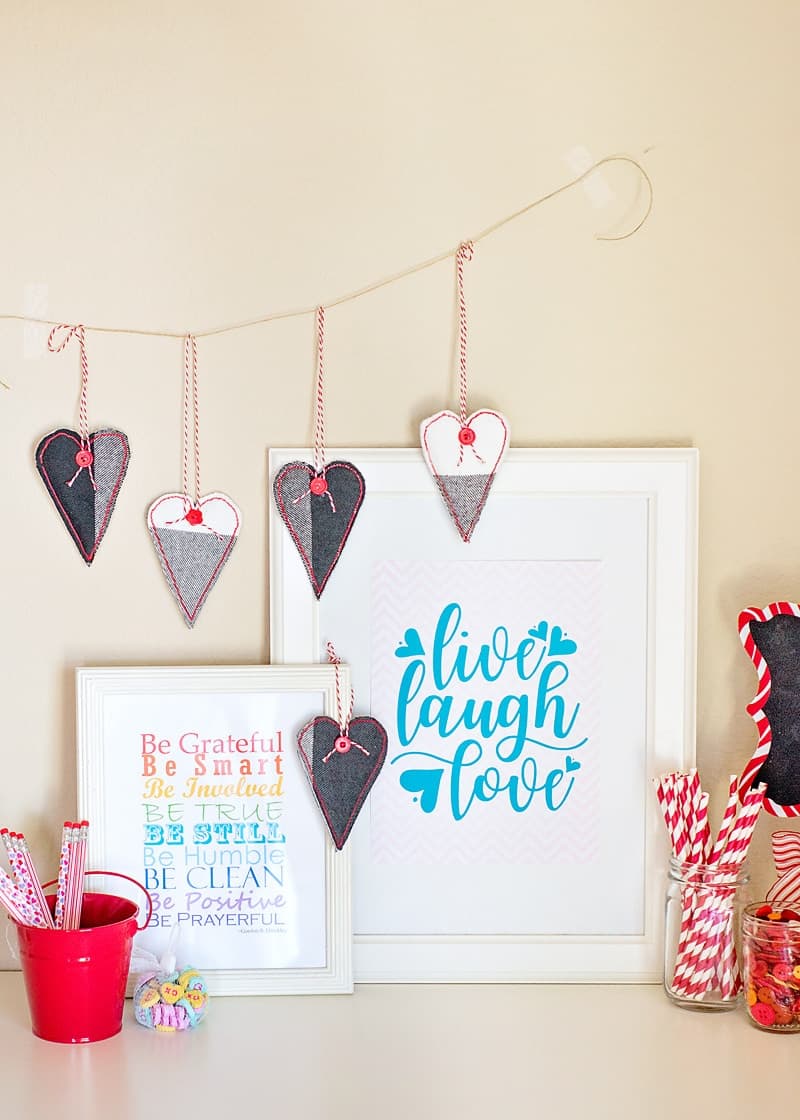
These Easy Peasy Heart Softies, are perfect for Valentines Day! They’re super simple to make and a great way to use up scrap fabric.

Heart Shaped Goodies For Valentine’s Day!
With Valentine’s Day just around the corner, we’ve been busy making all sorts of heart-shaped goodies!
The kids and I put together a sweet little V-Day themed vignette on one of the shelves in the playroom. We made some colorful printables and put them in frames and added a few Valentine-ish knick-knacks.
We decided it needed a little something else to dress it up and some sort of heart garland was the consensus. (If you like my live, laugh, love printable grab it here. The be grateful printable is something I printed several years ago from another website and is no longer available.)


Easy-Peasy Heart Softies
Based on what was in my craft room, these little heart softies were born! They are just a bit of scrap fabric, batting, string and buttons. (The black and white fabric is left over from the poncho I made for our family photos.)
What’s great about these heart softies is that they’re perfect to string up to make a heart garland and also make a super cute gift topper or ornament!

You might also like these Valentine’s Day ideas:
- Button Heart Valentine Cards
- Mini Conversation Heart Cupcakes
- Dolman Heart Tee
- Heart Appliqued Leggings
- Frozen Whipped Cream Hearts
- Boy’s Bow Tie Tutorial
- How to Make Heart Shaped Cupcakes
How to Make an Easy Heart Softie

Supplies needed:
- Fabric
- Batting
- Heart template => print here
- basting spray or glue stick (You could also just use pins)
- Scissors
- basic sewing supplies
Instructions
Step 1: Print and cut out heart template.
Feel free to enlarge or shrink the heart for various size hearts.
Step 2: Trace template onto fabric.
Trace the template onto your fabric. Make as many as you think you’ll need.
Don’t cut the hearts out yet!!

Step 3: Baste Fabric and Batting Together
Lay fabric out flat, the side you traced the template on, down. (If using basting spray, you’ll want to cover your work surface as the spray is sticky if it gets on your table.)

Spray the back of the fabric with the basting spray or glue stick. Place a piece of batting over the fabric.
Smooth the batting out, add a bit more spray or glue and place 2nd piece of fabric on top of the batting, right side up. You’ll have a little fabric/batting sandwich! (Just as an FYI, I did try 2 pieces of batting for extra puffiness, but the hearts didn’t turn out as well.)

Step 4: Sew Heart Softies Together.
Take your “fabric sandwich” over to the sewing machine and, with the template side up, sew around the template you traced.
You can use a straight stitch and free motion foot to go around multiple times or use a narrow zigzag stitch. I tried it both ways and preferred a narrow zig zag. If using a free motion foot, take care that the width of the zig zag fits within the foot.(This tooth fairy pillow is an example of the free motion/straight stitch.)
Tip: Be sure to use the same color top and bobbin thread so your heart softie will look cute from either direction.
Gently and slowly guide your fabric around the shape. (Watch the video below to see what I mean.)

Step 5: Trim the Fabric
With a pair of sharp scissors, trim around your stitches as close or as far as you like to get to look you want. (I did a scant quarter inch.)

You can stop here, but if you’d like to add a string loop to make a heart garland or for hanging, keep going!
Step 6: Adding a Loop to Make a Heart Garland
Cut a piece of ribbon/string to your desired length.
To hold the ribbon in place on the heart softie while attaching, you can pin it, tie it, tape it – whatever you need to do to hold it in place while you stitch on the button.

Sew or glue (hot glue works great too) your button in place. (With smaller buttons, I found it easiest to place the string where I wanted it, add the button and then use a piece of tape to hold the button in place while I sewed right through the tape.)
Trim the string/ribbon ends to the desired length. Use a bit of fray check to keep the edges from fraying.
(I tried to get fancy and use my machine to sew the buttons on, but I ended up breaking two needles in the process, so I switched back to my trusty hot glue gun for the rest of the heart softies!)

That’s it – so cute!
If you end up making a heart softie, be sure to stop by and share a photo to my facebook page or tag me on Instagram!
Don't miss any more posts!

Follow along on:
Feedly, Bloglovin', your favorite feed reader, or signing up via email and have new posts delivered to your email box each week!


