How to make a Bubble Fountain in a Pot
Disclosure: This post may contain affiliate links. As an Amazon Associate, I earn from qualifying purchases.

A couple of weeks ago, I teased you about the DIY Bubble Fountain my hubby had made for me last summer. I’ve finally taken a few moments to write up the instructions on how to make a Bubble Fountain in a Pot, so you can make one too!

Bubble Fountain in a Pot
We have a local water garden shop that is the most amazing place to go and browse. They have 5 acres of the most beautiful ponds and streams and fountains on display. It is so pretty, they’ve even opened up their location as a venue for parties and weddings.
I’d been wanting to add a small bubbler fountain to my side garden. It’s where all the birds hang out (check out this recent shot of the birds.) And I know if I can add a water feature that makes a soft flowing water noise, I will get ALL THE BIRDS, lol.
The first place I thought to go was our local Water Garden shop. (The Hill Country Water Gardens- seriously, if you are in the Texas Hill Country and are in the market for a fancy pond or water garden, you should really visit this place. The inspiration alone is crazy-good!)
 |
| Image source |
As beautiful as this place is, their services and products aren’t cheap and are out of the price range of someone on a super tight budget. After a significant amount of browsing, I just couldn’t find exactly what I wanted. Plus, not a single bubble pot that I liked was less than $150 – and that was just for the pot!
After consulting with the hubby, we decided to hit our local big box hardware store and see if we could find what we needed to make our own bubble fountain.
I am so glad we did, we spent more than 3/4 less than what we would have spent had we not made our own bubbler fountain. (If I had used a pot I already had, it would have been just the cost of the pump, tubing, and gravel.)

Pin this DIY Bubble Fountain project for later: ![]()
Supplies Needed to make your own self-contained bubbler fountain:
(you should be able to find all these items at your local big box hardware store or on Amazon)
- Submersible pump
- clear vinyl tubing (whatever size goes with your pump)
- 1 small and one large waterproof pot w/ no drainage holes. (Plastic or the fake stone-looking pots)
- something for the small pot to sit on (upside-down pot, brick or a cinder block)
- drill and bit
- Several medium-sized rocks
- bag of pea gravel or small decorative river rock
- clear waterproof silicone caulk/sealant
- electrical supplies needed to splice the electrical cord
How to Make a Bubble Fountain in a Pot
It wasn’t easy putting instructions together since I didn’t get step-by-step photos of the project as it was happening, but the process is really simple. I’m certain you can get an idea of what to do from the diagram below.
Instructions for the DIY Bubble Fountain:

Step 1: Cutting and splicing the electrical cord:
***This step is only necessary if you don’t want your cord to be seen. If your fountain is in a corner or up against the a wall, you might be able to just drape the electric cord over the edge and hide it. If this is the case skip to step 2.***
Drill a small hole near the bottom of the large pot. The diameter of the hole should be just big enough for the pump power cord. Cut the pump power cord in half – somewhere in the middle.
Thread the pump cord through the hole you drilled and splice the cord back together. (I found these two helpful tutorials on splicing an electrical cord and making it semi-water resistant. Hubby said he took this extra step of making the splice semi-water resistant since we buried the cord under the mulch. He also said he also used some sort of wire netting around the outside of his splice to make it more secure before the silicone and tape.)
Step 2: Assembling the pots
Stack the brick or upside-down pot at the bottom of the larger pot. Add a couple of larger rocks around the bottom of the pot and find a secure spot for the pump to rest.
Stack the smaller pot on the brick and decide where the hole for the tubing needs to be. Drill a small hole just large enough for the tubing. (You might want to move the pot to it’s final location, it will get heavy with all the rocks.)
Connect the tubing to the pump and slide it through the hole you drilled in the smaller pot.
Add a few large rocks to hold the tubing in place. (This may take two people) Make sure the end of the tube will sit right below the waterline. (Keep it long, so you can trim it later.)Seal the drilled holes with the silicone caulk. Follow the package instructions on how long to wait before adding water. (I think we waited for 24 to 48 hours.)Once the silicone is dry, add water to test the silicone seals and add more silicone if you have any leaks. (Ours has been going strong for a year.)

Step 3: Making it pretty:
Add more of the bigger rocks as needed.
Add pea gravel/small decorative rocks to the pots as needed, just to a couple of inches below the rim. This will also help keep the tube in place.
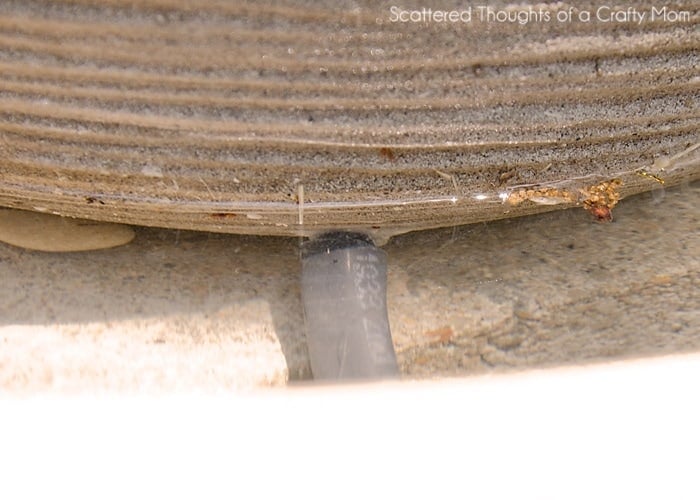
You can also add the pea gravel/small river rock to the larger pot, but do not cover the pump. You can almost see how we used a larger rock to keep the space around the pump clear in this picture:

Now, if after reading all that, it just sounds too hard- Amazon has some nice ready-to-go ones for a few more $$.
Fill with water and turn on the pump. Trim the tube a tiny bit at a time to get the proper bubbling- be careful not to trim too much, because you have siliconed the tube in at the bottom. Enjoy your Bubble Fountain!
Leave me a comment if you have any additional questions about this project.

Looking for more budget-friendly DIY outdoor projects? Be sure to check these out:
 Make a Wood and Rope Tree Swing
 No Sew Outdoor Patio Curtains (from drop cloths)


Don't miss any more posts!


The pots at 15 high and 9 inches high, I didn't get the diameter, but you can stack two together and see if you like how they look.
~Jamie
Great post! Curious as to the sizes (diameter and height) of your pots as they are a nice balance and scale. Thanks for sharing your process!
Several years ago, I made a similar fountain from two ceramic pots. For the interior one, I used a tallish pot with drainage hole; ran the pump tubing through that hole. I selected an interior pot with thick walls since the birds seem to especially like the wide rim with water flowing over it, perhaps because they can more easily stand on it. Also found that raccoons would sometimes get into it at night so I now have it on an exterior timer that automatically turns it off as dark falls and back on at sunrise. Should the raccoons lower the water level drastically (it has happened), since the pump is now off at night, there's no danger that it will burn out due to lack of water. The fountain has been a joyful addition to the garden.
This is beautiful..most of the more expensive, larger fountains I have seen are made out of clay or concrete. Just wondering if I could use some of my clay/concrete pots that I love so much, then drain at the end of the year and either take it apart to store? Or cover. We live in Idaho and have some pretty brutal winters. Could the "freeze" break the pump or do you think it would be okay as long as the water is taken out below the pump? Love your blog, definitely Following!!
Silly question
Where does the electrical cord go once its out the pot? Or what does the end of the cord go into?
Do you ever have a problem with mold or the water getting funky? Do you dump it out & replace, or do you end up cleaning everything? Or maybe a little bleach in the water? Thanks –
No, not really. We have added bleach in the past, but this summer we have been using little chlorine tablets we bought at walmart. (They are the kind that go in pool floaters.)
~Jamie
Just seen on Pinterest & was going to pass it by as I 'don't do' gardening, lol. So glad I hit the 2 links, this is such a cool idea. I am in UK so can never predict weather but read your reply regards unplugging pump when not in use. You & your hobby are very clever !!
ummm… LOVE IT!!!
So cool!!!
What a wonderful project! I love water features and this must add so much ambiance to your yard. Thanks for sharing the tutorial, Jamie!
I LOVE this project and have been wanting one on our patio.
Thank you for the inspiration!!
I'd love you to share it on my brand new blog party. It's all about sharing
your deals and thrifty projects.
http://bargainhoot.com/2013/05/03/whats-your-deal-share-it-every-friday/
This is beautiful.
Do you take it apart & store it for winter? I live in zone 6/7 where our winters can get below zero for short periods of time & below freezing for a week or more. I assume I'd need to at least empty the water out for the winter, would I need to move it? And how would you empty the water out? Maybe snake the tubing around in top pot so you'd have some slack to hang it over the edge & pump the water out?
We are in zone 8 (austin, tx) and got occasional freezes. We just unplugged the pump and let the water freeze. It's probably not a bad idea to dump the water out. You can unhook the tube from the pump and dump out most of the water.
Good luck,
~Jamie
I have a similar setup in Austin as well and I run it year round. The water circulation keeps it from freezing. I will get icicles sometimes. My set up is a bit different as I have an empty, large water reservoir so the more water the less chance of freeze. I'd try running it year round. You might be surprised.
Maybe you can add a drainage plug or cap to the bottom/side so that it would be easy to drain the water out without taking it a apart or trying to dump it?
This is beautiful.
Do you take it apart & store it for winter? I live in zone 6/7 where our winters can get below zero for short periods of time & below freezing for a week or more. I assume I'd need to at least empty the water out for the winter, would I need to move it? And how would you empty the water out? Maybe snake the tubing around in top pot so you'd have some slack to hang it over the edge & pump the water out?
I love this quick and easy to follow tut! Thanks for sharing! I also have looked for that perfect fountain….and yes…very expensive…now I can make my own!
Kelly
Great instructions and the diagram was very clear and easy to understand…will be doing this project as I already have the supplies from my old fountain. It has to be recycled somehow since the fibreglass bottom cracked and can't be repaired. Keep posting the great,inspirational ideas!
OMG! it´s awesome. I love this idea!
I´m going to continue visiting your site.
I let you my web!
http://www.dontcallyourmum.blogspot.com.es
Nice. Does the water from the top pot overflow into the bottom pot?
Yes, it does.
Oh! I love your fountain!!!!!!!! Thanks so much for the tutorial! I have pinned it in my garden section. Eventually I will make one. I will be looking for pots in the meantime. We just moved to our house a little over a year ago. Have lots to do with the yard. No shrubbery around the house at all.
Linda
I love your fountain! I just told hubby that's on my to-do list! Thank you so much for sharing at A Bouquet of Talent last week. Just featured you at Pick of the Bunch! Have a wonderful weekend.
Hugs
Kathy
I am not very good at these things, so forgive me if this is a silly question, but how does the water stay in the pots? Did you have to seal the drainage holes in the bottoms? Or are these not planting pots? All my pots have big holes in the bottom!
Not a silly question – We specifically bought plastic pots from Lowes that did not have holes in them. (the only holes were the ones we drilled for the tube and power cord, which we sealed with silicone caulk.
~Jamie