• Skip to primary navigation
  • Skip to main content
  • Skip to primary sidebar
  • Home
  • Recipes
    • main dish
    • dessert recipes
    • Appetizers
    • Breakfast Recipes
    • sides/snacks
    • drinks
    • low carb
    • Recipe round ups
  • Sewing Tutorials/Patterns
    • Girls Sewing Patterns and Tutorials
    • Ladies Sewing Patterns and tutorials
    • Boys Sewing Tutorials and Projects
    • scarves/hair accesories/hats/etc.
    • Quilting Projects
    • Home Sewing Tutorials
    • No Sew Fabric Projects
    • Sewing Round-ups
    • Sewing Inspiration
  • Crochet/Crafts/DIY
    • Crochet Projects
    • crafts
    • Outdoor DIY/Home Projects
    • pets
    • Lifestyle
  • About
    • Shop My Equipment
    • About Me
    • Contact Info
    • Work With Me!
    • Privacy Policy
    • Terms, Conditions and Disclosures
    • Frequently Asked Pattern Questions
  • Nav Social Menu

    • Facebook
    • Instagram
    • Pinterest
    • RSS
    • Twitter
scattered thoughts of a crafty mom logo

Scattered Thoughts of a Crafty Mom by Jamie Sanders

Inspiring you to sew, cook and create.

Related Posts

  • "Magic" Lemon Sponge in the Crock Pot

    I was at a friends house recently, and while flipping through one of her old…

  • Water Feature Inspiration and Hometalk

    Have you guys heard of Hometalk?  Hometalk is an online community devoted to all types…

  • Barbecue Chicken Breasts in the Crock Pot

    I made these Barbecue Chicken Breasts in the Crock Pot last week.  It was so…

  • Chicken Pot Pie Lightened Up

    I have a super easy and diet friendly Chicken Pot Pie recipe to share today.…

  • This Crock Pot Cheesy Chicken and Yellow Recipe is a hearty and delicious family meal - even better, it's super simple to make!
    Crock-Pot Cheesy Chicken and Yellow Rice

    Looking for a family friendly, hearty and filling meal that’s easy and won’t heat up…

Home / Home Projects / How to make a Bubble Fountain in a Pot

How to make a Bubble Fountain in a Pot

Home Projects

Disclosure: This post may contain affiliate links.

A couple of weeks ago, I teased you about the DIY Bubble Fountain my hubby had made for me last summer.  I’ve finally taken a few moments to write up the instructions on how to make a Bubble Fountain in a Pot, so you can make one too!

Instructions on how to make this easy Bubble Fountain in a pot


We have a local water garden shop that is the most amazing place to go and browse.  They have 5 acres of the most beautiful ponds and streams and fountains on display.  It is so pretty, they’ve even opened up their their location as a venue for parties and weddings.

I’d been wanting to add a small bubbler fountain to my side garden.  It’s where all the birds hang out (check out this recent shot of the birds.)  And I know if I can add a water feature that makes a soft flowing water noise, I will get ALL THE BIRDS, lol.

The first place I thought to go was our local Water Garden shop.  (The Hill Country Water Gardens- seriously, if you are in the Texas Hill Country and are in the market for a fancy pond or water garden, you should really visit this place.  The inspiration alone is crazy-good!)

Image source

As beautiful as this place is, their services and products aren’t cheap and are out of the price range of someone on a super tight budget.  After a significant amount of browsing, I just couldn’t find exactly what I wanted.  Plus, not a not a single bubble pot that I liked was less than $150 – and that was just for the pot!

After consulting with the hubby, we decided to hit our local big box hardware store and see if we could find what we needed to make our own bubble fountain.

I am so glad we did, we spent more than 3/4 less than what we would have spent had we not made our own bubbler fountain.  (If I had used a pot I already had, it would have been just the cost of the pump, tubing and gravel.)

bubbler fountain

Pin this DIY Bubble Fountain project for later:

Supplies Needed to make you own self contained bubbler fountain:

(you should be able to find all these items at your local big box hardware store or on Amazon)

  • Submersible pump
  • clear vinyl tubing (whatever size goes with your pump)
  • 1 small and one large waterproof pot w/ no drainage holes. (Plastic or the fake stone-looking pots)
  • something for the small pot to sit on (upside down pot, brick or a cinder block)
  • drill and bit
  • Several medium sized rocks
  • bag of pea gravel or small decorative river rock
  • clear waterproof silicone caulk/sealant
  • electrical supplies needed to splice the electrical cord

How to Make a Bubble Fountain in a Pot

It wasn’t easy putting instructions together since I didn’t get step by step photos of the project as it was happening, but the process is really simple.  I’m certain you can get the idea of what to do from the diagram below.

Instructions for the DIY Bubble Fountain:


how to make a fountain


Step 1:  Cutting and splicing the electrical cord: ***This step is only necessary if you don’t want your cord to be seen.  If your fountain is in a corner or up against the a wall, you might be able to just drape the electric cord over the edge and hide it.  If this is the case skip to step 2.***

Drill a small hole near the bottom of the large pot.  The diameter of the hole should be just big enough for the pump power cord.  Cut the pump power cord in half – somewhere in the middle.

Thread the pump cord through the hole you drilled and splice the cord back together.  (I found these two helpful tutorials on splicing an electrical cord and making it semi-water resistant.  Hubby said he took this extra step of making the splice semi-water resistant since we buried the cord under the mulch.  He also said he also used some sort of wire netting around the outside of his splice to make it more secure before the silicone and tape.)

Step 2:  Assembling the pots

Stack the brick or upside down pot at the bottom of the larger pot.  Add a couple of larger rocks around the bottom of the pot and find a secure spot for the pump to rest.

Stack the smaller pot on the brick and decide where the hole for the tubing needs to be.  Drill a small hole just large enough for the tubing. (You might want to move the pot to it’s final location, it will get heavy with all the rocks.)

Connect the tubing to the pump and slide it through the hole you drilled in the smaller pot.

Add a few large rocks to hold the tubing in place. (This may take two people)  Make sure the end of the tube will sit right below the water line.  (Keep it long, so you can trim it later.)Seal the drilled holes with the silicone caulk.  Follow the package instructions on how long to wait before adding water.  (I think we waited 24 to 48 hours.)Once the silicone is dry, add water to test the silicone seals and add more silicone if you have any leaks.  (Ours has been going strong for a year.)

Step 3: Making it pretty:

Add more of the bigger rocks as needed.

Add pea gravel/small decorative rocks to the pots as needed, just to a couple of inches below the rim.  This will also help keep the tube in place.

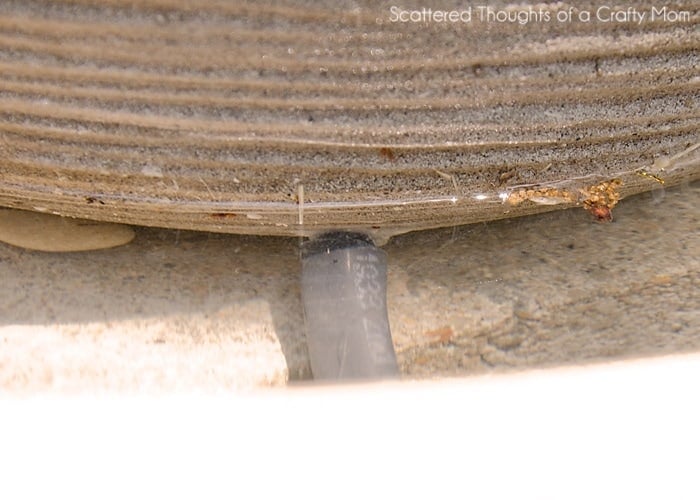
You can also add the pea gravel/small river rock to the larger pot, but do not cover the pump.  You can almost see how we used a larger rock to keep the space around the pump clear in this picture:


bubble fountain in a pot

Now, if after reading all that, it just sounds too hard- Amazon has some nice ready to go ones for a few more $$.

Fill with water and turn on the pump.  Trim the tube a tiny bit at a time to get the proper bubbling- be careful not to trim too much, because you have siliconed the tube in at the bottom.Enjoy your Bubble Fountain!

Leave me a comment if you have any additional questions about this project.


how to make a bubbler fountain


Looking for more budget friendly DIY outdoor projects?  Be sure to check these out:

Make a Wood and Rope Tree Swing


No Sew Outdoor Patio Curtains (from drop cloths)


DIY Outdoor Firepit


17 Outdoor Lighting Ideas


Don't miss any more posts!

Follow along on:

Feedly, Bloglovin', your favorite feed reader, or signing up via email and have new posts delivered to your email box each week!

April 16 · 71 Comments

Previous Post: « 12 Inspirational Spring Projects
Next Post: 29 Delicious Pecan Desserts and Sweet Treats »

Reader Interactions

Leave a Reply Cancel reply

Your email address will not be published. Required fields are marked *

Comments

  1. Danni Baird @ Silo Hill Farm says

    April 16 at 10:25 pm

    Oh I so want to make this! Thank you for the tutorial!

    Reply
  2. Reduce, Reuse, Renewed says

    April 17 at 1:24 pm

    My husband and I were talking about putting one of these on the back patio but didn't want to shell out a fortune for one. Great DIY tutorial!

    Reply
  3. Diana - FreeStyleMama says

    April 17 at 6:54 pm

    We made a fountain several years ago but we didn't research it at all and it didn't work how we wanted. I have pinned this so we can do it again but YOUR way!

    Reply
  4. espirational says

    April 17 at 9:30 pm

    I want to make one too, but I'm afraid I don't have a good place for it.

    Reply
  5. The CSI Girl says

    April 18 at 4:04 pm

    This is so cool and perfect for the garden or outdoor space. Very nice! Come on over and share this with The CSI Project this week. The challenge is Gardens and Flowers. Any flowers, created or planted. Link up will continue through Friday. Come on over!
    http://www.thecsiproject.com

    Reply
  6. Krystie says

    April 19 at 1:15 pm

    Terrific DIY tutorial! You make it sound pretty simple! By the way does it produce bubbles? (dumb question I'm sure)

    Reply
    • Scattered Thoughts of a Crafty Mom says

      April 19 at 1:23 pm

      Good question, it doesn't make actual bubbles, but the water kind of "bubbles up" to the surface and makes a pretty bubbly sound. How high your water bubbles up will depend on the strength of the pump and the placement of the tubing.
      ~Jamie

      Reply
  7. Kim M says

    April 19 at 3:10 pm

    Oooh! I love this! We have a pond on one side of the house, but I wanted another one next our covered porch (love the sound of the water). Hubby groaned at the prospect of digging, but this looks like a super easy compromise-with directions! Thanks!

    Reply
  8. Linda Bouffard says

    April 20 at 2:39 am

    Beautiful! I love fountains. PINNING! Please share this at What to do Weekends Party also… Following on Bloglovin. Linda

    http://www.craftsalamode.com/2013/04/what-to-do-weekends-16.html

    Reply
  9. Christy James says

    April 21 at 3:35 am

    I have always wanted to add a water feature to our garden, but they are so dang expensive!! I'm not comfortable with splicing wires, but I bet my hubby could do that part for me! Your diagram gives a perfect idea of how to put this together 🙂

    XO,
    [email protected]

    Reply
  10. starsandsunshine.com says

    April 21 at 5:00 am

    This is gorgeous! I've been thinking of putting something like this in our garden – thanks for the tutorial 🙂

    I grew up in NW Austin, but had never heard of the water gardens shop – I'll have to check it out next time I'm home just to browse!

    Reply
  11. Shirlee Smith says

    April 21 at 2:41 pm

    Do you have an estimate of how much you think this would cost? Also, it doesn't look like the water is bubbling over into the larger pot below. Is it doing that?

    Reply
    • Tyler Brush says

      July 28 at 4:36 pm

      I am making this with 2 plastic pots we just bought from Lowes ($18 & $8)… pump, gravel, etc… and I spent $90.00 CDN, taxes included. We had NO supplies. Had to buy the silicon, a waste bucket from the dollar store to support the upper planter, marbles for sparkle, pea gravel, etc. Hopefully it all turns out.

      Reply
      • Melissa says

        July 16 at 2:25 am

        Out of curiosity, What drill bit did you use?

        Love this and have a place for it already! <3

        -Melissa

        Reply
    • Jamie says

      July 28 at 4:55 pm

      Good luck Tyler, hope it turns out for you. Just an fyi: my hubby added a more powerful pump this summer (the bubble effect is more pronounced) When he re-sealed the hole, he tested it out – it was leaking a bit and added more sealer. So just be aware you might need to seal the hole more than once.
      ~Jamie

      Reply
  12. Scattered Thoughts of a Crafty Mom says

    April 21 at 3:51 pm

    Hi Shirlee,

    We spent about $15 on the pump (depending what you get, you could spend 10 to $40 here. I just looked pumps up on amazon, they have some for around $15 and I see lowes has one for around $20.)

    $8 on the tubing. (though we used white tubing and all I see online at lowes is black.)

    Hubby already had the Electrical supplies for the splice and silicone sealer ($4).

    We bought the pots for around $15 and $3ish last year at lowes.

    The large rocks were free and the small pond pebbles were about $4.

    So, if you don't already have any of these supplies expect to spend about $75 (or more if you buy fancy pots.)

    The water is spilling over the top pot into the bottom pot and is being recirculated by the pump. It is very hard to photograph water moving in the bright sunshine.

    The side of the bottom pot appears wet in the top photo because I had just added more water and accidentally overflowed the pot…

    ~Jamie

    Reply
    • Scattered Thoughts of a Crafty Mom says

      April 23 at 1:08 am

      That is supposed to read $30ish on the pot not $3ish…
      ~Jamie

      Reply
  13. [email protected]'s Mansion says

    April 22 at 12:39 am

    Really gorgeous, well done! I love water features

    Reply
  14. Christine says

    April 23 at 10:46 am

    CONGRATS!!
    You have been featured at The DIY Dreamer… From Dream To Reality! Come on over and grab your featured button, you deserve it 🙂
    http://thediydreamer.com/from-dream-to-reality/features-63/

    Don't forget to come over this evening to link up again 🙂

    Reply
  15. Miranda @ Someday Crafts says

    April 24 at 4:54 am

    What a fabulous idea! I never would have thought of making my own fountain, or even known where to start. Thanks for linking up at Whatever Goes Wednesday. I just wanted to let you know that your fountain was the most viewed link at the party last week, so it will be featured at the party tomorrow. We hope you'll stop by to check it out and join the party again! 🙂

    Reply
  16. Diana says

    April 24 at 12:54 pm

    Wow this is genius!! I think I'm going to make one for my backyard. Totally pinned!! @decoratemediana

    Reply
  17. Holly Lefevre (504 Main) says

    April 25 at 6:39 am

    I love, love, love this!

    Reply
  18. Holly Kolvig says

    April 26 at 5:56 am

    How do you keep sludge or slime from occurring? I live in GA, home of red algae, LOL. I thought of adding vinegar, Epsom salts, baking soda or bleach. I know bleach deteriorates in the sun so I am curious what you recommend. Thanks for your advice.

    Reply
    • Scattered Thoughts of a Crafty Mom says

      April 26 at 1:18 pm

      We added a little bleach every so often, and the circulation really helps.
      ~Jamie

      Reply
    • Holly Kolvig says

      April 28 at 7:08 am

      Good to know, thanks!!!

      Reply
    • Laura Mcmillan says

      September 23 at 1:20 pm

      I live in Austin, Tx and we get the slime build up, too. Hydrogen peroxide works perfectly for removing the slime and is bird friendly unlike bleach. You can put a cup or the bottle – it doesn't matter. It will last about three months.

      Reply
    • Jamie says

      September 23 at 1:44 pm

      Thanks for the tip! Last time I had to buy hydrogen peroxide, I had to buy a huge bottle, so I will definitely use it next. (Lately we've been using chlorine tablets meant for a pool.)
      ~Jamie

      Reply
      • J.C. Calhoun says

        July 23 at 12:07 am

        Dollar Tree has a big bottle for a buck.

        Reply
  19. Carrie says

    April 26 at 8:42 pm

    Beautiful!! Thank you for sharing on Sharing Saturday!

    Reply
  20. Robin Welch says

    April 27 at 12:49 am

    I've been wanting to put a fountain in my garden – this would be perfect! Thank you for the inspiration.

    Hugs, Smiles & Blessings,
    Robin
    Fluster Buster
    Creativity Inspired by Frustration

    Reply
  21. Amy says

    April 27 at 4:40 pm

    I am not very good at these things, so forgive me if this is a silly question, but how does the water stay in the pots? Did you have to seal the drainage holes in the bottoms? Or are these not planting pots? All my pots have big holes in the bottom!

    Reply
    • Scattered Thoughts of a Crafty Mom says

      April 27 at 5:30 pm

      Not a silly question – We specifically bought plastic pots from Lowes that did not have holes in them. (the only holes were the ones we drilled for the tube and power cord, which we sealed with silicone caulk.
      ~Jamie

      Reply
  22. Kathy Moody says

    April 28 at 3:14 am

    I love your fountain! I just told hubby that's on my to-do list! Thank you so much for sharing at A Bouquet of Talent last week. Just featured you at Pick of the Bunch! Have a wonderful weekend.

    Hugs
    Kathy

    Reply
  23. Artifice says

    April 28 at 5:33 pm

    Oh! I love your fountain!!!!!!!! Thanks so much for the tutorial! I have pinned it in my garden section. Eventually I will make one. I will be looking for pots in the meantime. We just moved to our house a little over a year ago. Have lots to do with the yard. No shrubbery around the house at all.

    Linda

    Reply
  24. EnoughAlready says

    April 28 at 6:42 pm

    Nice. Does the water from the top pot overflow into the bottom pot?

    Reply
    • Scattered Thoughts of a Crafty Mom says

      April 28 at 7:59 pm

      Yes, it does.

      Reply
  25. Don´t Call Your Mum says

    April 28 at 9:34 pm

    OMG! it´s awesome. I love this idea!
    I´m going to continue visiting your site.
    I let you my web!
    http://www.dontcallyourmum.blogspot.com.es

    Reply
  26. Trace says

    April 29 at 8:44 am

    Great instructions and the diagram was very clear and easy to understand…will be doing this project as I already have the supplies from my old fountain. It has to be recycled somehow since the fibreglass bottom cracked and can't be repaired. Keep posting the great,inspirational ideas!

    Reply
  27. kelly arent-Copper Roof Interiors LLC says

    April 29 at 11:17 am

    I love this quick and easy to follow tut! Thanks for sharing! I also have looked for that perfect fountain….and yes…very expensive…now I can make my own!
    Kelly

    Reply
  28. Jenny says

    May 2 at 2:16 am

    This is beautiful.

    Do you take it apart & store it for winter? I live in zone 6/7 where our winters can get below zero for short periods of time & below freezing for a week or more. I assume I'd need to at least empty the water out for the winter, would I need to move it? And how would you empty the water out? Maybe snake the tubing around in top pot so you'd have some slack to hang it over the edge & pump the water out?

    Reply
  29. Jenny says

    May 2 at 2:21 am

    This is beautiful.

    Do you take it apart & store it for winter? I live in zone 6/7 where our winters can get below zero for short periods of time & below freezing for a week or more. I assume I'd need to at least empty the water out for the winter, would I need to move it? And how would you empty the water out? Maybe snake the tubing around in top pot so you'd have some slack to hang it over the edge & pump the water out?

    Reply
    • Scattered Thoughts of a Crafty Mom says

      May 2 at 3:09 am

      We are in zone 8 (austin, tx) and got occasional freezes. We just unplugged the pump and let the water freeze. It's probably not a bad idea to dump the water out. You can unhook the tube from the pump and dump out most of the water.
      Good luck,
      ~Jamie

      Reply
    • Norah says

      October 11 at 5:38 pm

      I have a similar setup in Austin as well and I run it year round. The water circulation keeps it from freezing. I will get icicles sometimes. My set up is a bit different as I have an empty, large water reservoir so the more water the less chance of freeze. I'd try running it year round. You might be surprised.

      Reply
    • Alicia Reed says

      February 17 at 6:14 am

      Maybe you can add a drainage plug or cap to the bottom/side so that it would be easy to drain the water out without taking it a apart or trying to dump it?

      Reply
  30. Bargain Hoot says

    May 3 at 8:18 pm

    I LOVE this project and have been wanting one on our patio.
    Thank you for the inspiration!!
    I'd love you to share it on my brand new blog party. It's all about sharing
    your deals and thrifty projects.
    http://bargainhoot.com/2013/05/03/whats-your-deal-share-it-every-friday/

    Reply
  31. Sherry Clarke says

    May 8 at 10:06 pm

    What a wonderful project! I love water features and this must add so much ambiance to your yard. Thanks for sharing the tutorial, Jamie!

    Reply
  32. Julie redheadcandecorate.com says

    May 11 at 5:30 am

    So cool!!!

    Reply
  33. Chelsea @ Making Home Base says

    May 12 at 1:22 am

    ummm… LOVE IT!!!

    Reply
  34. Caroline says

    June 16 at 6:08 am

    Just seen on Pinterest & was going to pass it by as I 'don't do' gardening, lol. So glad I hit the 2 links, this is such a cool idea. I am in UK so can never predict weather but read your reply regards unplugging pump when not in use. You & your hobby are very clever !!

    Reply
  35. Chris H says

    August 2 at 4:59 pm

    Do you ever have a problem with mold or the water getting funky? Do you dump it out & replace, or do you end up cleaning everything? Or maybe a little bleach in the water? Thanks –

    Reply
    • Jamie says

      August 2 at 5:03 pm

      No, not really. We have added bleach in the past, but this summer we have been using little chlorine tablets we bought at walmart. (They are the kind that go in pool floaters.)
      ~Jamie

      Reply
  36. Jacqueline Anthony says

    August 4 at 11:27 am

    Silly question
    Where does the electrical cord go once its out the pot? Or what does the end of the cord go into?

    Reply
  37. mxmomma05 says

    September 3 at 9:24 am

    This is beautiful..most of the more expensive, larger fountains I have seen are made out of clay or concrete. Just wondering if I could use some of my clay/concrete pots that I love so much, then drain at the end of the year and either take it apart to store? Or cover. We live in Idaho and have some pretty brutal winters. Could the "freeze" break the pump or do you think it would be okay as long as the water is taken out below the pump? Love your blog, definitely Following!!

    Reply
  38. birdgardens says

    March 5 at 4:02 pm

    Several years ago, I made a similar fountain from two ceramic pots. For the interior one, I used a tallish pot with drainage hole; ran the pump tubing through that hole. I selected an interior pot with thick walls since the birds seem to especially like the wide rim with water flowing over it, perhaps because they can more easily stand on it. Also found that raccoons would sometimes get into it at night so I now have it on an exterior timer that automatically turns it off as dark falls and back on at sunrise. Should the raccoons lower the water level drastically (it has happened), since the pump is now off at night, there's no danger that it will burn out due to lack of water. The fountain has been a joyful addition to the garden.

    Reply
  39. Liz says

    April 4 at 1:57 am

    Great post! Curious as to the sizes (diameter and height) of your pots as they are a nice balance and scale. Thanks for sharing your process!

    Reply
  40. Jamie says

    April 4 at 4:30 pm

    The pots at 15 high and 9 inches high, I didn't get the diameter, but you can stack two together and see if you like how they look.
    ~Jamie

    Reply
  41. JerSea Girl says

    April 28 at 12:08 pm

    Just did this. My fountain turned out great. I used plastic pots. My only word of advice is to make sure your your larger pot is significantly larger. The first pot I used wasn't quite big enough and the water kept splashing out. I bought another pot and used my first pot, upside down, to hold my small pot.

    Reply
  42. JerSea Girl says

    April 28 at 12:11 pm

    I just did this project over the weekend. It turned out great. I only have one piece of advice. Make sure your bottom pot is significantly larger than the top pot. The first pot I used on the bottom wasn't quite bit enough and my water splashed out. I got a bigger one and used the original pot upside down and set my top pot on it. My fountain is working great. Thanks for the great idea.

    Reply
  43. Justin Schares says

    May 11 at 7:20 pm

    Pinned this morning, went to Lowe's to buy the post before lunch-super cool! Where did you get the larger rocks? Thanks!

    Reply
    • Jamie says

      May 11 at 8:23 pm

      Good luck, the larger rocks are ones we just picked up from around our property, nothing special.

      Reply
  44. Kim Powell says

    May 27 at 5:06 pm

    I love this project!!…want to do it this weekend…is there a way to print the instructions???

    Reply
  45. Sue Huber says

    April 22 at 8:23 pm

    I asked a question about winterizing for northern Indiana but didn't leave any way for you to respond. Just drain the pot and cover? Thanks!

    Reply
  46. Kati says

    May 18 at 3:11 pm

    My kids have been asking for a fountain since they love watching them at the fun local greenhouse we like to visit. Maybe I need to give this a try!

    Reply
  47. mjcarley says

    May 26 at 2:37 am

    Pretty! I love it! We have a water feature in our backyard that we are tired of. Looking for a change. This might be just the thing for us! Does it make a nice bubbly water sound when it's running? What happens with the bottom pot – does the water sit in that pot, or go up through the tube? Can it be made where the water flows out of the top pot, down to the bottom pot then back up again? Thank you!!

    Reply
  48. Anna says

    August 21 at 7:55 am

    i love this idea! maybe it is a very stupid question to ask but… does it make that relaxing water sound?

    Reply
    • Jamie says

      August 21 at 10:11 am

      Yes it does!

      Reply
  49. Lily says

    June 23 at 4:38 am

    The water fountain you have shown is a sure hit of any garden… Thanks for the share!

    Reply
  50. Joyce says

    April 13 at 11:13 am

    So excited, bought my supplies to build my fountain and realized I have no power outside where I was going to put it! Really bummed out! Any suggestions?

    Reply
    • Jamie says

      April 13 at 3:09 pm

      my hubby buried our line – I’m pretty sure you can find some youtube tutorials for that. good luck

      Reply
  51. Ruth Doyle says

    July 14 at 1:37 am

    How often do the pump and pots need to be cleaned go remove algae and make sure the pump doesn’t get clogged? I live in Northern New Mexico, so any fountain would need to be winterized. It seems that the fountain would need to be completely taken apart to clean and winterize. Is this correct or am I missing something? Thanks for your help — this is a really nice fountain that I hope to build this summer.

    Reply
    • Jamie Sanders says

      July 14 at 9:40 am

      If your pump comes with a screen/filter, be sure to use it to keep out debris. (Hubby just made me another one for our new house and didn’t use it, mistake he had to take it apart and put it back on as we have a lot of trees) Other than that, we would use chlorine tablets during the worst of the summer to keep it clean.

      Reply

Primary Sidebar

Never Miss a project or Delicious new Recipe

You may share 1 photo and up to 3 lines of text, under the condition that proper credit is given to scatteredthoughtsofacraftymom.com.
(Must be a clear link back to shared content & do not remove the watermark.) For more information see: Terms and Conditions.
Scattered Thoughts of a Crafty Mom is a participant in the Amazon Services LLC Associates Program, an affiliate advertising program designed to provide a means for sites to
earn advertising fees by advertising and linking to Amazon.com.  For more info, read full Terms and Conditions & Privacy Policy 

Copyright © 2021 ·Thyme theme by Restored 316

Copyright © 2021 · Thyme Theme by Restored 316