How to make a Bubble Fountain in a Pot
Disclosure: This post may contain affiliate links. As an Amazon Associate, I earn from qualifying purchases.

A couple of weeks ago, I teased you about the DIY Bubble Fountain my hubby had made for me last summer. I’ve finally taken a few moments to write up the instructions on how to make a Bubble Fountain in a Pot, so you can make one too!

Bubble Fountain in a Pot
We have a local water garden shop that is the most amazing place to go and browse. They have 5 acres of the most beautiful ponds and streams and fountains on display. It is so pretty, they’ve even opened up their location as a venue for parties and weddings.
I’d been wanting to add a small bubbler fountain to my side garden. It’s where all the birds hang out (check out this recent shot of the birds.) And I know if I can add a water feature that makes a soft flowing water noise, I will get ALL THE BIRDS, lol.
The first place I thought to go was our local Water Garden shop. (The Hill Country Water Gardens- seriously, if you are in the Texas Hill Country and are in the market for a fancy pond or water garden, you should really visit this place. The inspiration alone is crazy-good!)
 |
| Image source |
As beautiful as this place is, their services and products aren’t cheap and are out of the price range of someone on a super tight budget. After a significant amount of browsing, I just couldn’t find exactly what I wanted. Plus, not a single bubble pot that I liked was less than $150 – and that was just for the pot!
After consulting with the hubby, we decided to hit our local big box hardware store and see if we could find what we needed to make our own bubble fountain.
I am so glad we did, we spent more than 3/4 less than what we would have spent had we not made our own bubbler fountain. (If I had used a pot I already had, it would have been just the cost of the pump, tubing, and gravel.)

Pin this DIY Bubble Fountain project for later: ![]()
Supplies Needed to make your own self-contained bubbler fountain:
(you should be able to find all these items at your local big box hardware store or on Amazon)
- Submersible pump
- clear vinyl tubing (whatever size goes with your pump)
- 1 small and one large waterproof pot w/ no drainage holes. (Plastic or the fake stone-looking pots)
- something for the small pot to sit on (upside-down pot, brick or a cinder block)
- drill and bit
- Several medium-sized rocks
- bag of pea gravel or small decorative river rock
- clear waterproof silicone caulk/sealant
- electrical supplies needed to splice the electrical cord
How to Make a Bubble Fountain in a Pot
It wasn’t easy putting instructions together since I didn’t get step-by-step photos of the project as it was happening, but the process is really simple. I’m certain you can get an idea of what to do from the diagram below.
Instructions for the DIY Bubble Fountain:

Step 1: Cutting and splicing the electrical cord:
***This step is only necessary if you don’t want your cord to be seen. If your fountain is in a corner or up against the a wall, you might be able to just drape the electric cord over the edge and hide it. If this is the case skip to step 2.***
Drill a small hole near the bottom of the large pot. The diameter of the hole should be just big enough for the pump power cord. Cut the pump power cord in half – somewhere in the middle.
Thread the pump cord through the hole you drilled and splice the cord back together. (I found these two helpful tutorials on splicing an electrical cord and making it semi-water resistant. Hubby said he took this extra step of making the splice semi-water resistant since we buried the cord under the mulch. He also said he also used some sort of wire netting around the outside of his splice to make it more secure before the silicone and tape.)
Step 2: Assembling the pots
Stack the brick or upside-down pot at the bottom of the larger pot. Add a couple of larger rocks around the bottom of the pot and find a secure spot for the pump to rest.
Stack the smaller pot on the brick and decide where the hole for the tubing needs to be. Drill a small hole just large enough for the tubing. (You might want to move the pot to it’s final location, it will get heavy with all the rocks.)
Connect the tubing to the pump and slide it through the hole you drilled in the smaller pot.
Add a few large rocks to hold the tubing in place. (This may take two people) Make sure the end of the tube will sit right below the waterline. (Keep it long, so you can trim it later.)Seal the drilled holes with the silicone caulk. Follow the package instructions on how long to wait before adding water. (I think we waited for 24 to 48 hours.)Once the silicone is dry, add water to test the silicone seals and add more silicone if you have any leaks. (Ours has been going strong for a year.)

Step 3: Making it pretty:
Add more of the bigger rocks as needed.
Add pea gravel/small decorative rocks to the pots as needed, just to a couple of inches below the rim. This will also help keep the tube in place.
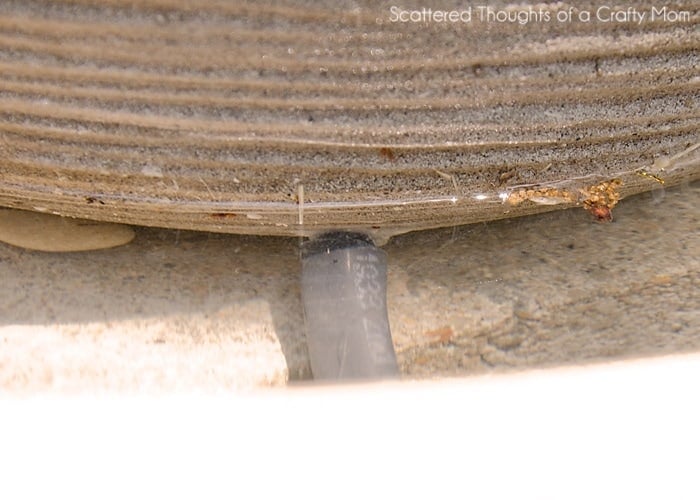
You can also add the pea gravel/small river rock to the larger pot, but do not cover the pump. You can almost see how we used a larger rock to keep the space around the pump clear in this picture:

Now, if after reading all that, it just sounds too hard- Amazon has some nice ready-to-go ones for a few more $$.
Fill with water and turn on the pump. Trim the tube a tiny bit at a time to get the proper bubbling- be careful not to trim too much, because you have siliconed the tube in at the bottom. Enjoy your Bubble Fountain!
Leave me a comment if you have any additional questions about this project.

Looking for more budget-friendly DIY outdoor projects? Be sure to check these out:
 Make a Wood and Rope Tree Swing
 No Sew Outdoor Patio Curtains (from drop cloths)


Don't miss any more posts!


I've been wanting to put a fountain in my garden – this would be perfect! Thank you for the inspiration.
Hugs, Smiles & Blessings,
Robin
Fluster Buster
Creativity Inspired by Frustration
Beautiful!! Thank you for sharing on Sharing Saturday!
How do you keep sludge or slime from occurring? I live in GA, home of red algae, LOL. I thought of adding vinegar, Epsom salts, baking soda or bleach. I know bleach deteriorates in the sun so I am curious what you recommend. Thanks for your advice.
We added a little bleach every so often, and the circulation really helps.
~Jamie
Good to know, thanks!!!
I live in Austin, Tx and we get the slime build up, too. Hydrogen peroxide works perfectly for removing the slime and is bird friendly unlike bleach. You can put a cup or the bottle – it doesn't matter. It will last about three months.
Thanks for the tip! Last time I had to buy hydrogen peroxide, I had to buy a huge bottle, so I will definitely use it next. (Lately we've been using chlorine tablets meant for a pool.)
~Jamie
Dollar Tree has a big bottle for a buck.
I love, love, love this!
Wow this is genius!! I think I'm going to make one for my backyard. Totally pinned!! @decoratemediana
What a fabulous idea! I never would have thought of making my own fountain, or even known where to start. Thanks for linking up at Whatever Goes Wednesday. I just wanted to let you know that your fountain was the most viewed link at the party last week, so it will be featured at the party tomorrow. We hope you'll stop by to check it out and join the party again! 🙂
CONGRATS!!
You have been featured at The DIY Dreamer… From Dream To Reality! Come on over and grab your featured button, you deserve it 🙂
http://thediydreamer.com/from-dream-to-reality/features-63/
Don't forget to come over this evening to link up again 🙂
Really gorgeous, well done! I love water features
Hi Shirlee,
We spent about $15 on the pump (depending what you get, you could spend 10 to $40 here. I just looked pumps up on amazon, they have some for around $15 and I see lowes has one for around $20.)
$8 on the tubing. (though we used white tubing and all I see online at lowes is black.)
Hubby already had the Electrical supplies for the splice and silicone sealer ($4).
We bought the pots for around $15 and $3ish last year at lowes.
The large rocks were free and the small pond pebbles were about $4.
So, if you don't already have any of these supplies expect to spend about $75 (or more if you buy fancy pots.)
The water is spilling over the top pot into the bottom pot and is being recirculated by the pump. It is very hard to photograph water moving in the bright sunshine.
The side of the bottom pot appears wet in the top photo because I had just added more water and accidentally overflowed the pot…
~Jamie
That is supposed to read $30ish on the pot not $3ish…
~Jamie
Do you have an estimate of how much you think this would cost? Also, it doesn't look like the water is bubbling over into the larger pot below. Is it doing that?
I am making this with 2 plastic pots we just bought from Lowes ($18 & $8)… pump, gravel, etc… and I spent $90.00 CDN, taxes included. We had NO supplies. Had to buy the silicon, a waste bucket from the dollar store to support the upper planter, marbles for sparkle, pea gravel, etc. Hopefully it all turns out.
Out of curiosity, What drill bit did you use?
Love this and have a place for it already! <3
-Melissa
Good luck Tyler, hope it turns out for you. Just an fyi: my hubby added a more powerful pump this summer (the bubble effect is more pronounced) When he re-sealed the hole, he tested it out – it was leaking a bit and added more sealer. So just be aware you might need to seal the hole more than once.
~Jamie
This is gorgeous! I've been thinking of putting something like this in our garden – thanks for the tutorial 🙂
I grew up in NW Austin, but had never heard of the water gardens shop – I'll have to check it out next time I'm home just to browse!
I have always wanted to add a water feature to our garden, but they are so dang expensive!! I'm not comfortable with splicing wires, but I bet my hubby could do that part for me! Your diagram gives a perfect idea of how to put this together 🙂
XO,
Christy@confessionsofaserialdiyer.com
Beautiful! I love fountains. PINNING! Please share this at What to do Weekends Party also… Following on Bloglovin. Linda
http://www.craftsalamode.com/2013/04/what-to-do-weekends-16.html
Oooh! I love this! We have a pond on one side of the house, but I wanted another one next our covered porch (love the sound of the water). Hubby groaned at the prospect of digging, but this looks like a super easy compromise-with directions! Thanks!
Terrific DIY tutorial! You make it sound pretty simple! By the way does it produce bubbles? (dumb question I'm sure)
Good question, it doesn't make actual bubbles, but the water kind of "bubbles up" to the surface and makes a pretty bubbly sound. How high your water bubbles up will depend on the strength of the pump and the placement of the tubing.
~Jamie
This is so cool and perfect for the garden or outdoor space. Very nice! Come on over and share this with The CSI Project this week. The challenge is Gardens and Flowers. Any flowers, created or planted. Link up will continue through Friday. Come on over!
http://www.thecsiproject.com
I want to make one too, but I'm afraid I don't have a good place for it.
We made a fountain several years ago but we didn't research it at all and it didn't work how we wanted. I have pinned this so we can do it again but YOUR way!
My husband and I were talking about putting one of these on the back patio but didn't want to shell out a fortune for one. Great DIY tutorial!
Oh I so want to make this! Thank you for the tutorial!