Bow Back Knit Top for Girls – Free pattern and tutorial
Disclosure: This post may contain affiliate links. As an Amazon Associate, I earn from qualifying purchases.
This Bow-Back Knit Top for Girls is a free PDF pattern and sewing tutorial. It is a simple T-shirt top with a small keyhole opening on the back and a ribbon tie.
It’s a perfect sewing pattern for those that are learning to sew with knits. Be sure to grab your copy today!

💌 Save this article
Free Bow Back Knit Top Sewing Pattern
I’ve got a sweet new girl’s top in a free pdf pattern to share today!
The top is a simple, t-shirt-style top that is designed to hit right below the hip and features a small keyhole opening with a ribbon tie. It’s a perfect sewing pattern for those that are learning to sew with knits.
I started this pattern earlier in the summer when the weather was still very warm. The short-sleeve style was perfect for the warm spring and summer days.
We recently had a cold front that cooled us off, and now I am picturing a long-sleeve version of this top in a black and grey leopard print sweater knit from my stash and a gorgeous silver-gray satin ribbon for the tie.
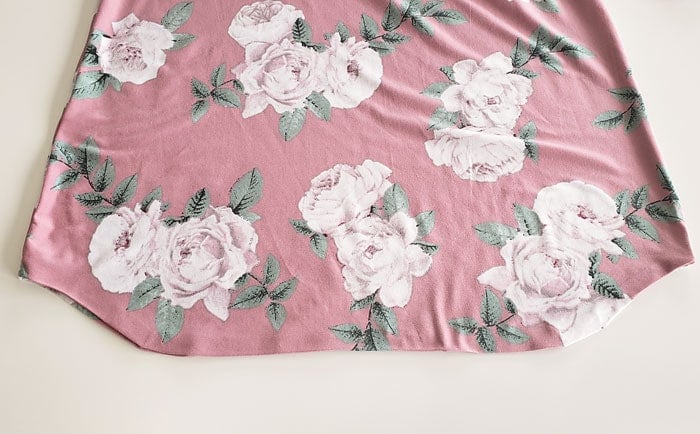
The pink double-brushed poly floral fabric used in today’s version came from Hobby Lobby. It is so soft (almost like velvet, but not) and stretchy. The fabric has a nice light (but not too light,) weight to it. I tried to find a link for the fabric online, but it must not be available.

Pattern Details
The Bow Back Top Pattern is a slightly longer-length top. (I aimed for it to hit at the bottom of the hip so it could be worn to school with leggings—although if your dress code is strict about what kind of tops can be worn with leggings, you may want to lengthen it a bit more. I recommend comparing the pattern with a top you already know works.)
The top is designed for knit fabric and is available in girls’ sizes 3 to 16.
The Top Features:
- Both long and short sleeves pattern pieces.
- Curved bottom hem.

- A keyhole back with a ribbon bow tie and the neckline is made using a facing instead of binding.


So cute!

Tie options
The ribbon tie closure is a sweet little detail that gives this top just a little something extra. So many options of lace or trims can be used for the tie, and depending on the fabric, your look can be casual or fancy. (How gorgeous would it be in an ivory sweater knit and coordinating satin ribbon for the holidays?)

For the tie, a 1 to 1.5-inch rayon, lace, or satin ribbon would work great. Lightweight chiffon would work nicely too.
To use chiffon, cut the strip 3 inches wide and sew the edges together to make a tie. The rayon ribbon I used in this pink floral version is from hobby lobby.
I tested the ribbon out first before using it on the top. I heat-sealed the edges (you could just fold and sew if needed.) and ran the ribbon through the wash on a gentle cycle. It held up well. (The photo below, on the right, is the ribbon after it came through the wash and had been ironed.)

In my first version of this top, I tried a lightweight knit to make the tie but felt it was a bit too heavy and made the back droopy, so I definitely recommend using ribbon. (This version was also made with a neck binding instead of facing, which I did not care for as much.)

Another fun option for this top would be to add a bit of lace around the bottom hem of the top. (I actually planned to do this but didn’t purchase enough lace.)

It would have been cute, right?

Pattern Skill Level:
Beginner/Intermediate
The tutorial instructions include using iron-on interfacing on the facing pieces and instructions for understitching the facing. (I often skip these steps but wanted to include them in the tutorial.)
Fit Chart:

Products used and recommended in this post:
- Recommended Sewing Machine: SINGER 9960 Quantum Stylist (600-Stitch Machine with Extension Table, Bonus Accessories and Hard Cover)
- Recommended Serger: Brother 1034D 3 or 4 Thread Serger or you can just use Pinking Shears
- Rotary Cutter
- I love my large ruler and large cutting mat, but you may prefer to start off with a smaller Cutting set
- Dritz Dual Purpose Marking Pen and Fray Check
- Wonder clips (I didn’t use these in the post, but they are just awesome!
- Ball Point/stretch needles
- Ball point/stretch double needle
- Singer walking foot or universal walking foot
- Wash away hem tape
- iron-on interfacing
- Knit fabric suppliers: Funkalicous Fabrics and Fabric.com
Tips for sewing with knits:
- Use a ballpoint/stretch needle
- Sew seams with either a serger, stretch stitch, narrow zig zag or a straight stitch with a longer stitch length and a slightly loosened tension. (Make a couple of practice stitches on your fabric to see what works best.) I also like to use this “lightning bolt” stretch stitch on seams that need strength but a little give. (For my project I used a combination of straight stitch and serger for seams and zig zag on the hems.)
- If you find your fabric keeps getting pulled inside the needle plate, place a small piece of tissue underneath the fabric so the feed dogs have something to grip.
If you don’t have a cover stitch machine for your knit hems, you have a couple of options…
- Leave it unhemmed. Some knits are thick and sturdy enough that they look fine.
- Use a zig-zag stitch. I use the zig-zag frequently and if you can get a perfect thread match on a solid fabric, the stitches just disappear.
- Use lots of spray starch on the hem, along with a twin needle meant for knits, and a walking foot. If you go slow, you can get a pretty hem on a fabric that is not super stretchy.
- If you are working with a fabric that is super-stretchy, my secret weapon for great hems is wash-away hem tape!
Materials Needed to Make the Bow Back Top:
- Stretchy knit fabric, 60 inches wide (1.5 yards of 60-inch fabric for size 16)
- optional: iron-on interfacing
- Pattern
- ribbon, lace, chiffon, or other lightweight fabric for the bow
- ball point/stretch needle
- iron
- basic sewing supplies
Optional:
Fabric Layout Guide:

Ready to sew a bow-back top for your missy?
How do I get the Bow Back Top Pattern?
To receive the free pattern, visit the pattern page in my shop HERE. <<== click that link. (My website has been acting funny lately; if you get a page not found, try right-clicking on the link, copying it, and pasting it into the URL bar on a new page.
Add the pattern to your cart and navigate through the checkout process. (Don’t worry—this pattern is free, and no payment info is asked for—it takes about 20 seconds.) After completing the checkout process, you will see a button prompting you to save the pattern.
Bow Back Top Sewing Instructions:
- Seam allowances are 1/4 inch unless otherwise specified.
- All measurements are in inches.
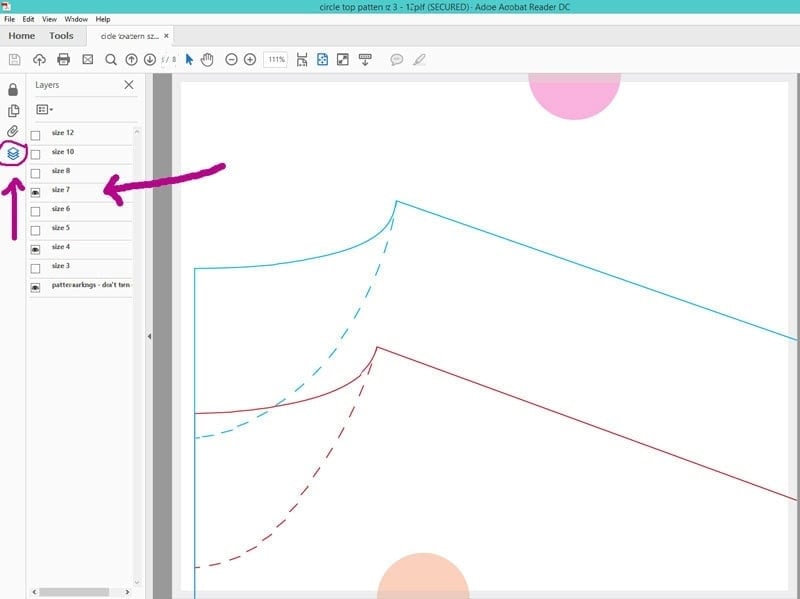
Step 1: Printing and assembling the pattern.
Save the pattern to your pc, and open it with Adobe Acrobat Reader (not the reader in Google Docs.) Select your pattern size, choose auto landscape/portrait, the scale at 100%, or the actual size and print.
I recommend first printing page 1 only and checking that the one-inch square is printed at one inch. Once you have confirmed your printer settings, you can print the entire pattern.

Cut out each block around the outer gray edge and align the gray boxes, edge to edge (don’t overlap), matching up colored circles.
Tape the pattern together and cut it out.
FYI, there’s a new printing option for you! You can now print only the size needed. (This pattern only, I’ll slowly go back and start updating the older patterns.) This function is super handy and makes it much less confusing when cutting the pattern; plus I love that it enables me to print in black and white. (Color ink can be pricey!)
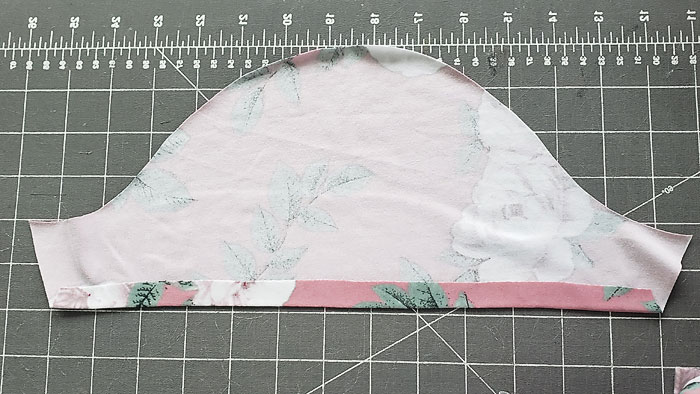
Step 2: Cut out pattern pieces.
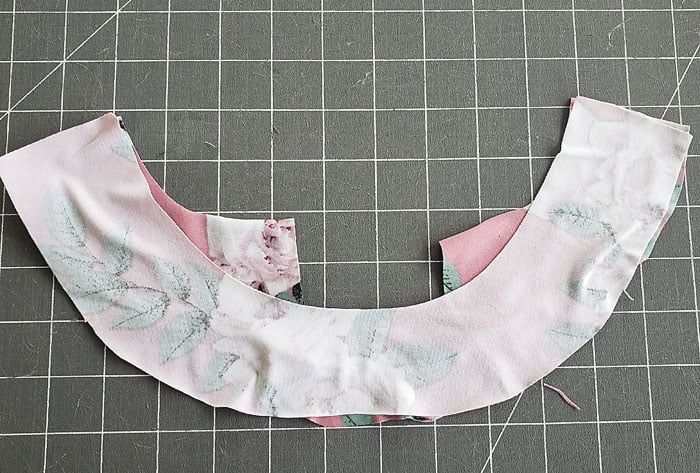
Line the bodice and sleeve patterns up on the fold, with stretch going side to side, and cut out one front bodice, one back bodice, and 2 sleeves.

If you choose to add the iron-on interfacing to the front and back neckline facing pieces, it is SO MUCH EASIER to iron the fusible interfacing to the fabric first and then cut the neckline facing pieces out. You will waste a bit of interfacing, but it is worth it in time and frustration. (I did not do this on my test piece, and getting the fusible interfacing and fabric neckline facing pieces to line up was a major pain!)
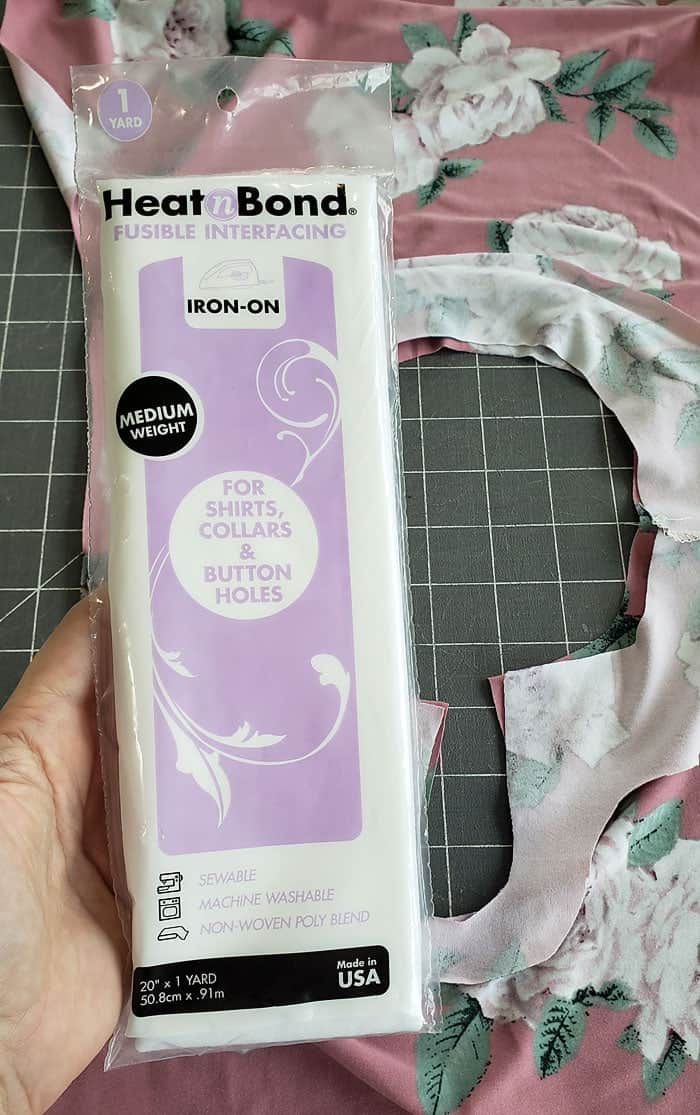
Line the facing pieces up on the fold (with stretch going side to side) and cut. Don’t forget; I recommend ironing the interfacing to the facing fabric FIRST, then cutting the pattern pieces out. It is ok if you don’t; you will just need to use the facing pattern pieces and cut two facing pieces from the fusible interfacing, line them up, and iron them together.

Cut 2 strips of your ribbon 38.5 inches each.
So you will have 2 sleeves, front and back bodice, a front and back neck facing, and whatever you choose for the bow. (Ignore the pink lace shown in the photo, I intended to add that to the bottom of the hem but did not have enough.)

Step 3: Assembling the bodice.
Line up the front and back bodice and sew them together at the shoulder seams.

Line up the front and back neck facings at the shoulder seams and sew together. If using fusible interfacing, it should already be fused to the fabric.
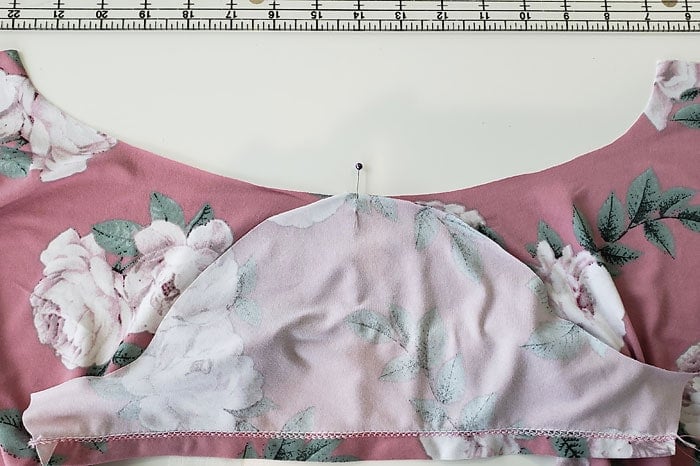
Line up the neckline of the facing and the bodice, right sides together.
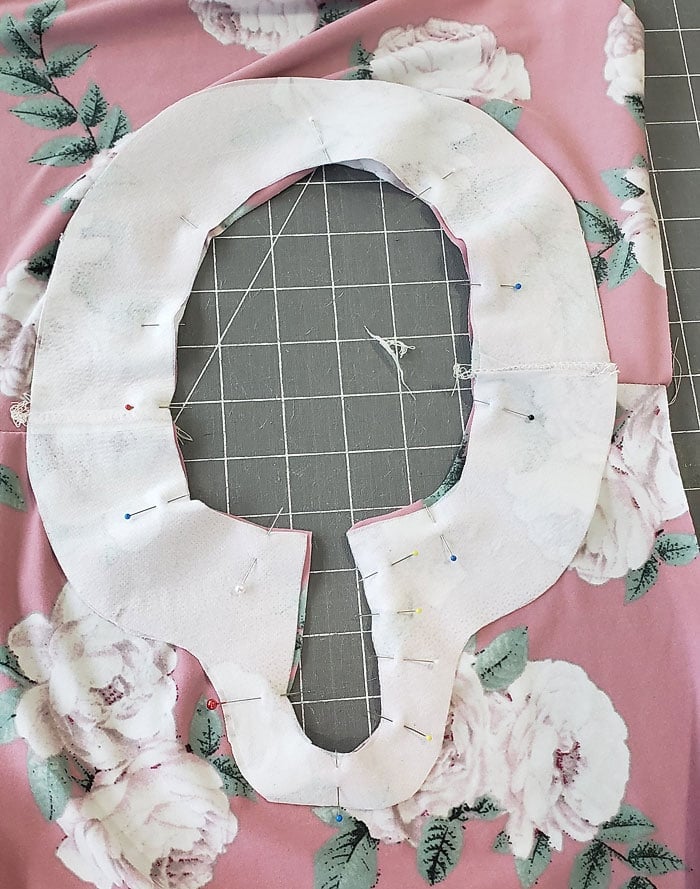
Insert the ribbon strips in between the bodice and the facing piece. (as shown below) Pin in place.
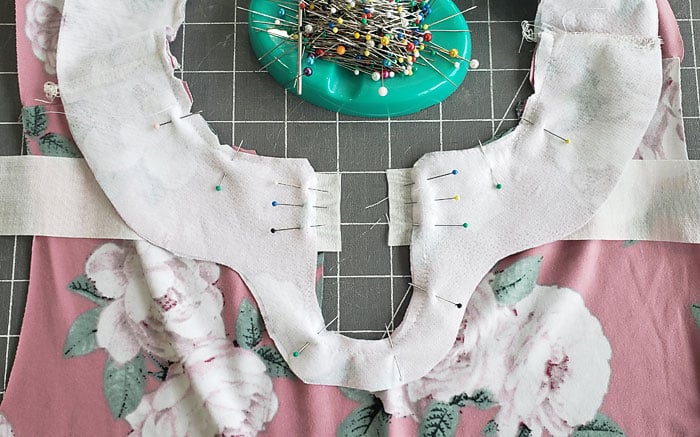
Carefully sew along the neckline using a 1/4 in the seam allowance. Taking care not to catch the ribbon in the neckline seam.
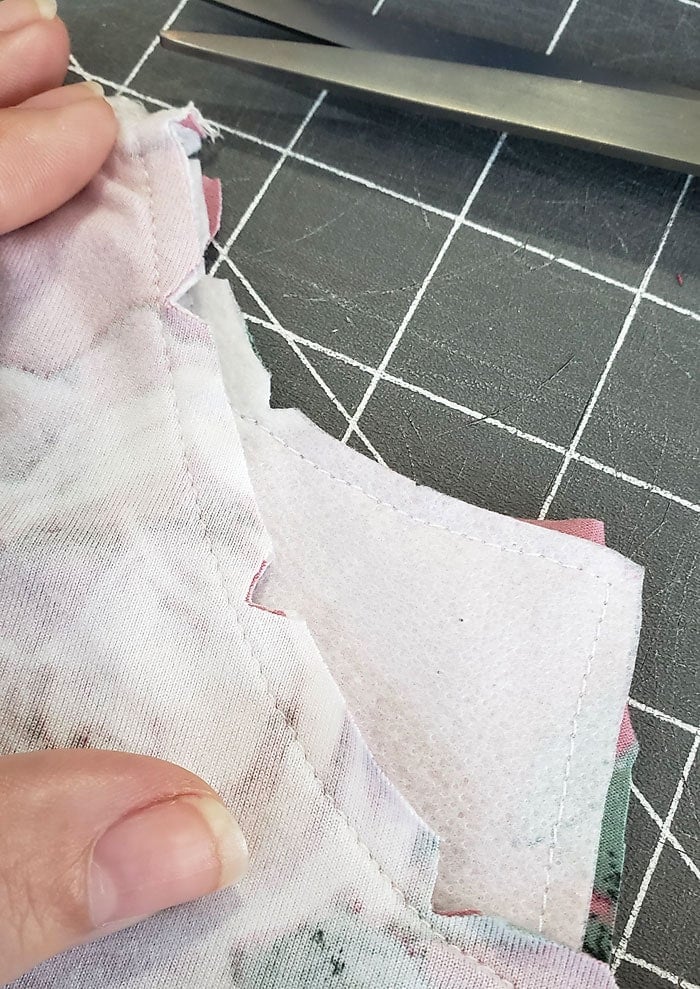
Press the seam allowance toward the facing.
Use scissors to clip the corners and notch the curves, taking care not to cut into the seam line.
Step 4.: Optional Understitching Step.
Understitching is not a step I typically do as I usually topstitch around my facings for stability. But if you want a seamless neckline, you may wish to take this additional step and understitch the facing, as it will help keep the seam of the neckline from rolling/being visible to the outside.
To understitch around the facing, simply sew a line of stitching on the facing side, right along the 1ist seam.
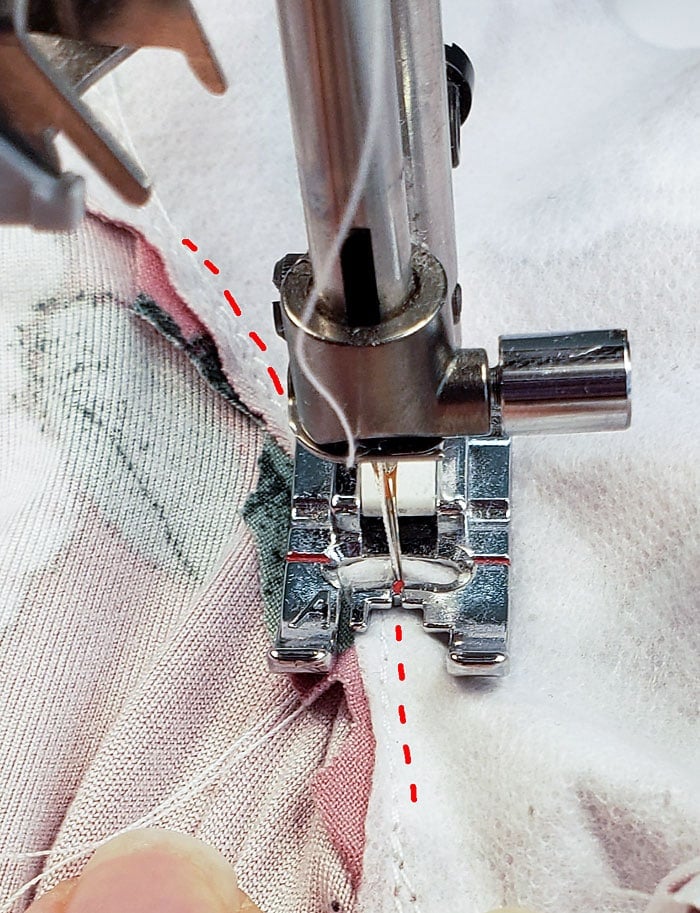
When you get to the corner, just go slow and stay as close as you can to the original stitches. Also, take care not to catch the ribbon in your stitches.
In my corner example photo below, the original stitches are in black and my stay stitches are in red.

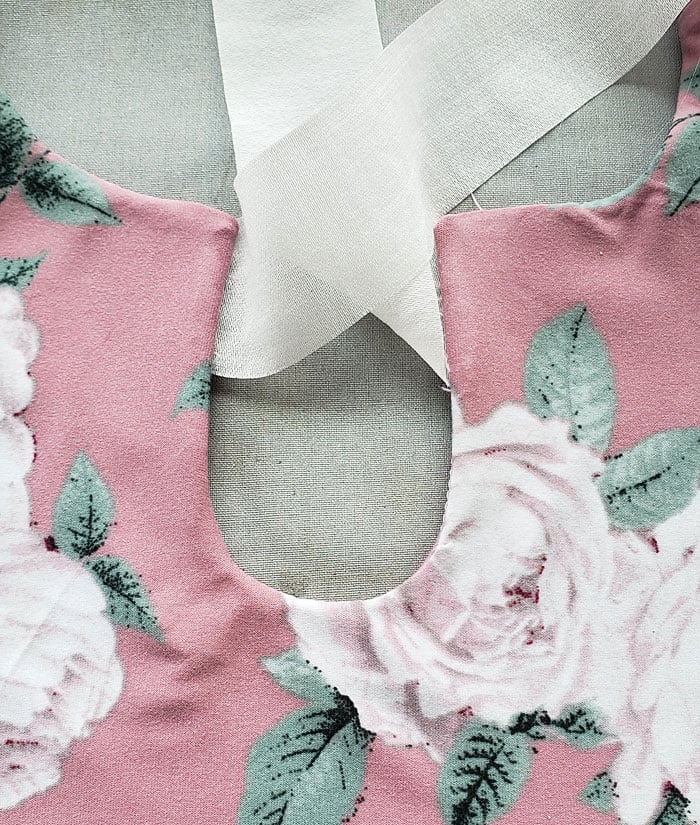
Flip the bodice right sides out and give everything a good press.
Step 5: Adding the Sleeves.
Hem the sleeves.
If you don’t have a cover stitch machine, I recommend the wash-away hem tape for perfect knit hems.
Line up the center point of the sleeve to the shoulder seam, right sides together.
Ease, pin, and sew the sleeve in place.
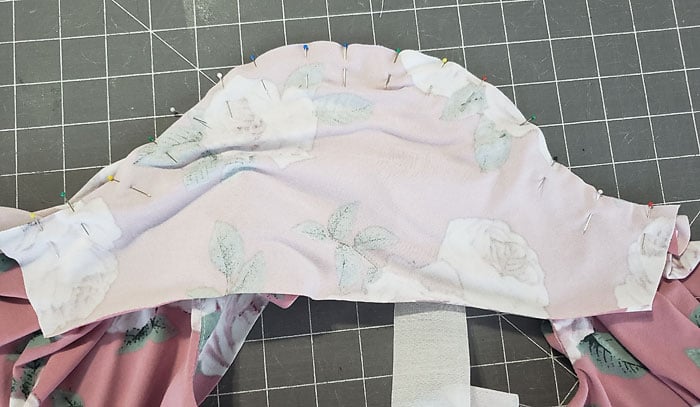
Repeat for the other sleeve.
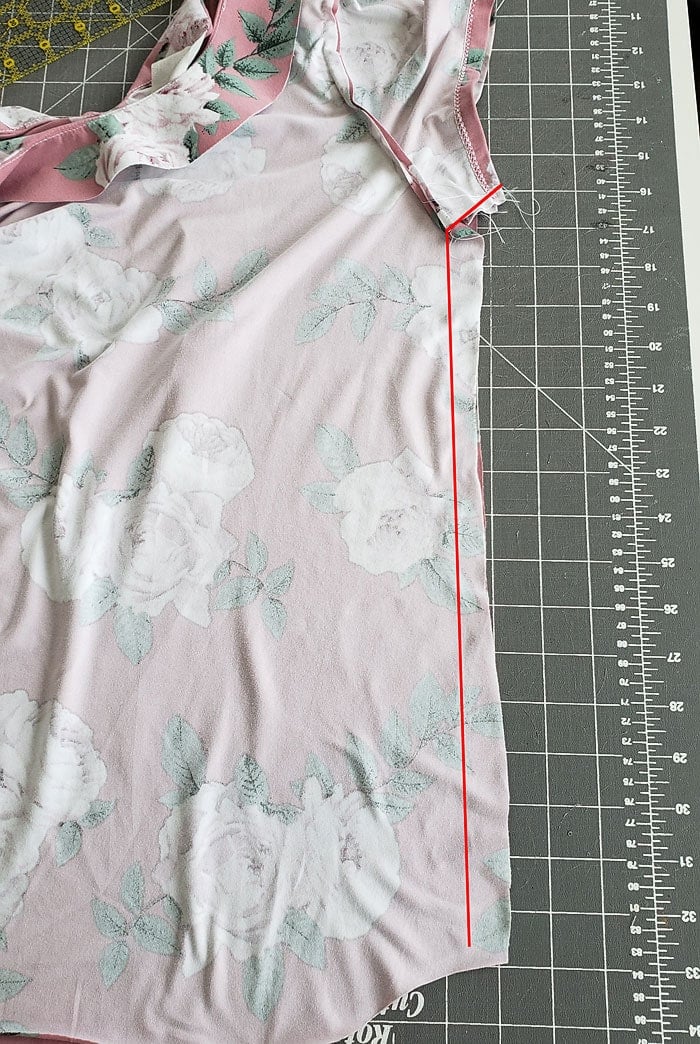
Line up the side and sleeve seams and sew them together.
If desired, hem the bottom of the shirt, and you are finished!
As always, if you end up sewing one of these tops, please share a photo in my Facebook group or tag me on Instagram using #scatteredmompatterns
Don't miss any more posts!


Fri 8/15/2025 on my mac that I use to print patterns often (without test block measurement issues) your 1 inch test block on the bow back shirt pattern is measuring 1 1/8 inch at 100%. Why? Have you heard this before? How do I fix? If I print the pattern with test block at 1 1/8″ will pattern work, if I grade for child’s size? Please respond. thank you….
Make sure you are using the adobe reader on a computer and choose “actual size” when printing.
That knit top pattern is just lovely. It looks so vintage. Can’t wait to try it. Thank you.
Dear Jamie, thanks for one pattern with a neck facing, for those of us not great at bindings.
Regards, Margaret
I taught my 12 yr. old granddaughter to sew this top today. She did great! When I left she was doing the hem. i hope to get a picture of the finished top in a day or two.
Thank you for sharing this pattern. I would love to see this in women’s sizes.
Thank you so much for this pattern. I’m going to try it!
I love this! I like simple design with a small detail like this top, thank you for the pattern!
Thanks for sharing, I love your idea! This lovely bow top is definitely a must-try!
Love this pattern! I combined the bow back t-shirt with the bell sleeve dress pattern to make Christmas dresses for my granddaughters.
Love this! I’d like to see it in women’s sizes, too!
Thank You! This top is so pretty!
Thank you for this pattern. Scared of knits, but love this pattern and going to Hobby Lobby today!