DIY Weathered Wood Photo Backdrop
Disclosure: This post may contain affiliate links. As an Amazon Associate, I earn from qualifying purchases.


One of my blog goals this summer is to update a some of my recipe photos. I have a few from the very beginning that were snapped with my phone or just not very appetizing looking. I may even update some that were taken this past winter in my kitchen. (Most of those photos aren’t bad, just a little yellow from my kitchen lights. We’ll see if I get to those, it can be hard to squeeze in picture taking with 2 hungry little monsters sweeties hanging from my apron strings…)
I am always on the look out for pretty dishes, tablecloths, place mats or backdrops I can use to dress up my food photos. I’ve had a weathered wood backdrop on my to do list for a while, but I kept putting off the trip to Lowes for supplies.
I finally got it done and love it!
We do have a garage full of supplies and tools, but I wanted this project to be simple. (And it was… why drag out a bunch of tools and get hot and sweaty when you can work in the AC and use a little glue…) Here is how I made it:
Supplies needed for a weathered wood photo backdrop:
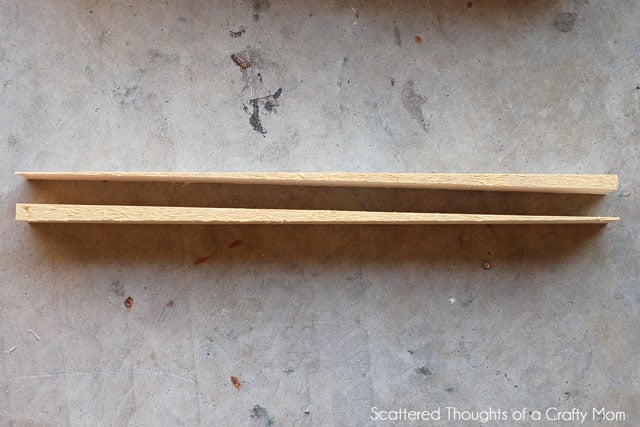
- Shims (they come in different sizes, mine were 12 inches long and came in a pack of 42, I bought 2 @ $3.87.)
- Wood for the back supports (I bought 3 1/4X3X2 aspen planks @ $1.24 each.)
- Wood glue (I used Elmer’s wood glue that I already had.)
- Paint (I used paint I had on hand- The blue was a sample I had for my laundry room, leftover white paint and some of my Ralph Lauren tea stained glaze.)
- Clear coat sealer (I used one with a matte finish.)
Instructions:
 |
| Oops, just added a little more gluing than intended to my project… |
Step 1: Glue all your shims together so they make a flat level piece of wood and let dry for about an hour.
Step 2: Line up the support pieces, using the shims as a guide on how far apart to space the supports.
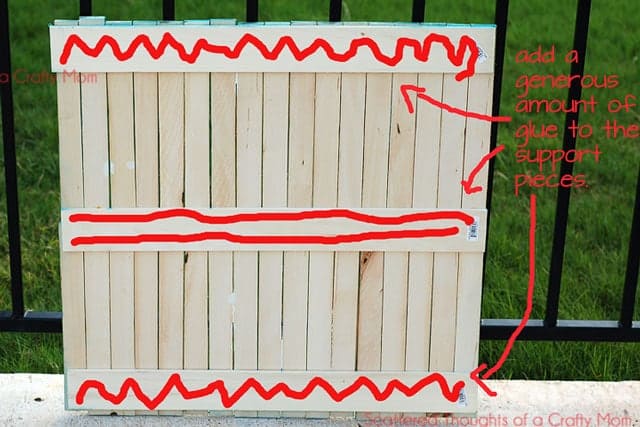
Step 3: Add glue to the support pieces and place the shims. Let dry. (I placed a few heavy objects on top of the drying shims to help make sure they dried securely and flat.)
Step 4: Once the glue is dry, add your paint. To achieve a similar effect as mine, I applied one thick coat of regular blue paint, and let it dry. Then find something to distress the wood. (I could only find was a very heavy chain. It was so heavy, all I could do was drop it a few times on the wood.)
Next , with a wet rag, I rubbed my dark glaze over the entire panel, then rinsed the rag and wiped away most of the color. (You could mix water with a dark color to get the same effect.)
After the glaze dried I did the same thing with white paint- mixed it with water, wiped it on and then wiped the excess off.
After it dried, I finished it off with a quick coat of Valspar matte finish spray sealer.


Isn’t it pretty?

In this picture, I used Photoshop Elements to change the background to a dull yellow. (At the time I looked up this link, Elements was on sale for $63. That is a good price!)

I am thinking about adding some dark stained shim pieces to the back side so I can have 2 looks in one. I need to find some dark water based stain next time I am at the craft store.
If you like this type of project and want to see more, consider following my blog! That way you won’t miss any posts and I would love to have you! You can subscribe using the Google Friend Connect widget, through a reader, or signing up via email. Just click on one of the icons below:


I will be linking up to some of the linky parties listed on this page.
![]()

Love this backdrop! I need to make something like this!
What a great idea! I have been looking for ways to add something "extra" to my photos. Thanks for sharing. 🙂
great tutorial, I'm always looking for new ideas for photo props!
stopping by from CSI. love this project. i had no idea shims were so cheap. at less than .10/lf, i'll be keeping these little guys in mind for future projects.
meegan @ crafylittlebitches
I always admired photos taken with weathered wood as a backdrop. Cute idea and love the color! Stopping by from the CSI project.
This is such a great idea. Maybe I can convince one of the "handy" men in my life to make me one 🙂
I love this!! When I first saw it, I thought it was 2x4s. It's so much easier to make than I first thought. I might just have to make one for myself. I'm your newest follower. =)
this is so great! and sure beats buying scrapbook paper over & over! pinned it to try later 🙂
What a fabulous backdrop! So versatile especially if using Elements! Thanks for the great tutorial and sharing at Mom On Timeout!
Makes the perfect backdrop, I need to make me one too! Thanks for the how-to!
Britta @ TheHandmadeHouse.net
This is such a great idea!