How to Make a Simple No Sew Pillow
Disclosure: This post may contain affiliate links. As an Amazon Associate, I earn from qualifying purchases.


I was browsing the Christmas clearance at T.J. Max the other day and came across this gorgeous table runner. I just love the bunched fabric details, so pretty!


In reality, this table runner is just way to fancy for my table and I started to put it back on the shelf. But as I looked a little closer at the table runner, I discovered the base fabric was double layered! Jackpot! I knew exactly what I wanted to do with it…
Pillows! I wanted to make pillows. And I was going to make the pillows without any sewing!

Here is how I made the easiest no-sew pillows from a table runner.
To do this all you need is:
-a double layer fabric table runner or a double layer placemat (here is my Pillow Placemat tutorial.)
-Pillow stuffing
-Fabric marker
-ruler
-Scissors
-Iron
-Hot glue (if you are afraid of using hot glue, you could also use an iron on adhesive/hem tape.
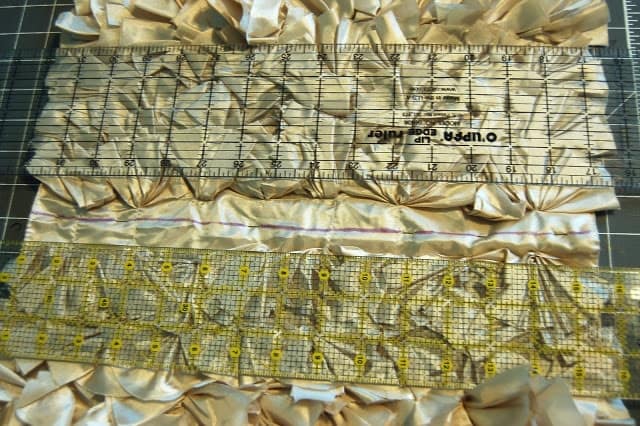
1. Table runners come in all lengths, so the first thing to do is determine how many and what size pillows you want, based on your table runner’s size. My table runner was 15 X 36 inches, so that was just perfect for two rectangle pillows, all I had to do was cut it in half. I could have made my pillows 15 X 15 if I wanted square pillows, I would only have had to do a little more measuring and an additional cut.
2. Based on your desired pillow width, mark where you need to cut with a fabric marker and then cut the fabric. (I marked mine on the front so I wouldn’t cut through any of the ruffles.)
3. Fold the cut edge about 3/8 inch to the inside. Use your iron and press the fold to get a good crease.

4. Go ahead and fill the pillow with the stuffing about 3/4 of the way full. I use this polyester fiberfill from hobby lobby. It is $2.99 and you can use your 40% coupon on it.

5. Next we will seal part of the seam with hot glue or iron on adhesive. I used hot glue, it has held up very well on a couple of my projects, especially on loosely woven fabrics. (If you use the iron on adhesive, just follow the packages directions.) Starting at one edge, apply a generous line of glue on the folded edge. Then squeeze the two hems together. (Be careful, the glue is called “hot” glue for a reason.) It is much easier if you do it one inch at a time. Leave about a 3 inch opening in the center of the hem, so you can finish stuffing the pillow.

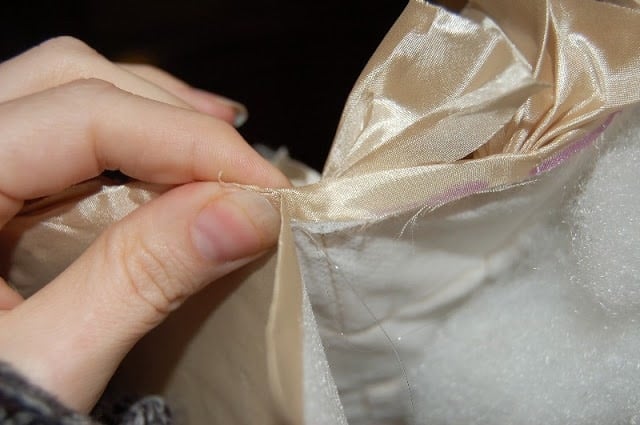
6. Once you have finished stuffing the pillow, finish gluing the seam closed.
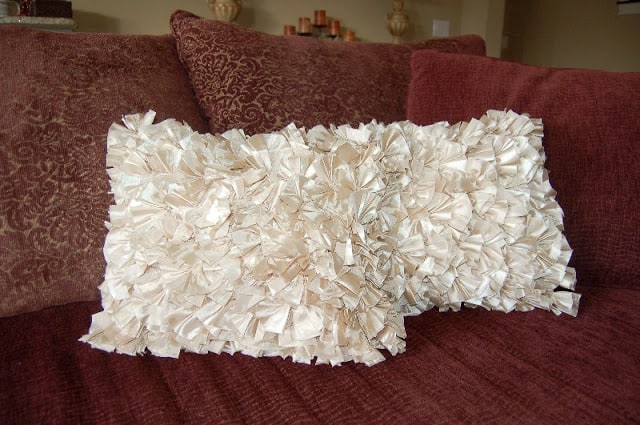
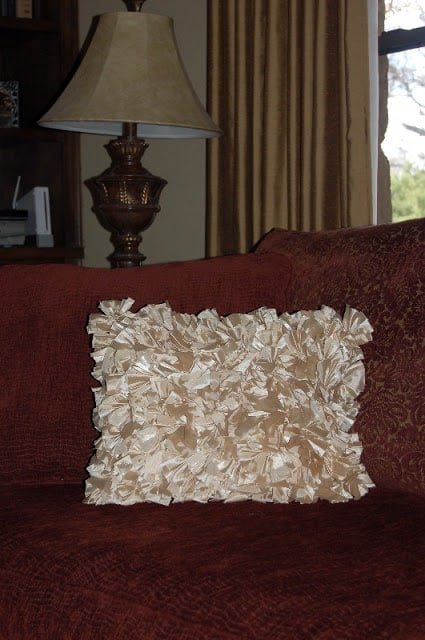
Ta da! You have two new pillows! Of course, you don’t have to use hot glue, these can be sewn just as easily, like I did in this place mat to pillow project. It probably would be quicker to sew than using the hot glue, but this method gives non-sewers a chance to make themselves pretty pillows too.
Looking for other No-Sew projects? Be sure to check these out:
No-Sew Ruffled Tote
No-Sew Pillow Case Dress
No-Sew Patio Curtains
No-Sew Table Runner
No-Sew Fabric Flowers
Don't miss any more posts!


I saw some of those at Homesenese (Canada) and loved them…I didn't think to make them into pillows!!! Great job!
Shannon
Amazing pillows…so cute! Thanks for linking up to "Strut Your Stuff Saturday." We would love to have you back next Saturday to share more of your great ideas. -The Sisters
Just a test…
Testing back…
Absolutely LOVE these! I have nearly identical ones in blue from Target that I'm sure were not as inexpensive as yours!! Awesome!
Amanda
This is brilliant! And what a great find!
I'm happy to be your newest follower, and I'm hoping you'll stop by my BRAND NEW blog and follow me back!!
Thanks a million 🙂
Love how these turned out!
Looking to re-do my bedroom decor and will eventually want new pillows. I love the texture of these and love that they were made from a table runner. Now I'll be on the lookout for fun table runners that maybe I could make into pillows too 🙂 Thanks for posting this over on Blue Cricket!
So (sew) cute! Just spotted this at ItsOverFlowing linky party and THEN again, over on Aimee's FB page!
Very darling! You have a good eye!
Smiles, Suzanne in NW IL
I shared this on It's Overflowing's FB Page and am also your newest follower! Told you I love this idea! On my way out the door to look for a table runner!!! Thanks for linking up to my party!
Excited to be your newest follower!!!
XO, Aimee
I love this project! So glad I found you over at Junk in their trunk!
I love this idea so much!!! I'd love to have you link it to my party that just started! Overflowing with Creativity!!! Thanks LOTS!
XO, Aimee
Very creative!
~Mrs. Delightful
ourdelightfulhome.blogspot.com
These are so great! I've featured them at Grits and Giggles. Come grab a featured button!
http://www.gritsandgiggles.blogspot.com/2012/01/what-i-love-wednesday.html
Those pillows look great. Such a creative use for the runner. Thanks for sharing at DIYbyDesign.
Ha Ha! I love it! Great way to make those pillows – and with such fabulous fabric too! Great find!
I would love if you came over and linked this project to my weekly Round Tuit party at:
http://jembellish.blogspot.com/
Have a great week!
Jill @ Creating my way to Success
I just love the way these turned out! I would have never guessed that you didn't go out and buy them – nor that they're no sewing involved. I'm always scared to try things like this BC of the sewing!
Super pretty ruffly pillows! Love em'!
I love no sew projects and these turned out so pretty!
YOU'RE A GENIUS!!!!!!!!!!! Love it!!!!!!!
Check out my blog too:
http://thediydreamer.blogspot.com/
Love this!!!! Found this on Take a Look Tuesday Linky party and am going to have to try it
Wow, those look terrific – love the ruffles!! (Sorry about the deleted comment – LOL – I hit "publish" too soon!)