Girl’s Twirly T-Shirt Dress Pattern and Tutorial (pattern sizes 4 to 8)
Disclosure: This post may contain affiliate links. As an Amazon Associate, I earn from qualifying purchases.
Do you remember the T-shirt dress I’d made for the Holiday Sewing blog tour in December? I’ve been very quietly working behind the scenes and have finally made another T-Shirt Dress. This time, I documented my steps and put together a tutorial and printable pdf pattern to share. Hope you like this Twirly T-shirt Dress Pattern!

(Looking for more free patterns girls? Be sure to check out my free patterns and tutorials page here.)
Twirly T-Shirt Dress
Pin the pattern here:

The pattern comes in 5 sizes: girls, size 4 to 8.
The top half is designed to be sewn with a stretchy knit fabric and the bottom with a fun contrasting woven fabric. (You could use a knit on the skirt, but the knit fabric might not give as much fullness, so I guess use whatever fabric based on the look you are going for…)

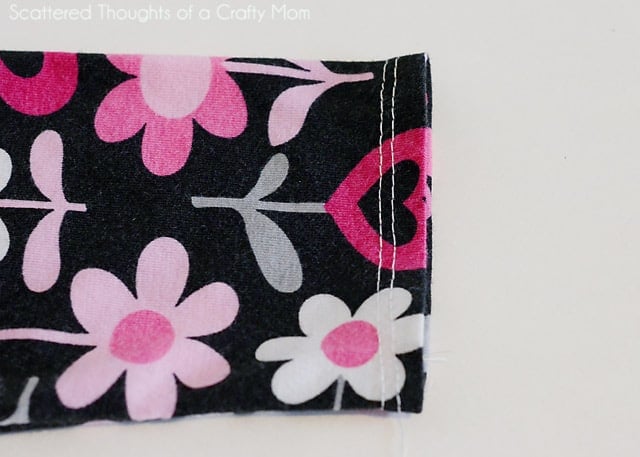
I used a knit fabric from Funkalicious Fabrics and the Chevron was a special deal from Pick your Plum.
It’s a perfect pattern for transitional weather. Add tights and a sweater for cold days or as is when the weather is mild.

Additional pattern info/sewing tips:
- When sewing with knits, use a ballpoint/stretch needle and increase your stitch length by at least one setting. (For my machine 2.5 is normal and I switch it to 3.)
- A walking foot helps to keep the fabric stretching to a minimum. (I have another great knit top tutorial w/ some great tips for sewing w/ knits here: Knit Tunic Top.)
- The pattern uses a 1/4 inch seam allowance unless otherwise noted. (You’ll use a 1/2 inch allowance when attaching the skirt to the bodice.)
Fit Chart:
- Size Height Weight
- 4: 39 inches 36
- 5: 42 inches 42
- 6: 47 inches 48
- 7: 51 inches 60
- 8: 53 inches 66
Twirly T-Shirt Dress Tutorial w/ printable pattern
Materials Needed:
- 1/2 yard of 54+ inch wide knit fabric for the top/sleeves
- up to 1 1/4 yard fabric for the skirt
- 1/3 to 1/2 yard fabric for belt (options discussed below)
- ball point needle/regular sewing needle
- Twirly T-shirt Dress pattern (click the link to access the file)
- iron
- optional: spray starch, double stretch needle, walking foot
- basic sewing supplies
Step 1: Assemble pattern and cut out main fabric pieces.
Save the pattern here and save it to your pc. Open with adobe acrobat reader and print from there. Choose auto landscape/portrait and print actual size.
- Print the bodice piece twice. (one for front and one for back.)
- Assemble pattern by lining up edges of the grey lines and matching up blue dots/letters.
- Line up pattern pieces on the fold of the fabric and cut a front bodice, back bodice, 2 sleeves and neck binding. Be sure to transfer pattern markings onto the sleeves.
**Important for Neck binding:**
The pattern is based on fabric with a 30% stretch. (Which isn’t that stretchy) If using ribbing, (which usually has a 50 to 75% stretch) subtract .75 inches from the pattern piece. I don’t recommend using fabric w/ less than 30% stretch.)

For the skirt, cut 2 pieces on the fold:
Size 4: length: 16.25, width (on the fold) 18.5 (so you will have 2 pieces 16.25 tall by 37 wide.)
Size 5: length: 17.25, width (on the fold) 18.75
Size 6: length: 18.25, width (on the fold) 19
Size 7: length: 19.25, width (on the fold) 19.25
Size 8: length: 20.25, width (on the fold) 19.5
For the belt:
2 options: Cut 2 pieces of fabric: 35.5 inches wide by 6 inches tall. This uses 1/3 yard of fabric but you will have a seam in the middle of the belt.
or Cut 3 pieces, 25.5 by 6 inches. You won’t have a seam at the center of the belt, but 1/2 yard of fabric is needed.
Step 2: Assembling bodice and attaching sleeves.
Line up the front and back bodice pieces, right sides together. Sew along the shoulder seams, 1/4 inch from edge.

Mark the center top of the sleeve. Sew a basting stitch from pattern mark to pattern mark, 1/4 inch from edge. Don’t back-stitch.

Loosely gather the top of the sleeve. Leave the threads loose so you can adjust gathers when pinning.

Spread the bodice out flat, right side up. Then, right sides together, line up the center of the sleeve with the shoulder seam and pin the top of the sleeve to the armhole (armscye- I feel funny using the term armscye, I always use “armhole” when talking to myself…)
You may need to loosen or tighten your gathers to make the sleeve the same length as the armscye.
Sew the sleeve to the bodice.

Looks like this when you flip it over. Repeat for the other sleeve.

Line up the side seams of the bodice and sleeve and sew along the edge. (for both sides.) You can remove the gathering stitch from the shoulder seam if it is showing.

To hem the sleeve edge, (I recommend using a double needle and walking foot) fold the edge over 1/2 inch, press using spray starch and sew.
You could also add sleeve binding as I did with my anywhere dress or leave the edge raw.
Step 3: Neck binding.
Fold the neck binding strip in half (as shown below) and press. (Use spray starch if you have it, it makes working with small pieces of knit fabric much easier.)

Open binding strip, fold opposite way, right sides together, and sew along the short edge. Flip fabric right side out and refold it along the iron crease.

Divide the binding into four equal sections and mark with a pin.

Divide the neckline into 4 equal sections and mark with a pin. Keep in mind the shoulders seams may not be at the center, due to the lower front neckline.

Line up the raw edges of the binding and bodice neckline at the pins and pin in place.

Sew along the raw edge, using a scant 1/4 inch seam allowance, stretching the binding as you go, taking care not to stretch the neckline of the bodice.
After the neckline is attached, I always steam the neckline to help it “un-stretch” and look better. If you want to topstitch around this neckline, I recommend using a double-needle, because it might need to stretch a bit.

Step 4: Assembling and attaching the skirt.
Line up the skirt panels right sides together and sew along the sides. If working with cotton or fabric that frays, be sure to finish this seam with pinking shears, serger or zig zag stitch on your sewing machine.

Sew two gathering/basting stitches along the top of the skirt, 1/2 inch from the top. Pull the bobbin threads and gather up the top of the skirt until it is the same width as the bottom of the bodice. (You could get away with just one gathering stitch, but 2 makes it easier to attach to a flimsy knit.)

Right sides together, line up the top of the skirt with the bottom of the bodice, pinning all the way around.

Sew along the gathered edge using a 1/2 inch seam allowance. Be sure to remove the pins as you sew, this will help keep the knit fabric from stretching and/or puckering. Finish this seam with your preferred method.

Hem the bottom of the skirt using a 1/4 inch hem. (Fold over 1/4 inch, press, fold over another 1/4 inch, press again and sew along the edge.)

Step 5: Assembling the belt.

To attach the belt you could sew in place at the side seams or create a belt loop with embroidery thread.
That’s it, I hope I haven’t forgotten anything! Email or Facebook message me if you have any questions, I’ll do my best to help.

Oops, had a little rock in our shoe!

Like this pattern? Be sure to pin it! 
My favorite fabric shop for knits: Funkalicious Fabrics.
- My Sewing Machine: SINGER 9960 Quantum Stylist
- My Serger: Brother 1034D 3 or 4 Thread Serger or you can just use Pinking Shears
- Rotary Cutter
- I love my large ruler and large cutting mat, but you may prefer to start off with a smaller Cutting set
- Dritz Dual Purpose Marking Pen and Fray Check
- Ball Point needles
- Singer walking foot or universal walking foot
- Blind hem foot.
- Wonder clips (I didn’t use these in the post, but they are just awesome!
Don't miss any more posts!


Jamie,
I cannot locate the size chart. I know I have seen it before, but I cannot locate it. I am having difficulty choosing the correct size. Any suggestions?
My Basic Fit Chart: I will get this added to the post.
Fit Chart:
Size Height Weight
4: 39 inches 36
5: 42 inches 42
6: 47 inches 48
7: 51 inches 60
8: 53 inches 66
Could you verify how much fabric is used for the skirt. I am visualizing 77 inches, 19.25”x4? Is that correct?
For the skirt, cut 2 pieces on the fold:
Size 4: length: 16.25, width (on the fold) 18.5 (so you will have 2 pieces 16.25 tall by 37 wide.)
Size 5: length: 17.25, width (on the fold) 18.75
Size 6: length: 18.25, width (on the fold) 19
Size 7: length: 19.25, width (on the fold) 19.25
Size 8: length: 20.25, width (on the fold) 19.5
yes, each side will be almost the width of the fabric. This is a very full skirt. Although you could customize it to whatever you want.
Hi there, can’t seem to call up the skirt pattern portion of this. Found only 5 pages in the link and they were all of the bodice and sleeves. Might you repost a link to just the skirt? Thanks!
There is no pattern, it’s just a rectangle. If you look under step 1, you will find the measurements for cutting. good luck
Very nice dress you made!
What a talented gal you are. Thank you for sharing!
Such a cute dress, I'll guess my pink-loving daughter would have loved those fabrics!
Such a pretty dress!! I've linked to your pattern on Craft Gossip: http://sewing.craftgossip.com/free-pattern-girls-twirly-t-shirt-dress/2014/02/24/
–Anne
What an adorable dress! I give you so much credit for sharing such a detailed tutorial. I'm sure so much work went into it. 🙂 Thank you so much for linking up to Sunday Best!! XOXO
What a great pattern and a super cute dress. You pictures, as always, are stunning.
Jamie thanks so much you offer us so much free stuff from advice to patterns you have a very KIND HEART!!!!! Thanks so very much !!!! Linda Lee
Thank you so much! You are really awesome for sharing your skills the way you do. I really appreciate it!
Very nice dress!Thanks for patern!
Have a great weekend!
So darling! Thank you!