How to Make a Quilt-As-You-Go Pincushion
Disclosure: This post may contain affiliate links. As an Amazon Associate, I earn from qualifying purchases.

This quilt-as-you-go pincushion is a perfectly quick, easy, and beginner-friendly sewing project that is just begging to be made!
This easy tutorial demonstrates the basic quilt-as-you-go method, giving you the cutest scrap-busting project made in under 30 minutes!

💌 Save this article
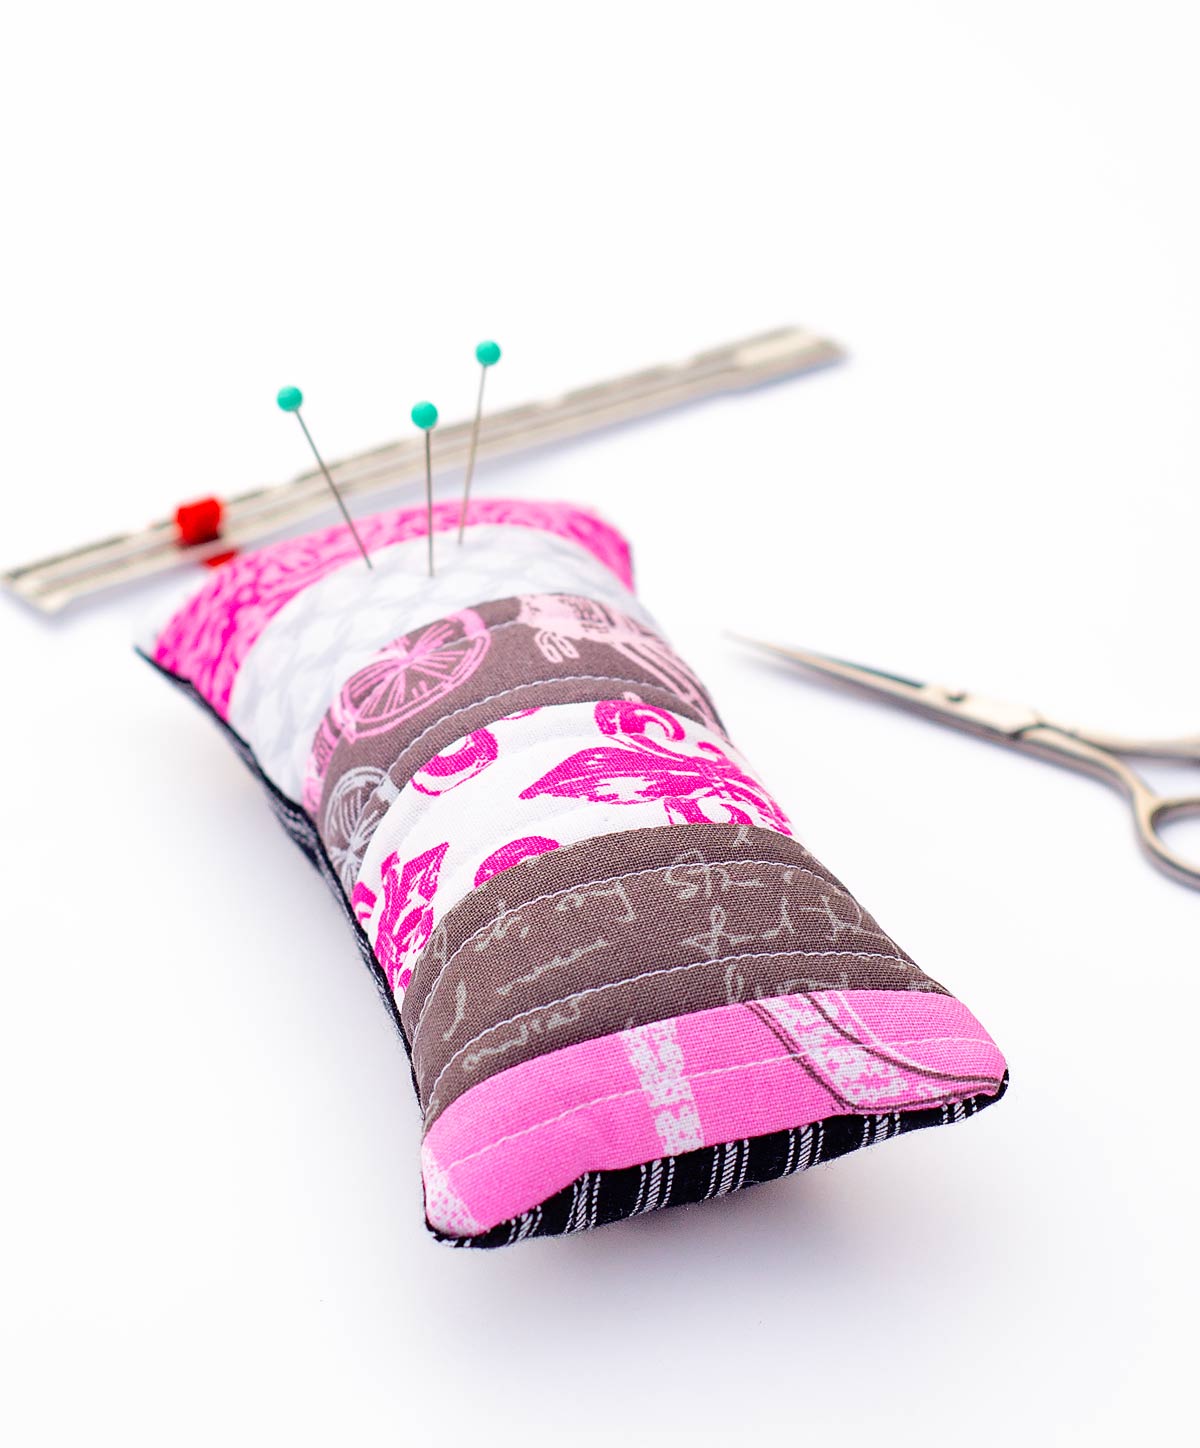
Quilt as you Go Pincushion
Are you missing that dash of color and convenience in your sewing kit? It’s time to fill that gap with a handmade quilt-as-you-go pincushion! This delightful project is ideal for adding some charm to your craft space or gifting to someone who loves sewing.
The combination of our recent dreary weather and a head cold that has been dragging on, my motivation to create has been at an all-time low. The rain just seems to bring the kind of chill that makes you want to burrow under a quilt!
I came across this Valentine’s Day-themed charm pack in my hall closet under a pile of random items. I can’t remember where it came from or how it even ended up in that closet, but truly, nothing spices up a gloomy day quite like a splash of color. I knew I could piece together several strips of this pretty pink fabric into something quick and cute! And what better than a pincushion? A girl can never have too many!
Why you’ll love this Quilt-as-you-go Pincushion

Pin this project for later.
Ready to make the Pincushion?
Grab those fabric scraps, and let’s get started!
Materials needed to get started:
- Colorful fabric scraps – You need about seven strips of fabric that are 1.5 inches by about 4 inches, plus an additional piece of fabric that is about 4 inches by 7.5 inches for the back of the pincushion.
- Batting – The batting is used as a foundation to sew the strips of fabric to. You can also use fleece, felt, or a piece of white fabric that is about 4 inches by 7.5 inches.
- Stuffing – You can use just about anything to stuff your pincushion. Opt for fleece scraps, pillow stuffing, or even ground walnut shells or that satisfyingly firm pincushion feel.
- Basic sewing supplies – Sewing machine, thread, hand sewing needle, and scissors at the ready.
More Quick and Easy Sewing Projects


How to make the Quilt as You Go Pincushion
Step 1: Prep your fabrics.
Choose your fabrics and cut them into 1.5-inch by 4-inch pieces. Lay them out in the desired order.

Step 2: Sew the strips to the batting.
- Right side up, line up the 1st strip of fabric along the edge of the batting.
- Line the 2nd strip of fabric up with the 1st, right side down.
- Sew along the edge of the strip (as shown) with a 1/4-inch seam allowance.
- Fold the 2nd fabric strip over to the right side and finger press flat.


Keep repeating this process until all the strips are sewn to the batting. If desired, you can sew a few more lines of quilting along the fabric.

Step 3: Sewing the pincushion together
Trim the quilted front piece to 3.5 inches by 7 inches.
Cut a 2nd piece of fabric to 3.5 by 7 inches.

Line the quilted front piece up with the back piece, right sides together, and sew all the way around, leaving about a 2-inch opening.
Trim the corners as shown below and flip the pincushion right side out, using a pencil or turning tool to poke out the corners.

Fold the open edges in and press flat.

Step 4: Add the stuffing and sew the opening closed
Add your favorite stuffing and sew the pincushion closed using an invisible stitch.


That’s it- you’re done! How cute is that pincushion? It’s so quick and easy that it kind of makes you want to sew a bunch more!
Let me know if you end up making some of these quilt-as-you-go pincushions!
Don't miss any more posts!


Had fun with this pin cushion. Thanks for the tutorial.
I needed this so badly. Made it and love it! Thanks for the great tutorial!
Yay! If you want to share your finished project, we would love to see in in my private sewing facebook group here: https://www.facebook.com/groups/Scatteredmompatterns/
This is so cute!!! Love this idea!
Jamie, I love this newsletter. Thank you
Eva
Thank you!