Seaside Squares Lap Quilt (square in square quilt block tutorial)
Disclosure: This post may contain affiliate links. As an Amazon Associate, I earn from qualifying purchases.
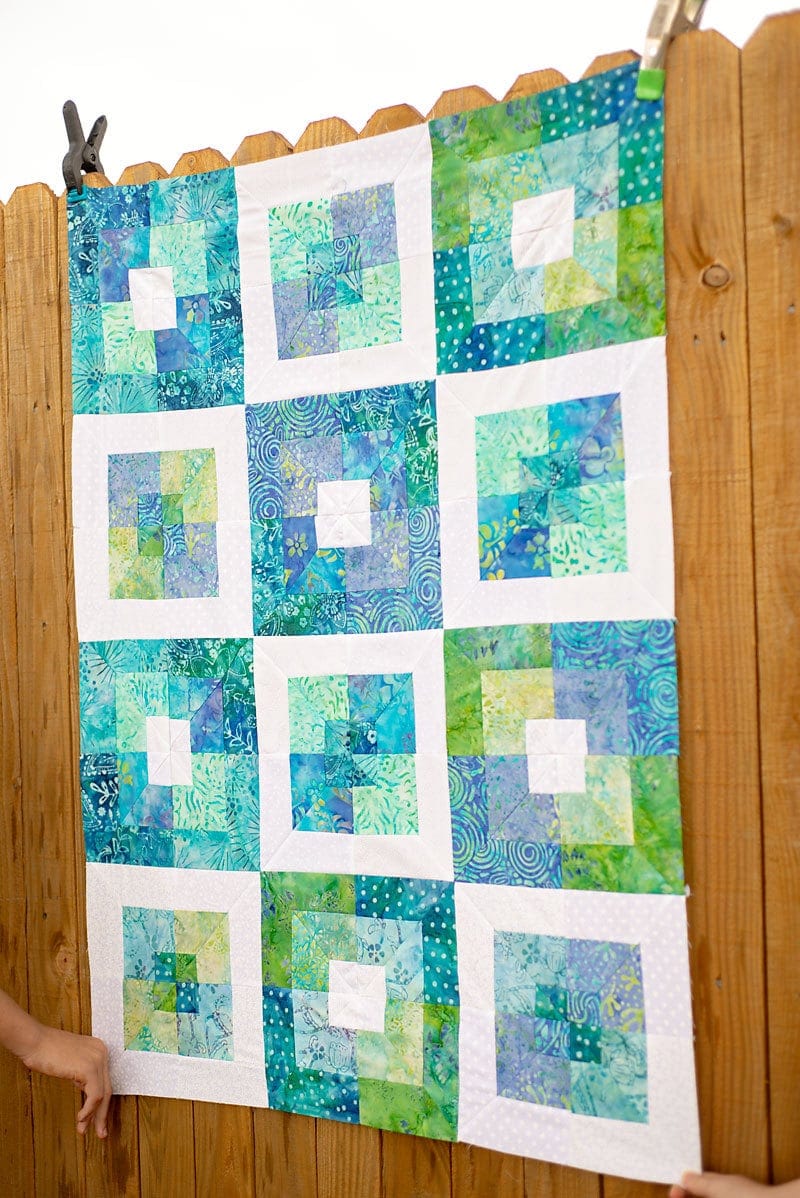
Learn how to make an easy square in square quilt block from a jelly roll with this easy quilt block tutorial! This Seaside Squares quilt pattern is put together completely with square in square quilt blocks.
Even better? I used a precut jellyroll to make the blocks! This project comes together very quickly and is a great next-step project for a beginner quilter.

💌 Save this article
New Quilt Block Using a Jelly Roll
I know we are practically into the month of October already and this quilt is more of a summer-themed quilt, but just so you know, I DID start this project back in July with the intention to get the project up on the blog within a few days!
Unfortunately, I’ve just gotten really slow with completing projects lately. (I’ve got home building on the mind, lol.) I do admit though, I did end up creating a few extra problems for myself while making this quilt.
You know that old saying, measure twice, cut once? Well, I hate to be a know-it-all type person who says this kind of stuff, but this is especially true in quilting too! I took too long of a break when making these quilt blocks, that I had forgotten what size I was supposed to be cutting.
So yes, lots of boo-boos, curses, and seam ripping definitely slowed down the finishing of this project, lol.
Square in Square Quilt Block Using a Jelly Roll
I basically just came up with this block by playing with jelly roll strips. I have no idea what type of block it might be. I did a bit of google research, but did not see anything similar. the best I could come up with is that it might be some type of framed square, square in square, bento box, etc…
Personally, I like the term square in square, so that’s what I’m going with.

Since this block is made with a jelly roll, it comes together a bit differently, than the typical square in square, but I like it! Plus there is a lot less cutting and piecing in this method.

What is a Jelly Roll?
In case you are not familiar with the phrase Jelly Roll when it comes to quilting or sewing, “Jelly Roll” is the term given by Moda fabrics to collections of 2 1/2″ x 42″ strips of fabric. They come rolled up in a cute little package and resemble a jelly roll. The best thing about a jelly roll IMO is that you get a small sample of so many different fabrics!
A few tips for this project.
- I recommend opting for a jelly roll that has two each of the patterns/colors.
- Three strips of fabric ( l used 2 colors and one white) will be sewn together and cut into six 6.5 inch blocks. Then after sewing and cutting those 6.5-inch blocks into half square triangles, if you use a white strip, you will have three white-edged squares and three-patterned squares.
- So if you want a full block with white edges and a full block with colored edges, you will have to repeat the process with 3 more jelly roll strips.
- I know I just spouted a bunch of gibberish, but I think if you watch the video, you’ll understand what I mean. (The video should have popped up automatically, if not, I added a link to the youtube version at the bottom of the post.)
The jelly roll I am using only has one of each fabric, so I do think I will grab one more to finish it as I don’t want to use the teals in this quilt.
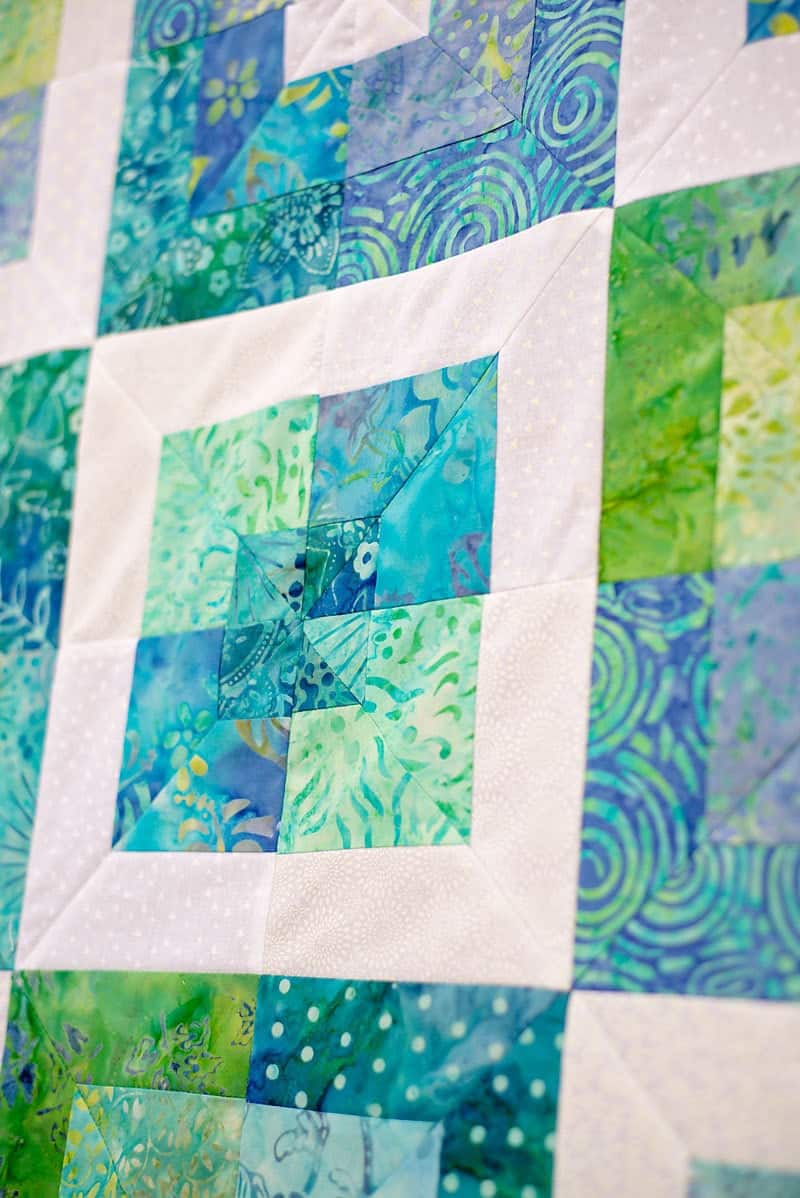
So Many Looks with this pattern!
You can get so many looks with this pattern just by using different fabric patterns and shades. In this case, I used a jelly roll in a batik pattern very similar shades of blue and green from Joann.
Find similar jellyrolls here and here.
Another version I made with pinks and purples:

As I was putting together this quilt top, I seriously considered sending it out to be professionally quilted. I’ve never done that before and don’t even know where to start looking.
Have you ever sent a quilt off (via mail) to be quilted professionally? How was your experience?
I’m sure there are people that do it locally, but I live kind of far out and am not interested in driving 30 to 45 minutes when I could just package it up and have the mailman pick it up from my house. My time (and dislike of driving in heavy traffic) is worth more to me than the cost of shipping.
Products used and/or recommended in this quilt block
- 6.5-inch triangle square up ruler (this sure would have helped me with that cutting mistake!)
- Rotary Cutter
- I love my large ruler and large cutting mat, but you may prefer to start off with a smaller Cutting set
- Dritz Dual Purpose Marking Pen
- Wonder clips
- Walking foot
Have fun trying this quilt block!
How to make a square in square block with a Jelly Roll:
Materials needed to make the quilt block:
- Several jelly roll strips (depends on how many quilt blocks/ how big you want your quilt to be. 6 jelly roll strips will make 3 blocks)
- Rotary cutter
- rulers
- fabric pen
- basic sewing supplies
Step 1: Organize your Fabric
Separate out your strips of fabric and choose how you want them lined up.

Step 2: Sew the Jelly Roll Strips Together
Sew the Jelly Roll strips together in sets of 3, using a 1/4 inch seam allowance. Press seams flat.

Step 3. Trim and cut the jellyroll strips into squares
Trim the up edges on one side.

Cut the jelly roll strips into 6.5 inch squares.

Step 4: Make Half Square Triangles with your squares
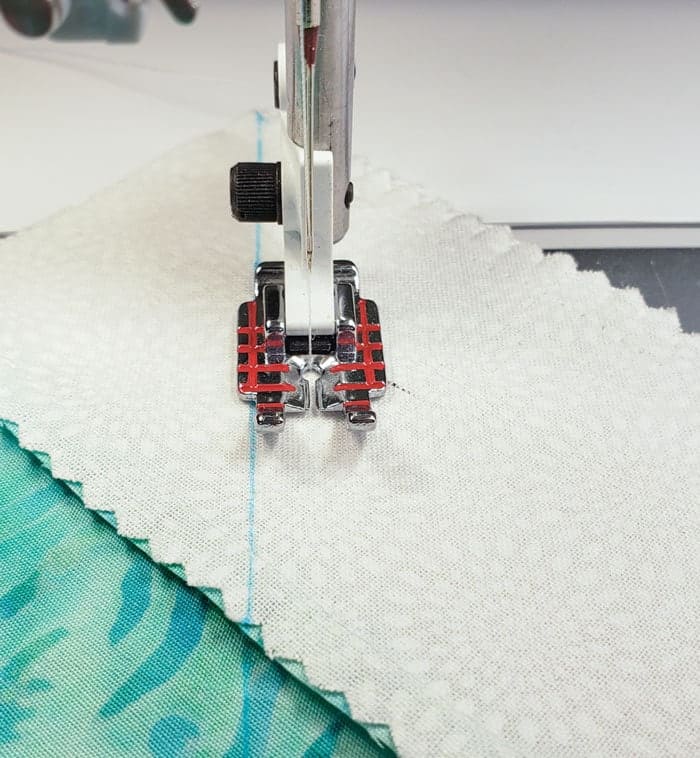
Line up 2 squares, right sides together and draw a diagonal line from corner to corner on your jelly roll squares.


Sew the two squares together with a straight stitch 1/4 inch on each side of the line. (a 1/4 inch quilting foot is so handy for this!)
Cut the square in half, along the line you drew.

When opened the new squares look like this:

Press seams flat and trim the extra fabric.

Step 5: Repeat the previous steps at least 6 to 10 more times
You’ll need quite a few more blocks if you want to make a quilt!
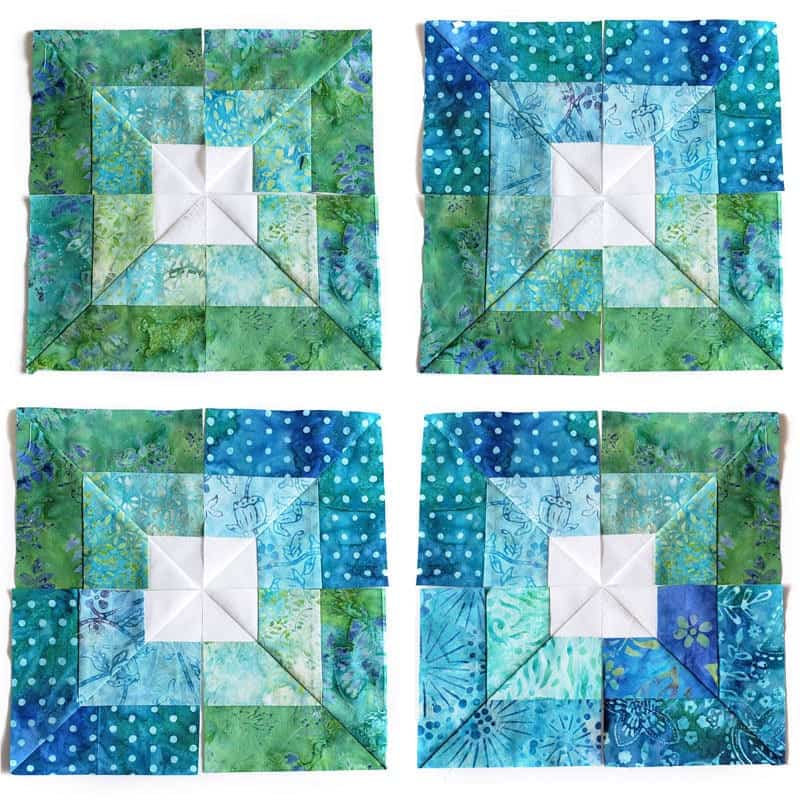
Step 6: Decide how you want to arrange your new half square triangle blocks
Decide how you want to arrange your new squares. Depending on your fabric choices, you can get all sorts of looks.
Step 7: Create the Final Block
Once you have fabric squares lined up how you like
Sew the top two blocks together and then the bottom two blocks with a 1/4 inch seam allowance.

Then line up the two rows and sew them together. Press seams flat.

Step 8: Sew your blocks together to make a quilt!
Once you have all your blocks assembled, sew the blocks together to make rows, and then sew the rows together to complete the quilt top

Step 9: Finish your quilt as normal or send it out for quilting.
That’s it you’re done!
Let me know what you think and if you end up trying this quilt block be sure and come back and share a photo on my Facebook page or tag me on Instagram using #scatteredmompatterns.
Don't miss any more posts!

Follow along on:
Feedly, Bloglovin', your favorite feed reader, or signing up via email and have new posts delivered to your email box each week!Square in square quilt block tutorial

Materials
- Several jelly roll strips (depends on how many quilt blocks/ how big you want your quilt to be. 6 jelly roll strips will make 3 blocks)
Tools
- Sewing Machine and basic sewing supplies
- 6.5-inch triangle square up ruler
- Rotary Cutter
- large ruler and large cutting mat
- Wonder clips
- Dritz Dual Purpose Marking Pen
- Walking foot
Instructions
- Step 1: Separate out your strips of fabric and choose how you want them lined up.
- Step 2: Sew the Jelly Roll strips together in sets of 3, using a 1/4 inch seam allowance. Press seams flat.
- Step 3. Trim the up edges on one side.
- Step 4: Cut the jelly roll strips into 6.5 inch squares.
- Step 5: Line up 2 squares, right sides together and draw a diagonal line from corner to corner on your jelly roll squares.
- Step 6: Sew the two squares together with a straight stitch 1/4 inch on each side of the line. (a 1/4 inch quilting foot is so handy for this!)
- Step 7: Cut the square in half, along the line you drew.
- Step 8: Press seams flat and trim the extra fabric.
- Step 9: Decide how you want to arrange your new squares. Depending on your fabric choices, you can get all sorts of looks.
- Step 10: Once you have fabric squares lined up how you like. Sew the top two blocks together and then the bottom two blocks with a 1/4 inch seam allowance. Then line up the two rows and sew them together. Press seams flat.
- Step 11: Once you have all your blocks assembled, sew the blocks together to make rows, and then sew the rows together to complete the quilt top


Thank you for the block tutorial! Love the fabric colors and turns out I previously purchased those exact batik prints and shades just in fat quarters. It’s so great to see them worked into a quilt. It helps to give me an idea of how to coordinate each shade with another in the bundle. I already have a different pattern in mind for this fabric but will definitely make this very soon.
Hi Jamie
I just viewed your quilt tutorial! Nice job!!
I just startef quilting this year and had 6 of them professionaly quilted! Im a bit anal when it comes to style but i found a gal in the mountains of VA. She did an awesome job!! Eavery quilt had a different theme and she quilted with patterns that went with the quilts them selves!!
I can forward you her contact info if youd like but you may have alreafy found someone closer. Lol
I also kmnow of a gal in i think its giddings tx that does machine quilting and is very inexpensive! I no longer have her info, however if you contact Barbra Mapels at the Bryan Tx senior center one of the quilters there her name is Connie should have the contact information for her!
Love this color scheme, so pretty. Thanks for the tutorial, this is now on my summer sewing agenda! I have been guilty of the same, coming back and thinking I can just start from what I “rememebered”.
Beautiful colours – I have some purple batik jelly rolls. Do I understand correct that the size of one block is 12 inch?
the block size is 11.5 by 11.5
I don’t actually see any kind of pattern to download for this quilt. did I miss it? or is it free by you just talking about it and what you did. I would be nice to know exact how many jelly rolls I need, how many blocks I need, yardage for backing, binding, boarders. All I am getting is they are 6.5 x 6.5 blocks that I cut on diagonal on both sides of the line to make it into 2 half square triangle’s.. please let me know.
thanks for you timely response.
Becky
Correct. This is not a quilt pattern. It is a quilt block tutorial. (As stated in the title, 1st paragraph and more times in the blog post.) Where do you see it written that it is a free quilt pattern (because I can’t find that statement.) Please let me know where you saw that so I can correct any future confusion.
Thank you forthe tips and is a beautiful quilt
Ive never used jelly rolls or Fat Quarters and i notices you never said how much yardage it takes to make a jelly roll I do all my quilt blocks individually so i always use yardages could you tell me how much yardage is in a jelly roll I wouldlike to at least try it and how many jelly rolls per squqre or the size ofthe finished block My grandmother showed me the old basics other than that im kinda slow with new technichs my grandmother passed before she finished teaching me so i have basicly taught myself the res that i know which is not much but LOVE Quilting
It depends on the size of the jelly roll. Some of them have 42 strips others only 20. So your yardage will vary, you’ll just have to calculate it based on the number of strips. Jelly roll are 2.5″ wide each.
I have lots of batik fabric. My grand daughter love hot pinks. I am going to mix in some lovely purples also is your square in a square pattern. And if I have enough left I will make a pillow to match. Her birthday is coming up. I just finished a black, gray and white blend of skulls and skeletons in a log cabin design. He loves skulls and his birthday is in a week. Time to get it in the mail!
sounds like fun!
. Love the batik colors. Am trying to find out how many jelly rolls it takes to make a queen or king size quilt.
Can you tell me how many Jelly Rolls it takes to make a Queen or King Size Quilt? I bought the same Jelly Rolls that you show this quilt being made from. I, too, bought them from Joann’s. Love the batik colors.
Lovely quilt! Where did you get the fabric from? FYI as a warning: I sent a quilt out to The Feverish Quilter in Rochester NY and never received it back. I set in September 2018 and I have made many requests but I believe it to be stolen at this point. There are many reviews on line that complain about them as well. So please fellow quitters do not send your quilts to them!!! But on a positive note, this is a lovely post and I think I will try it after I’m finish the quilt I am currently working on. Thank you so much!!!
PS: Could you say where you got the fabric from?
Wow, good to know! That jelly roll came from Joann’s.
I bought this jellyroll from Joanns a few weeks ago and have been looking for suitable patterns. Love this one. Thanks. Did you have any issues with the colors bleeding after washing? I have heard people say blue Batiks are notorious for color bleeding- which has put me off using the strips with a white background.
I actually have not washed it yet. Have you heard of the color catchers by shout? I have had good success with them. Here: https://amzn.to/2TXkVba. You might try throwing a few in with your fabric or you could try prewashing the blues. (that would be a lot of ironing thought.)
These do bleed a little but to be it was enough that I decided to pre-wash them. I always wash my fabrics with vinegar to help prevent any further release of dye and so far I’ve had a lot of luck. With red shades I add salt directly in the wash basin. Great minds think alike though. Personally I think it’s one of the prettiest sets JoAnn’s has carried.
Thanks for the tips! You cant miss with shades of blue and green!
Hello. I was reading through the comments and decided to do a quick check on Feverish Quilter in Rochester and found quite a few issues on the BBB site(Better Business Bureau). This company appears to be a sham! At best they have horrible service and at worst they are stealing peoples’ quilts!
thank you for the update!
I love the colors, they called me right away! I have been browsing for something that the men in my family could enjoy and I’m interested in this colorway for them. I send my quilts out to quiltingbydavid .com – check out his gallery! He’s affordable, quick and does amazing work! Thank you for sharing this one!
Beautiful quilt. The colors just pop. The pattern was a great choice to allow the colors to shine. Thank you for sharing.
Can you put in a pdf to be able to download to save? It’s beautiful
I could, but then I would want to add it to my shop to sell so it would no longer be free.
Turned out so pretty! Hope I can learn from your little opps! I got confused(happens to me often).
When you cut it apart-you get 1 pc for the 2 different blocks? Am I right?
Yes
Beautiful! I have used those fabrics in many projects. Some of my favorites!
I made my very first quilt this year with the same beautiful jelly roll from Joanns Fabrics. Mine was just an easy strip quilt , but the lovely colors made it really shine. Will have to try yours!
Great minds think alike! Love that jelly roll.
Love this quilt pattern. And thank you for sharing it.
I love your color choices! Gorgeous! I have sent out quilts to be quilted to the Missouri Star Quilt Company and they have come back beautifully done. They are very accommodating and have an excellent variety in their services.
I did not know they did that, thanks for the tip!
How if is this quilt
In your opening paragraph, your wrote this quilt was more of a summer themed quilt. I love it; the colors could take you away to a summer beach.
Definitely!
Love love love this quilt! The fabrics you have chosen, the way you have put them together and the overall design -makes me smile all over!
Thank you!
These are my favorite colors, and these blocks are beautiful! I think I’ll make one, too!
Thank you and good luck!
?????such a pretty quilt!
Thank you! (My favorite colors)