Easy Breezy Summer Lounge Dress Pattern and Tutorial
Disclosure: This post may contain affiliate links. As an Amazon Associate, I earn from qualifying purchases.

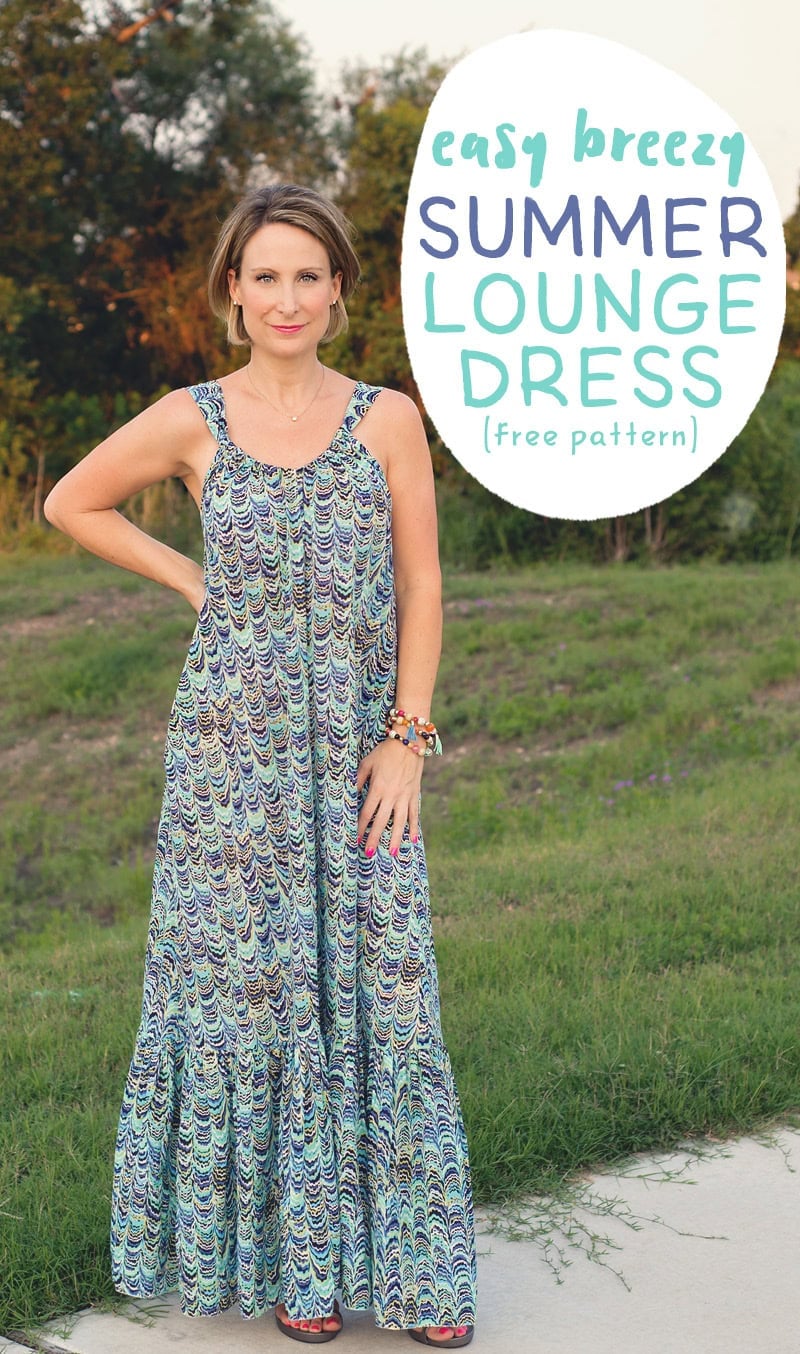
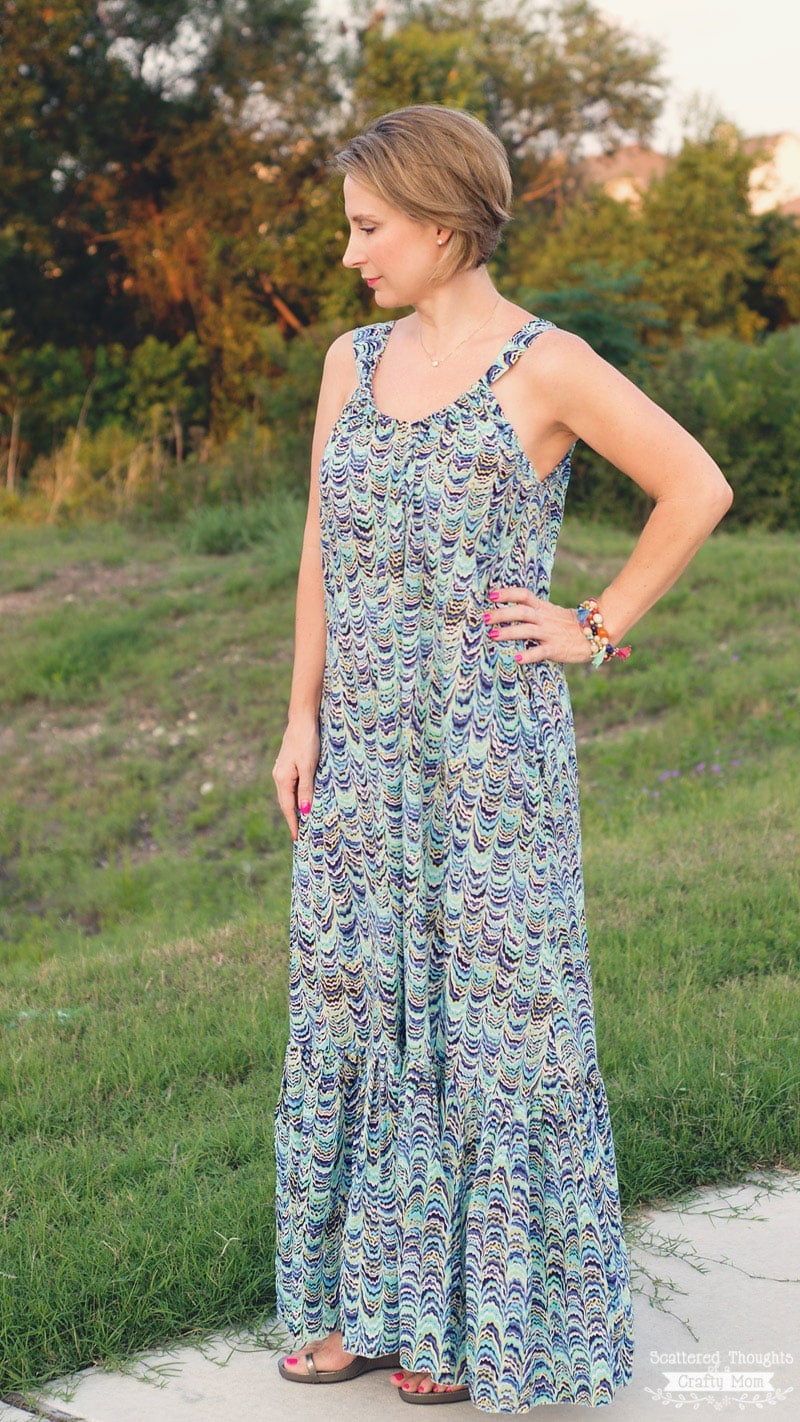
This Easy Breezy Summer Lounge Dress pattern and tutorial will guide you through the steps of how to sew a perfect summer Maxi Dress. This Summer Lounge Dress is perfect for keeping you cool and comfortable on hot summer days.
The free ladies’ dress pattern can be made knee-length, or you can add the optional ruffle to make it maxi-length. Even better, no buttons, hooks, zippers, or special notions are needed. It even has pockets!
💌 Save this article
The Best Summer Lounge Dress Pattern
Who remembers growing up, their mom’s and grandmas wearing “house dresses” like this one? I admit, I’ve never been a jeans or pants person and I too, love to wear casual, comfy dresses around the house. (I bet I have 5 or 6 of these little numbers in my closet. I usually find them at Ross or TJ Maxx for around $15, and I live in them, lol!) Although nowadays these dresses are mostly referred to as leisurewear, loungewear, or patio dresses. (or as I call them, “my comfy dresses.”)
I wanted to make myself a new dress, one that was casual enough to wear around the house but could also look good out and about. (Depending on fabric choices and dress length, of course.)
Why You Need to Make this Summer Dress!
I am so pleased with how this dress turned out. It’s flowy, easy, and just the perfect dress for summer!
Let me assure you – I’ve tested this dress thoroughly! It sleeps wonderfully on the couch, makes me feel glamorous walking to the mailbox, and looks beautiful hanging from the hook on the back of my bathroom door.
The dress is also flowy enough to let the evening breeze keep you cool while you enjoy your favorite red wine sangria, watching the birds at the feeder on the back patio.
Even better? The flowiness of this dress is sooo flattering! It hides all the lumps and bumps
The best part is, this dress is actually super easy to sew! No buttons, hooks, zippers, or special notions are needed. It even has pockets for all those misc. items that we tend to pick up around the house.
Because of the flowy-ness and way the bodice can be adjusted, the pattern works for many sizes. I’ve drafted and uploaded two pattern sizes for you to print. S/M (which is what I’m wearing) and Lrg/XL.
*Update 2020: I’ve gained at least 20 pounds since sewing this dress (yes, time for my once every 5-year diet), and it still fits and looks great. It’s definitely snugger in the bust, but all I had to do was loosen the ties for a more generous fit.
When sewing this dress, you’ll notice that the dress pieces aren’t cut on the fold. I overheard a designer on TV say that the reason many garments have this center seam is that the seam helps the item drape better.
Is this true? I don’t really know, but I thought this would be the perfect pattern to try it out on. This dress does drape and fall prettily, but it also has a lot of fabric and is very flowy, so I’m not sure whether the center seam contributes to that or not.
How Much Fabric is Needed to Sew this Summer Dress?
Be advised, this pattern, with the added ruffle, uses a lot of fabric! The good thing is you can sew the length to whatever you like. The actual dress pattern I provide falls just below the knee (on me, anyway, and I am 5’4). But I include the option to add the ruffle in the sewing instructions.
You will need 2.75 yards of a 44-inch wide fabric w/ nap for a knee-length dress. You could get away with a bit less on a wider, no-nap fabric. If you want to add the bottom ruffle, you would need an additional +/- 1.375 yards of fabric. (Every inch over/under 5’4″ add or subtract 3 additional inches of fabric to that 1.375 yards.)
If you can find a good deal on fabric, definitely add the ruffle – It makes for an amazing dress! The ruffle does add over a yard to the amount of fabric needed.
What Type of Fabric is Recommended for the Summer Lounge Dress Pattern?
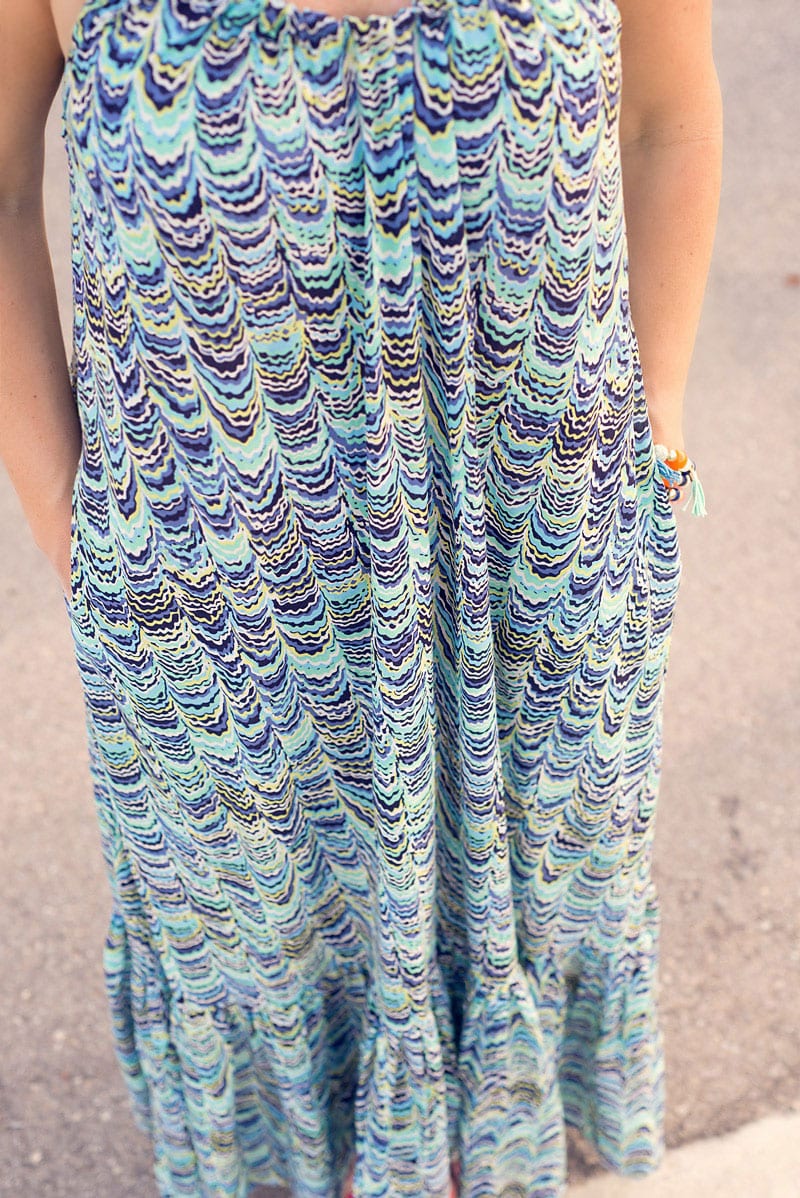
The fabric in my version is cotton lawn, other recommended fabrics are:
- cotton lawn
- double gauze
- voile
- rayon
- lightweight polyester/cotton blends
- knits that are not too clingy, heavy, or thick
- Or maybe even a super cute cotton flat sheet
I’ve already hit Joann’s and found some cute rayon prints for my next version. (I also plan to make my Missy a version with my leftover fabric, but it will have to be a knee-length version since I only have about a yard left.)
You can adjust the tie so the bodice is pulled up high.

Or slightly lower. Whatever you are comfortable with and is most flattering to you.

Ready to Sew Free Summer Lounge Dress Pattern?
Visit my shop (here), add the free maxi dress pattern to your cart, and check out. Keep reading for sewing Instructions.
Not ready to sew it just yet? Save this pattern for later by pinning it here.![]()
Easy Breezy Summer Lounge Dress Pattern Sewing Instructions
Materials needed to sew this Lounge Dress:
- Pattern
- fabric (2.75 yards of a 44-inch wide fabric w/ nap for a knee-length dress. You could get away with a bit less on a wider, no-nap fabric. If you want to add the bottom ruffle you would need an additional +/- 1.375 yards of fabric. <Every inch over/under 5’4″ add or subtract 3 additional inches of fabric>)
- bias tape (or make your own from your extra fabric
- iron
- basic sewing supplies
Products used and recommended:
- My favorite fabric shop for knits: Funkalicious Fabrics and Girl Charlee. My favorite shop for cottons and other fabrics: Fabric.com.
- My Sewing Machine: SINGER 9960 Quantum Stylist, my coverstitch: Janome Cover Pro 1000cpx
- My Serger: Brother 1034D 3 or 4 Thread Serger or you can just use Pinking Shears
- Rotary Cutter
- I love my large ruler and large cutting mat, but you may prefer to start off with a smaller Cutting set
- Dritz Dual Purpose Marking Pen and Fray Check
- Wonder clips (I didn’t use these in the post, but they are just awesome!
Pattern Tips:
- When printing the pattern, first save the pattern to your pc, then open in adobe reader choose auto/landscape and print at actual size.)
- 1/4 inch seam allowance
- Light, flowy fabrics recommended (rayon, knits, voile, cotton lawn, polyester/silk type fabrics)
- Sew as a knee-length dress or add an optional ruffle
- Transfer pattern markings, shorten or lengthen if needed by cutting at the specified mark, and redraw side seam
Fit Chart:

Lounge Dress Pattern layout guide (not including optional ruffle):

SEWING INSTRUCTIONS:
Step 1. Print pattern, tape together and cut out size needed.
Step 2. Cut pattern pieces from fabric
Dress pieces: Fold the fabric so selvages line up, wrong sides together. Cut 4 main dress pieces (not on the fold!!) and transfer the pattern markings. 4 pockets, and 4 facings. (Since the fabric is folded, you will be cutting 2 at a time.)
Fabric tie: Cut fabric strip 74 by 5 inches. (you’ll have to piece 2 strips together.)
Bias tape: Cut a 50-inch strip of fabric for sm/med and 60 inches for the lrg/xl on the bias, 1.5 inches long. (It’s ok to sew together a few pieces to get 50 inches. Since you only need a little, I recommend just lining your fabric up on the bias and cutting a few strips and pressing them by hand to make coordinating bias tape. Store bought double fold bias tape works fine too.)
Step 3. Assemble the Summer Lounge Dress.
Dress front:
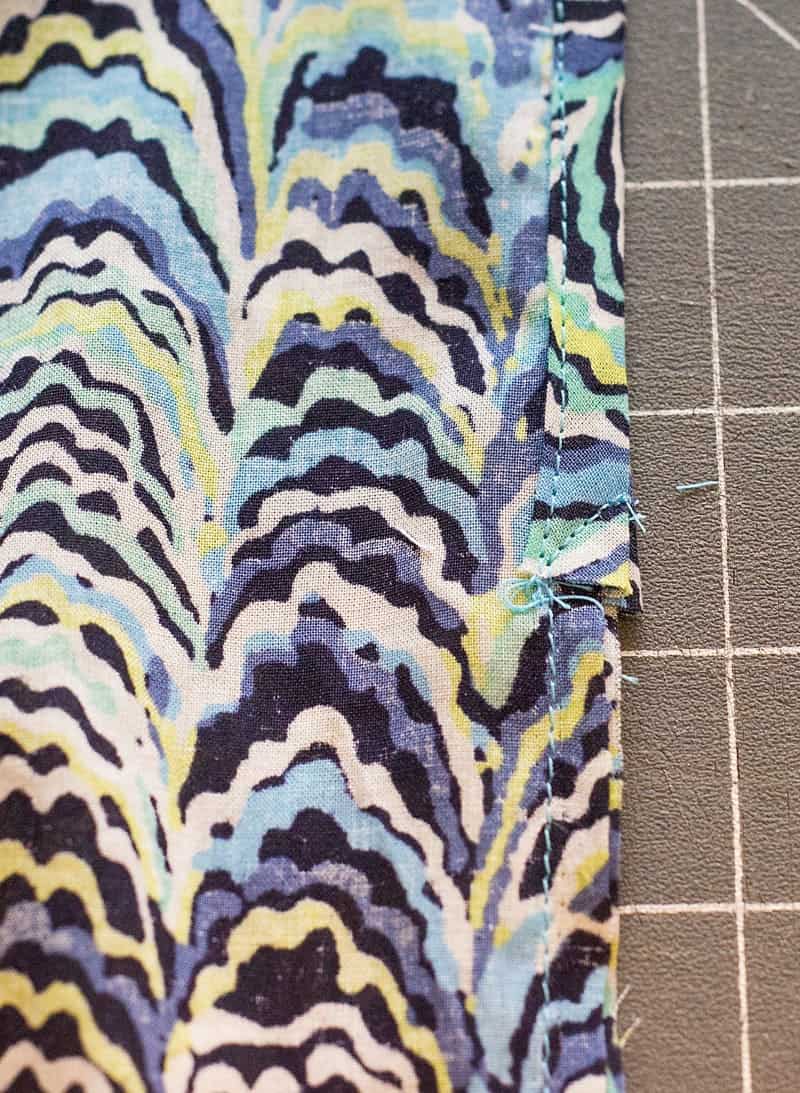
Line up 2 dress pieces right sides together and sew along the center front seam. Finish this seam and press.

Dress back:
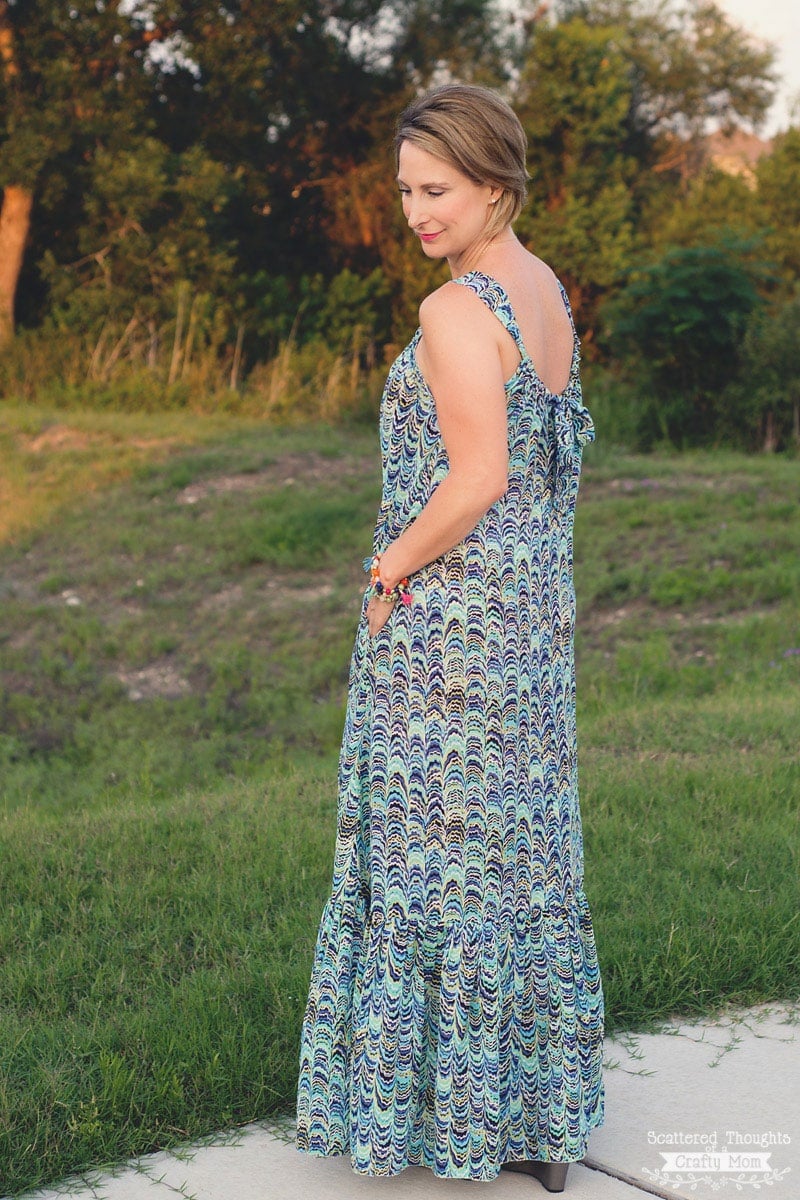
Starting at the “start sewing here” pattern marking, sew the back 2 pieces together (right sides together and finish this seam) along the center seam. This leaves an opening at the top of dress back, where we will later be applying bias tape.
Facings:
Line up 2 of the facings pieces (right sides together) and sew. (as shown) This is the facing for the front of the dress.

Attach facings:
Line the front of the dress and the front facing together. (right sides together) Sew along the top .25 from the edge.

Press the seam up and top stitch along the facing.
Repeat the facing application for the back dress pieces. The facings should be in two pieces for the back.)

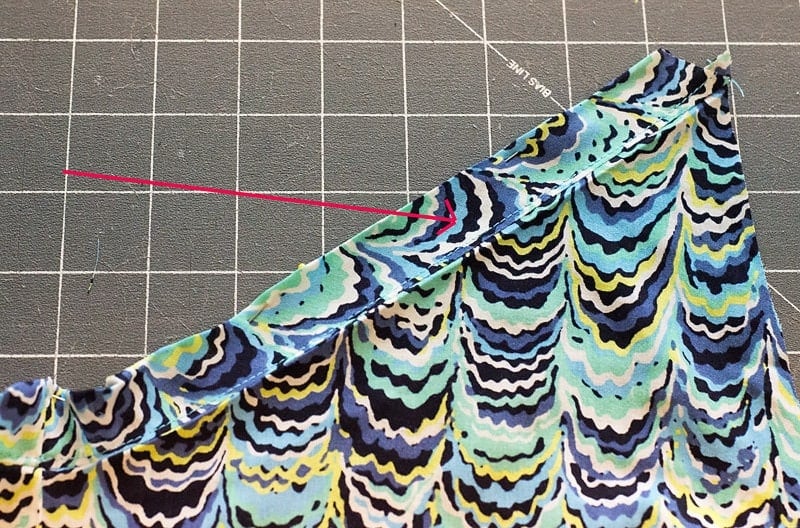
Add bias tape to back pieces:
Cut 2 pieces of bias tape about 7 inches long. pen bias tape and apply tape to the top of the center seam of the back dress piece. Line the bottom of the bias tape up with the pattern marking “start bias tape here.” Pin in place and sew along the 1st fold of the tape.

Fold bias tape around the edge of the fabric and sew it in place. Repeat this step on the other side of the dress back.

Sew the two sides together as shown below, and continue sewing down the back dress piece center seam until you meet up with the original “start sewing here” pattern marking. Finish this seam and press.
Step 4: Adding the pockets and sewing dress together.
Right sides together, line up the top of the pocket with the pocket markings. Sew along the edge of the pocket a scant .25 inches from the edge.

Finish this seam.

Fold the pocket open and press.
Line up the front and back dress pieces, then sew along the sides and around the pockets. Finish this seam and press everything, including seam edges, around pockets.

Step 5: Adding Bias tape to the armscye.
Apply bias tape around the edges of both arm armscyes.

Step 6: Create Casing.
Finish the edge of the facing by serging or folding it over by 0.25 inches. (I tested it both ways in the photo above, just use your preferred method.)
Fold facing over on the seam and press. Trim up any uneven pieces.

Sew along the bottom edge.

Step 7: Make the Fabric tie.
Line the fabric strips up right sides together. Cut the ends of the strip at a slight angle.
Sew the strip together all the way around the edges, leaving a 2-inch gap in the middle.

Flip the fabric strap right side out and press. Sew the opening closed.
Use a safety pin or bodkin to thread the fabric tie through the casing.
If making a knee-length dress, hem and you are finished!
Optional Step 8: Adding a bottom ruffle.
Try on the dress, adjust the fabric straps, and dress to the right place. Measure from the bottom seam to the desired hemline location. Add one inch for seam allowances and hem.

Cut strips the height of your measurement by 130 inches wide. (For me, that was almost 3 full widths of fabric sewn together.)
Hem or serge the bottom (1/2 inch hem allowance included in measurement).
Sew a gathering stitch along the top of the ruffle strip.
Gather fabric, until the ruffle is the same width as the bottom of the dress.

Right sides together, pin the raw edge of the ruffle to the bottom of the dress.

Sew along the gathering line. Flip the fabric right side out and press.

That’s it, you are done! Try on your new dress.

Let me know what you think! If you end up making one of these, please share your finished project over on my facebook page or tag me on Instagram!
Don't miss any more posts!


I would love to make this if I could by the pattern, but I can’t imagine how many pieces of printer paper this would take plus the ink to print it out. But it’s very pretty
Yes, it definitely takes a lot. That is the downfall of printing a PDF pattern. (Although, the printable part of this pattern only goes to the knee and I just give you measurements for the final ruffle to save paper.)
But the funniest part is, people complain when I give only the bodice part of the pattern and cut measurements for the rest, and they also complain when I give the entire dress! There’s just no winning, lol
12 pieces of paper is nothing. I print off the pattern for my daughter’s Irish dancing dress and it takes 39 sheets of A4 which all have to be jigsawed together
Hello Jamie!
I’m looking to make myself a few roomy pregnancy dresses for this pregnancy – do you think this pattern has enough room for a little bubba underneath? I don’t grow hugely during pregnancy and can usually get away with just wearing size AU 14/16 regular clothes. It looks so light and roomy, I’m keen to give it a go! I live in the tropics in Australia, and so it’s hot almost all year round, so this could be just what I’m looking for!
I’m sure it would work, and would be easy to adjust. good luck
Don’t know if I’ll get a response for my question as I just started sewing and this is an older post/tutorial. Love this pattern and want to thank you so much for ALL your posts. So extremely helpful for a beginner. My question is I’m so confused on the bias tape that’s added to just the back seam. Is it supposed to be single bias? I only have extra wide double fold. Would I cut that in half. So sorry about the dumb question. Also why would it be just down the back of the dress instead of front and back? I’m doing an old sheet first because I know I’ll mess up and this is a lot of fabric and so want to make it work.
Thank you kindly again for all you do,
Ruth
That is double fold bias tape and it is added to the “keyhole opening” to finish the seams.
The keyhole opening is just a design feature, so the tie stays in the back. You could eliminate it entirely and make the dress more of a pillowcase style.
Thanks! Ordering fabric now!
How much fabric for the small?
(2.75 yards of a 44-inch wide fabric w/ nap for a knee length dress. You could get away with a bit less on a wider fabric with no nap. If you want to add the bottom ruffle you would need an additional +/- 1.375 yards of fabric.)
Hi! I am excited to make this dress for a trip to Mexico. But I am an extra small. Can you advise me on how to adjust the pattern? I can shorten it by not sure how to adjust otherwise. Hope you can help. Thanks,
Lisa
Check out this tutorial
How to make a pattern smaller
I am so excited to try this dress pattern!! I’ve been looking for a loose fitting sleeveless dress to make for my mother who has a lot of various ailments that cause her to not be able to wear normal clothes (or any sometimes) and this looks just perfect. It fits the bill and it looks super cute so she will feel comfortable wearing it out of the house if need be. My mom is in her 60s and is 5’4″ with a relatively slim build and average/large bust (but does not wear a bra so not sure that will affect things). Do you think the L/XL would be better or the S/M? She really prefers to wear clothing loose so I’m not sure if the smaller one would be too tight for her. I love the option to adjust the neckline. This is perfect for my mom’s situation. Any feedback would be appreciated. I will let you know how it goes once I’m done.
I think the small/med will be fine, its very generous.
This was a great pattern. Thank you. Have you tried it by cutting the front and back on the fold? Wish I could share my pictures
no I have not. This is why “I overheard a designer on tv say that the reason many garments have a center seam is that the seam helps the item drape better. Is this true? I don’t really know, but I thought this would be the perfect pattern to try it out on. This dress does drape and fall prettily, but it’s also has a lot of fabric and is very flowy, so I’m not sure if the center seam contributes to that or not.”
I had just a little problem because the wrong side of the fabric was almost the same as the right side, I had to enlarge the picture to figure it out several times wish the wrong side was either darker or a different color to figure it out but other from that it’s good!
I like this dress! Thanks so much for posting a free pattern for it. I plan on altering it a little bit: No bow at the back neckline, just adjust where I want the neckline to be, then stitch it together and tuck the excess tie into the neck casing. If I want to readjust it later I can just snip those few stitches, adjust, restitch, and retuck the excess into the casing again. Make a long tie to use as a belt with the bow at waist back. Then hubbies/boyfriends won’t be too critical of it “not being form-fitting” as your waistline will be somewhat defined.
sounds great!
Thank you for this fun pattern. I printed and taped the pattern together…ready to cut out my size. Did anybody else notice the purple lines are larger all around, but the pattern says purple is sm/med. and green is lg/xl? It appears the color code has been switched for the sizes…? Or am I missing something?
tha might be an error. I’ll check it out!
Are the sizes correct? the large on the pattern looks as though it would be smaller.
oops, sorry, the size color code chart is backwards
Looking good, so far, your instructions are great. I’m making it out of a duvet cover I got cheap from Ikea, so it might not be the best thing to wear around town! Probably a bit too see through for me! But I’ll make it again sometime
Finished it! Looks good, thanks for the pattern x
so glad to hear!
What does the bias tape on the back do? I think I screwed that part up. Oops!!!
The bias tape finishes the back openings and armsyces.
Uhg, I’m so confused. Could you please tell me where the center seam is? Is it opposite the fold? Is the fold on the left side of the pattern? Simple sewer here 🙁
When you cut out the main dress pieces, you should have 4 pieces. Front right and left, back right and left. Then you have to sew the front pieces together and the back pieces together. The seam where you sewed them together is the center seam. Exactly what are you having trouble with?
Hello Jamie! As I am not very familiar with PC I cannot understand what to do in order to get the patterns. I try from time to time, as I am interested in all yr patterns, but fail. I add the pattern to my card, the pattern is added to my card, but where is the pattern? I cannot find it. Thank you for yr reply. Kassiopi Reyes
What a great looking dress for summer. Thank you for posting it.
I love the style of the dress. Thank you for making it available for free. Is there a way I can make it bigger in the breast area?
Google “full bust adjustment” to learn how to resize a pattern for a full bust. Good luck
I have been so looking for a dress to wear as we are in our in our first month of Spring at the moment as it is getting very hot. So I think we are going to be in for another very hot Summer again and this pattern and instructions are great. I am a beginner sewer and plan to make this. So thank you for sharing this with us.
Thanks so much for the free pattern! While it may not be the most flattering dress on me. It’s certainly comfortable. It’s been crazy hot here and I was in a desperate hurry to make this right away (like, the day after you posted it- lol), so I made it out of a flat sheet. Since, I have spent many days in the porch shade, evenings relaxing with a drink, nights (sleeping) and I may or may not have gotten directly out of bed and done a run or two to the bus stop in the morning in it.(with a cute sweater thrown over the top). It’s been nice and cool and breezy for working and watering in the garden and hanging out in front of the AC. Maybe my next version I’ll leave the ruffle off and try a nice cotton lawn. So thanks again!
I love it! I agree though, even my hubby says he prefers a more “form-fitting” dress on me, but I just love how comfy this dress is. I’ve worn to get my nails done, to the mailbox and a couple other errands. The ease of it can’t be beaten. The idea of using a sheet is super-smart!
Question about the Easy Breezy Ladies Lounge Dress —
Is the tie in the back decorative or it is necessary to untie it to get the dress on and off?
Thank you very much.
The tie is necessary. Depending on how tightly you tie the tie and adjust the bodice, you may or may not have to untie it to get on and off. For me, (in these photos) I just slip the dress off/on without adjusting the tie.
If you don’t like the idea of a tie, you could always make the dress and a short tie. Figure out exactly where/how you want the bodice to sit, then sew the tie ends together at that point. Rotate the seam so that it is inside the casing and then tack everything in place.
~Jamie
do you think this dress would work using a vintage sheet? Say, a queen size for the L/XL version?
definitely!
How could I make this a size 3x dress pattern. I have a lot of health issues due to having had cancer in 2019 finished treatments in 2020. I am a beginner sewer . How much material would a 3X long dress take