How to Make a Pincushion (Mini Patchwork Pincushion Tutorial)
Disclosure: This post may contain affiliate links. As an Amazon Associate, I earn from qualifying purchases.
How to Make a Pincushion: I’ve got a great little tutorial to share today on How to Make a Mini Patchwork Pincushion.
A DIY Pincushion is a great project for the holidays as it makes an adorable gift or maybe even a gift topper for a fellow sewist. Plus it’s a fun way to dip your toe into quilting and uses up your fabric scraps.
💌 Save this article
Charm Packs vs Mini Charm Packs
I tend to do a lot of my shopping online, everything from groceries to shoes to fabric! While convenient, online shopping does have it’s downsides. Like you don’t always know the quality of what you’re getting OR if you don’t read the description properly, you may not even get what you think you are ordering.
Case in point, I recently ordered what I thought was going to be an adorable charm pack for the holidays. Turns out, I did not order a charm pack, I ordered a mini charm pack! (I wondered why the price seemed lower than other charm packs, but I just thought maybe they were going on clearance.)
Nope!
The price was lower because I ordered a tiny version of a charm pack.
While cute, I had no idea what to make with it.
View this post on Instagram
Mini Charm Packs are perfect for DIY Pincushions
I did a little brainstorming over on Instagram and settled on the idea of a mini patchwork project.
What’s cuter than a Mini Pin Cushion? (Also – is it spelled pincushion or pin cushion? I googled it and it seems it goes either way, but since the spell checker keeps correcting me to “pincushion” I guess I will go with that spelling.)
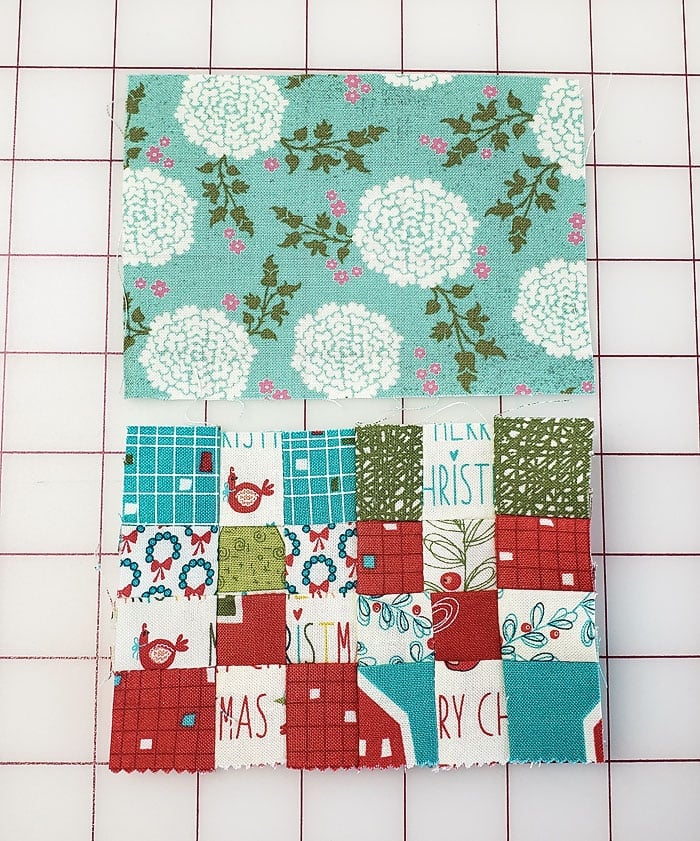
Uncut, a mini charm pack is 2.5 inches, but I wanted something smaller, after a little playing around the patchwork squares on the pincushion ended up being 3/4 of an inch and are absolutely adorable!

Wouldn’t these be adorable as little gifts for your sewing friends? I also considered adding a loop of ribbon and hanging a few from my Christmas tree. It would have been so cute, but I think I might do a stuffed Christmas tree ornament instead!
To make this project, you will need 9 different 2.5-inch squares. You can use a mini charm pack, cut a regular charm pack into squares or just use a template to cut several fabric scraps into 2.5-inch squares. (Another idea would be to use a cutting machine to cut the squares! I plan on giving that a try soon.
How to Make a Pincushion
Technically, you only need six 2.5-inch squares to make the pincushion, but using 9 squares gives more variety and if you make multiples, you can work the extra strips into other pincushions. ( So 18 squares will actually give you 3 pincushions.)

Patchwork Pincushion Project Tips:
- A rotary mat and cutter is a necessity for this project.
- Even if you don’t usually use pins, I recommend it in this project to keep your points sharp and squares even. Use the smallest/skinniest extra fine quilting pins possible. The big thick quilting pins are just too bulky for these mini patchwork squares.
- A quarter-inch foot is so helpful in keeping your seams accurate!
- Take care to press your blocks accurately and thoroughly.
What Kind of Stuffing is Best for a Pincushion?
There are tons of options for the stuffing of a pincushion. If you wanted a professional store-grade pin cushion, many sewists use finely ground walnut shells or even steel wool. I personally don’t want to deal with a mess and this is the type of project I like to use my stash on, so I recommend cotton or polyester batting. (like what you would use in a pillow.)
Fabric scraps are also a great option. In fact, for my project, I used leftover bits of fleece. Fleece is soft, fluffy and most of us probably have tons of it!

Want more scrap busting projects? Check these out:
- Scrap Buster Alert: Easy Quilted Fabric Coaster Tutorial
- Scrap Busting Fabric Flower
- Patchwork Tunic Top
- DIY Catnip Toy
- Gift Tin Cozy
- How to Make an Easy Eyeglass Case
- How to Make a Stretchy Headband
How to Make a Pin Cushion:

Materials Needed for a DIY Pincushion:
- Fabric squares cut to 2.5 inches (I used a mini charm pack)
- 1/4 inch presser foot
- rotary cutter and mat
- ruler
- iron
- basic sewing supplies
Patchwork Pincushion Sewing Instructions:
Just FYI… I have a video tutorial coming soon for this DIY Pincushion. It’s all filmed, just needs to be edited. (Video editing is not my friend.) I will email out a note to my newsletter subscribers when it has been added to the post. (So if you are not already a subscriber, you can sign up here!) ![]()
Save this project for later here:

Step 1: Choose your fabrics and layout.
Chose 9 different mini charm squares (or use a template to cut 9 different 2.5-inch squares. Arrange them in a pleasing layout.

Step 2: Sew the first 3 rows.
Sew the first row together by lining up the edges of 2 squares right sides together, and sew together with a 1/4 inch seam allowance.

Sew the first two squares with the third square of the row.

Repeat for the next 2 rows. Press the rows with your iron.

Step 3: Make the 1st cuts.
Use a ruler and your rotary blade and cut the row in half lengthwise. Repeat for the other two rows.

Chose your four favorite strips and arrange them however you like. (Save the other 2 strips for the next pin cushion. Technically, you could make a pincushion with just 6 squares, but the finished result is better with 9 different fabrics.)

Step 4: Sew the next four rows together.
Sew the first 2 rows together and press.

Then the second two rows together and press with iron.

Then sew the 2 blocks together and press well.

Press well.

Step 5: Make the next round of cuts.
Cut block in half down the middle column to make 2 blocks. (That cut will be one inch from the seam.)

The next cut is trickier… Grab one of the new blocks and cut it 1 inch from the seam as shown below. That cut will be one-inch from the seam and will be 1.25 inches from the edge. Don’t worry, it will all work out perfectly.

Repeat on the second block. This gives you 4 new columns.
Step 6: Piece together the final 4 columns.
Line up the 2 pieced columns in the middle and the single columns on the edges. Sew the 2 middle blocks together.

Sew the 2 edge pieces on.

Give the block a firm press with the iron.

Step 7: Put together the pincushion.
Cut a backing piece the same size as your block.
Line up the block and backing piece, right sides together and sew 1/4 inch from the edge, leaving about one inch open to flip the pin cushion around.

Trim the corners.

Flip the pincushion right side out.

Fold the opening closed and press with an iron.

Step 8: Stuff your pincushion and sew it closed.
Fill your pincushion with batting or fleece pieces.
Sew the opening closed with a hidden ladder stitch and you are done!
How cute!

What will you do with your pincushions?
Don’t forget, if you end up making any of these DIY Pincushions, be sure to share your images over in my Facebook group or tag me on Instagram using #Scatteredmompatterns!
Don't miss any more posts!

Follow along on:
Feedly, Bloglovin', your favorite feed reader, or signing up via email and have new posts delivered to your email box each week!

Oh, this site is amazing! Thank you so so so SO much! You guys are amazing!
What a cute DIY to try! Thank you so much for sharing!
This is really cute. About what is the finished size before stuffing? Joyce
This pincushion pattern is about 2.5 by 4 inches.