How to Sew a Peasant Dress – Free Peasant Dress Pattern (sz 12 mo to 14y)
Disclosure: This post may contain affiliate links. As an Amazon Associate, I earn from qualifying purchases.


Learn how to sew a Peasant Dress with this free girl’s peasant dress pattern. This free printable pdf dress pattern and tutorial is available in size 12 months to a girl’s size 14 with both long and short sleeve options.

💌 Save this article
Why Sew a Peasant Dress?
Peasant Dresses truly are one of the simplest dresses to sew. No buttons, zippers or labor-intensive fabric gathering is needed.
One of the reasons a basic peasant dress pattern is so great, (other than the fact it is so easy to make) is there are just SO MANY different ways to change up the look of this easy-to-sew dress.
- Various lengths – this dress looks great above the knee, below the knee, tunic length or as a top.
- So many different fabric choices you can make.
- Many sleeve options (long, short, 3/4 flutter, flounce)
- And of course hem choices (ruffles, tiers, contrasting fabric bands or scallops.) You can even shorten it to make a top.
- So many ways to embellish this dress: with a split neck, bell sleeves, ribbon, ric-rac, pockets, shirring, aprons, a separate bodice w/ sash for a little extra pizzazz, lol!
I have sewn at least 20 variations of this peasant dress pattern over the years. (different sleeve options, hems, lengths, etc…) For a few new ideas, you can check them all out in my Peasant Dress Variations tab.
Why a Peasant Dress is a Great Project for Beginners
This peasant dress pattern is perfect for beginners. Whether you are picking up sewing again after a several year hiatus (as I did – nothing more motivating to get you back to sewing than a sweet little daughter or granddaughter to sew for!) or are just starting out. (In which case, welcome to the club!)
You’ll enjoy sewing this super simple pattern AND you master a few basic sewing skills at the same time.
The most difficult part of this pattern (other than cutting it out and taping it together) is trying not to sew the sleeve on backward or maybe sewing the casing for the elastic band in the sleeve (and that is only because it’s small.)
This style of a dress is very forgiving, if you make a mistake, just remove the stitches and re-sew it.
A Peasant Dress is a Style of Dress that grows with Her
A peasant dress is fairly boxy in shape. The elasticized neckline and sleeves bring the dress in and give it shape.
Because this style of dress is loose, after sewing, it starts as a dress, but as your little one grows, she can continue to wear it as a tunic or top. (Another great “grow with her” dress is a pillowcase dress and (of course) I have a free pillowcase dress pattern available as well.)

This printable PDF Peasant Dress Pattern is free. The file includes the full dress and 2 sleeve shapes (short and long.)
I have updated the pattern over the years and the peasant dress pattern is currently available in 7 different sizes: 12 to 18 months, 2t/3t, 4/6, 7/8, 9/10, 12, and 14.
(Note: On the last pattern update (May ’18) I updated the pattern to include the full dress instead of just the bodice. I personally prefer the original bodice-only version because it uses half the amount of paper. If you prefer that version too, I did keep a copy of the original pattern available. (You’ll find the link to that version in my private Facebook group. It’s also a great place to show off your creations.)

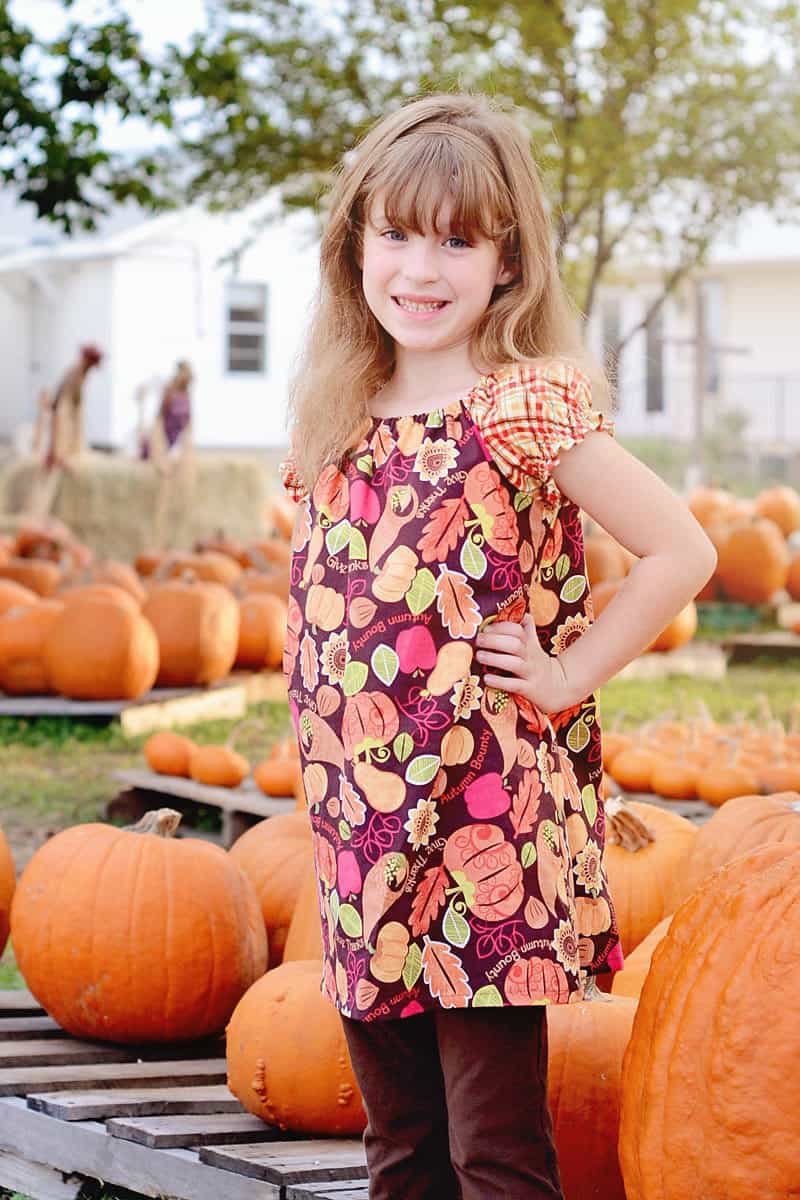
For the peasant dress version I’m showcasing today, I opted to keep the dress simple and let the two fabrics make the statement for our fall pumpkin photos.
I am loving tunic length right now. The length is perfect for school as it allows my missy to wear leggings and still adhere to the dress code.
Peasant Dress Pattern Fabric Amount Suggestions
When it comes to fabric used in my sewing projects, I am very conservative. I’ll fold and refold, move fabric pieces around to use as little fabric as possible. The fabric estimates listed below are what I used for each size.
If you make a mistake or don’t cut properly, you might not have enough fabric. So cut wisely and feel free to add 1/2 yard to my suggestions below.
- 12 mo to 3t: Will easily fit on 1 yard of 40-inch wide fabric
- 4 to 6: With creative fabric wrangling on fabric with no directional fabric nap, you can just barely fit a size 6 with short sleeves on one yard of fabric. If your fabric will only go in one direction, you will need 1 3/8 yard.
- 7 to 12: you can fit these sizes + the long sleeve on 1 3/4 yard
- 14: 2 yards of fabric
- When I say “creative fabric wrangling” that means you will fold the fabric to use the least amount possible for the 1st cut, then refold for the 2nd, 3rd and 4th cut.
Fit Chart

*Note: This peasant dress pattern goes up to size 14.
Materials Needed to Sew a Peasant Dress
- Pattern (When printing, be sure to save the pattern to your pc, open in adobe reader choose auto/landscape and print at actual size.)
- 1 to 2+ yards of fabric
- 1/4 inch Elastic (I have some elastic cutting estimates at the bottom, but if possible, you should fit the dress on the child.)
- iron
- basic sewing supplies (such as Pinking shears, fabric marker or fabric chalk, scissors, ruler )
Elastic cutting guide for the peasant dress pattern
Neck Elastic:
- 12 to 18 months: 15 to 16 inches
- 2t/3t: 17 to 20 inches
- 4/6: 19 to 20 inches
- 7: 20 to 21 inches
- 8: 21 to 22
- 10: 22 to 23
- 12: 23 to 23.5
- 14: 23.5 to 24
Arm Elastic (if you chose to add arm elastic):
- 12 to 18 months: 7 to 7.5 inches
- 2t/3t: 8 inches
- 4/6: 8.75 inches
- 7: 9 to 9.5 inches
- 8: 9 to 9.5 inches
- 10: 9.75 to 10
- 12: 10.25 to 10.5
- 14: 10.5 to 11
Sewing Products and Tools Used and Recommended for this Project
- My favorite shops for fabric are Fabric.com, girl charlie and Stylish Fabrics. (My fave for knits is Funkalicious Fabrics.)
- My Sewing Machine: SINGER 9960 Quantum Stylist 600-Stitch Machine with Extension Table, Bonus Accessories and Hard Cover
- My Serger: Brother 1034D 3 or 4 Thread Serger
- Pinking Shears
- Rotary Cutter
- I love my large ruler and large cutting mat, but you may prefer to start off with a smaller Cutting set
- Dritz Dual Purpose Marking Pen
- Fray Check
- Wonder clips (I didn’t use these in the post, but they are just awesome!
Fabric Layout Guide

Pattern tips and tricks: Important, please read!
- *** Important pattern printing tip*** When printing the patterns, do not print directly from Google docs. Save the pattern to your computer and open it in your adobe acrobat reader, choose actual size auto portrait landscape and print. (If you use any program other than the adobe reader, there is no guarantee the pages will print at the appropriate size.)
- Peasant dresses/tops are designed to be roomy, if you prefer a slimmer fit, move the bodice pattern over from the fold by about 1/2 inch. (I frequently do this.)
- The short sleeves are so cute if you shirr or add elastic to the bottom. (Unless it’s a nightgown, then I usually leave the elastic out of the sleeves…)
- This Free Peasant Dress Pattern includes a 1/4 inch seam allowance unless otherwise noted in the instructions.
- Pattern note: If you choose to sew the long sleeve version, the sleeves sew up just like short sleeves and you can finish the edges with elastic, a regular quarter-inch hem (where you fold 1/4 inch, press, fold another 1/4 inch, press and sew.) or with the quarter-inch hem and shirring. It’s cute in all ways.
- The long sleeve pattern comes in a regular (fuller) sleeve style and a narrow sleeve for knits. (I only recommend the narrower version when you are using stretch/knit fabric.)
Update: the latest version of the adobe reader allows you to print different layers. Each pattern size is on its own layer, so you are able to save ink and print only the size you need. (Click the icon that looks like a stack of papers to see the layers and click the eyeball to turn off the ones you don’t want.)

Have fun making your dresses and as always, if you sew something from one of my tutorials or patterns I would love to see it! Be sure to come back and share a photo on my facebook page or tag me on Instagram @scatteredmom, with #scatteredmompatterns!
FYI: I update my patterns yearly with new sizes! To be notified about new patterns, tutorials pattern updates and fun family recipes, be sure to sign up for my weekly newsletter. =>> Here.
Ready to Learn How to Sew a Peasant Dress?
Visit my Shop and add the free pattern to your cart and check out. Then come back here for the sewing instructions.
Where Do I get the Pattern?
- To get the pattern, don’t forget, you must navigate to the peasant dress pattern page in my shop.
- Enter your name and email and check out (it’s free.)
- The pattern will be emailed to you.
- Click the Pattern link and the pattern automatically saves to your computer.
- Open The free Adobe reader and then open the pattern file. (Don’t print from directly from google’s online version of adobe reader. It will sometimes cause the pattern to print to small or it just won’t open.)
Pattern Info:
- All measurements are in inches.
- Seam allowance is 1/4 inch with a 1/2 inch bottom.
Peasant Dress Sewing Instructions
(printable instructions, with no photos, can be found at the bottom of page)
Step 1: Print your pattern pieces and cut them out and tape them together.
Full pattern looks like this:

Assembly in progress:

Tip: There are two necklines on the dress pattern piece. To make it easier, you can print the bodice pages twice, then cut out the back neckline on one and the front neckline on the second. (or just trace it on another sheet of paper.)

Step 2: Cut pattern pieces from fabric:
Line dress and sleeve pattern pieces up on the fold of the fabric.

Cut one front dress piece, one back dress piece, and two sleeves. (Using either the short sleeve or long sleeve pattern.)
If using the long sleeve pattern, there is an optional narrow sleeve for use on a stretch knits only.

You will have: 1 Front piece, 1 back piece and 2 sleeves.
Step 3: Assemble the dress.
Right sides together, line up the sleeve edges with the armhole edges of the dress front. Sew along this seam (marked in blue) using the 1/4 inch seam allowance and finish the edge with a serger, zig zag stitch or Pinking Shears.

Grab the back dress piece and line up the other sleeve edges and sew the arm/sleeve edges the same way.

When you are done with this step the pieces will connect like below. (No laughing at my drawing skills…)

Next, line up the front and back pieces and sew down the sleeve edge all the way to the bottom of the dress, do both sides and finish the seam edge with your preferred method.
Step 4: Create the Elastic Casing.

To create the neck casing, fold the edge of the neckline in 1/4 inch and press. Fold the neckline over another half inch and press again. Use pins if needed, but be careful not to melt your pinheads when pressing!

Stitch along the edge of the casing, a scant 1/8 inch from the folded edge. Backstitch at the beginning and end and leave a 1.5 inch opening in the casing to insert the elastic.
Cut your elastic according to this guide. (Keep in mind you may want to cinch up your neck line more or less depending on how the dress is fitting:)
- 12 to 18 months: 15 to 16 inches
- 2t/3t: 17 to 20 inches
- 4/6: 19 to 20 inches
- 7: 20 to 21 inches
- 8: 21 to 22
- 10: 22 to 23
- 12: 23 to 23.5
- 14: 23.5 to 24
Attach a safety pin to the edge of the elastic and thread the elastic through the casing. Have your model try on your dress if possible and make any needed adjustments.

Sew the elastic ends together (Be careful not to twist them) using a wide zigzag stitch and trim any excess elastic. Finish sewing the elastic casing closed.
Step 5: Hemming the Dress.
Fold the bottom edge over 1/2 inch, press, fold over another 1/2 inch press again and sew along the folded edge.

Step 6: Sleeve Finishing Options:
To finish the sleeves of your dress, you have a couple of options: Shirring the Sleeve edge, creating a casing and adding elastic or just hemming.
Here are some examples of the different sleeve options and the instructions to do them:
1. Shirring the sleeve edge:

Fold the sleeve edge over 1/4 inch, press, fold another 1/4 inch press again and sew along the folded edge. With elastic thread on your bobbin, add 3 to 4 rows of shirring, 1/4 inch apart. For a more detailed shirring tutorial, see my shirred sundress tutorial.
2. Adding a casing:

The arm casings are created just like the neck casing. Elastic cutting guide lengths for the arms:
- 12 to 18 months: 7 to 7.5 inches
- 2t/3t: 8 inches
- 4/6: 8.75 inches
- 7: 9 to 9.5 inches
- 8: 9 to 9.5 inches
- 10: 9.75 to 10
- 12: 10.25 to 10.5
- 14: 10.5 to 11
3. Hemming the sleeves:

You can also hem the sleeve w/out adding elastic as I did with this nightgown. This is the easiest option and is still very cute. Just fold the sleeve edge over 1/4 inch, press, fold over another 1/4 inch press again and sew.

That’s it! Your peasant dress is done! Go have your little one try it on and pose for a few pictures to share!
Don't miss any more posts!

Follow along on:
Feedly, Bloglovin', your favorite feed reader, or signing up via email and have new posts delivered to your email box each week!How to Sew a Peasant Dress

Learn to sew a peasant dress with this free girl's peasant dress pattern. Peasant Dresses truly are one of the simplest dresses to sew. No buttons, zippers or labor intensive fabric gathering is needed.
Materials
- Pattern (When printing, be sure to save the pattern to your pc, open in adobe reader choose auto/landscape and print at actual size.)
- 1 to 2+ yards of fabric
- 1/4 inch Elastic (I have some elastic cutting estimates at the bottom, but if possible, you should fit the dress on the child.)
- iron
- basic sewing supplies (Ex: Pinking shears, fabric marker, pins, scissors, ruler )
Tools
- Sewing machine
- Basic Sewing supplies
Instructions
Step 1: Print your pattern pieces and cut them out and tape them together.
- Tip: There are two necklines on the dress pattern piece. To make it easier, you can print the bodice twice (page 1 and 2) then cut out the back neckline on one and the front neckline on the second.
Step 2: Cut pattern pieces from fabric:
- Line dress and sleeve pattern pieces up on the fold of the fabric.
- Cut one front dress piece, one back dress piece, and two sleeves. (Using either the short sleeve or long sleeve pattern.)
- Tip: If using the long sleeve pattern, there is an optional narrow sleeve for use on a stretch knits only.
- You will have: 1 Front piece, 1 back piece and 2 sleeves.
Step 3: Assemble the dress.
- Right sides together, line up the sleeve edges with the armhole edges of the dress front. Sew along this seam (marked in blue) using the 1/4 inch seam allowance and finish the edge with a serger, zig zag stitch or Pinking Shears.
- Grab the back dress piece and line up the other sleeve edges and sew the arm/sleeve edges the same way.
- When you are done with this step the pieces will connect like below. (No laughing at my drawing skills…)
- Next, line up the front and back pieces and sew down the sleeve edge all the way to the bottom of the dress, do both sides and finish the seam edge with your preferred method.
Step 4: Create the Elastic Casing.
- To create the neck casing, fold the edge of the neckline in 1/4 inch and press. Fold the neckline over another half inch and press again. Use pins if needed, but be careful not to melt your pinheads when pressing!
- Stitch along the edge of the casing, a scant 1/8 inch from the folded edge. Backstitch at the beginning and end and leave a 1.5 inch opening in the casing to insert the elastic.
- Cut your elastic according to this guide. (Keep in mind you may want to cinch up your neck line more or less depending on how the dress is fitting:)
- 12 to 18 months: 15 to 16 inches
- 2t/3t: 17 to 20 inches
- 4/6: 19 to 20 inches
- 7: 20 to 21 inches
- 8: 21 to 22
- 10: 22 to 23
- 12: 23 to 23.5
- 14: 23.5 to 24
- Attach a safety pin to the edge of the elastic and thread the elastic through the casing. Have your model try on your dress if possible and make any needed adjustments.
- Sew the elastic ends together (Be careful not to twist them) using a wide zigzag stitch and trim any excess elastic. Finish sewing the elastic casing closed.
Step 5: Hemming the Dress.
- Fold the bottom edge over 1/2 inch, press, fold over another 1/2 inch press again and sew along the folded edge.
Step 6: Sleeve Finishing Options:
- To finish the sleeves of your dress, you have a couple of options: Shirring the Sleeve edge, creating a casing and adding elastic or just hemming.
- Here are some examples of the different sleeve options and the instructions to do them:
1. Shirring the sleeve edge:
- Fold the sleeve edge over 1/4 inch, press, fold another 1/4 inch press again and sew along the folded edge. With elastic thread on your bobbin, add 3 to 4 rows of shirring, 1/4 inch apart. For a more detailed shirring tutorial, see my shirred sundress tutorial.
2. Adding a casing:
- The arm casings are created just like the neck casing. Elastic cutting guide lengths for the arms:
- 12 to 18 months: 7 to 7.5 inches
- 2t/3t: 8 inches
- 4/6: 8.75 inches
- 7: 9 to 9.5 inches
- 8: 9 to 9.5 inches
- 10: 9.75 to 10
- 12: 10.25 to 10.5
- 14: 10.5 to 11
3. Hemming the sleeves:
- You can also hem the sleeve w/out adding elastic as I did with this nightgown. This is the easiest option and is still very cute. Just fold the sleeve edge over 1/4 inch, press, fold over another 1/4 inch press again, and sew.
That’s it!
- Your peasant dress is done! Go have your little one try it on and pose for a few pictures to share!

I’ve made this dress several times. It’s so quick and simple. It’s easy to read and was perfect for when I was a beginner sewer, and is still great now. I’ve used it to make Halloween costumes that later turned into dress up clothes, I’ve used it to make a simple shift dress for the Renaissance Festival, and to make a simple top for my girls.
Thanks.
So glad you liked it!
You are a life saver with this free peasant dress pattern! Thank you so much, it turned out perfectly!
I’m so grateful for the work and time you give. Just wanted to share how much your pattern meant to a little girl, and me. Over a year ago I made a dress and pjs for my granddaughter. I just received a text with a photo of a pleading face asking for a larger pj. Right now it is very cold and I made the peasant dress out of flannel with a ruffle on the bottom to extend the use. Poor child can barely fit into it as a shirt! She doesn’t want to give it up! Bless you for having the pattern ready in a larger size! I will be sewing away promptly with a joyful heart!
Thank you! My daughter is going through the exact same thing right now. She has completely outgrown all her nightgowns I’ve made with this pattern. I’ve even replaced the elastic to make them last longer. At Christmas time, I tried to find some larger sized nightgowns I could just purchase so she could have something to wear that fit properly, but they were all sold out everywhere! She needs a size 12 now (or 14 since I like to size up.) I am in the process of adding a few more larger sizes very soon and making my poor lil missy some new nightgowns!
Hi thanks so much love the tutorial and pattern. I’m making one up for my daughter who is 7mths old – using the 12mth old pattern. Was wondering if I can adjust it to make a size to fit her now? perhaps take it in?
You could try sliding the bodice and sleeve pieces over about an inch past the fold (so the pieces will be narrower) I also think since she is crawling, you will want the dress/to be a wider fit on the bottom. So measure over 2.5 inches from the armscye to get the bottom skirt width.
Good luck!
Got it! thanks so much you saved Christmas!
Know those recipes where people say “I changed everything about it, but it’s a great recipe!” That was me making this nightgown. I didn’t know how I was going to make it, so I bought material weeks ago. I didn’t have enough for sleeves. I did have enough for some thin straps, so I did that. And since I didn’t sew sleeves to it, I did a rolled hem on the bottom of the straps & the arm hole (because I didn’t have enough for facing either). I anticipate quite a few summer dresses for the granddaughter, & yearly jammies now that I’ve found this pattern, so I’ll have opportunity to get it right.
Thanks, it’s exactly what I was looking for (& I want a grown-up size because it’s adorable)!
Ha ha, Angela, I know exactly what you mean! One of the reasons I love this pattern so much is you can change it up and do so much with it. I’m going to be adding a couple of larger sizes to the pattern this spring and I am also hoping to get to an adult version too. Stay tuned and thanks for stopping by with a comment!
~Jamie
Wow what a great pattern! Thank you so much! I used it with the new “in” fabric musselin and I really like one fpr myself now 🙂 Will definitely make some more peasant dresses!
Thank you so much for this tutorial! It was so easy to follow your instructions. I used it to make a costume for my daughter’s 2nd grade project. So helpful!
Thank you so much for this pattern. I can’t wait to use it to make a nightdress for my daughter!
Thank you so much for your free pattern, it is perfect for the dresses for Africa project. I have made 6 dresses so far. Your pattern was easy to understand and sew. I plan on making many more, your dresses are blessing others across the globe.
I have used this pattern in the past for a charity in Haiti. But I have misplaced it. Getting ready to start up my spring sewing.
This is a very easy pattern to use and the dresses are so cute!
Thanks so much for the tutorial and pattern – looking forward to making some of these for my granddaughter this summer!
Thank you so much for this tutorial! I’m a begginer, and this was wonderful!!! I may have spent all day on it lol, but I’m very happy with my first peasant dress!
Fed up with all these PDF patterns on the net. Wish they would sell the paper patterns. I do not think it is the same.
I agree that pdf patterns are a pain to put together, but that’s just the way things are now. I am sure you can find a peasant dress tissue/paper pattern to purchase at your local sewing store. But keep in mind this one is free and has been used over 55,000 times. (just imagine if I had a dollar for every time someone “bought” this pttern. I’d have a fully-funded college savings account for both kids.)
Pefect pattern for my daughter’s Princess Leia costume
Just what I needed. Thank you!
How do i get to the tutorial. Your page is so heavy with adds It took forever and still did not completely load. I understand its for money. I get that, but wow. I got the pattern but see no way of sewing instructions..
I’m so glad you found the pattern! I have put countless hours and money into the upkeep of this website and the creation of over 120 patterns and tutorials that I make available at no cost to you. I hope you enjoy this pattern and are able to sew something pretty for a loved one or someone in need.
The ads load after the content has loaded and does not slow the page down. The reason it is slow is that is that there are many photos in this post and that does take time to load.
If the ads or load time bother you, I suggest you purchase a pattern on etsy. That way your purchase price gets you an ad-free pattern! Here is one that only costs only $6.95: http://tidd.ly/ead68369
Good luck, Jamie
Been looking for a dress like this – thanks so much! However, I saved it, and put my printing to "no scale". Doing this, the 1" box measures out perfect, but the gray boxes have no gray top to them at the top of each page, and just show a tiny bit of the oval with the letter. Should I just line up where the oval with the letter is or am I missing a printer setting? I'm printing in landscape, but don't see any other print settings to use. Thanks
Hi Mary, you can check the box for actual size and auto portrait/landscape. That should center the pattern and still print it at the correct size.
Good luck,
Jamie
Would love to try this but the link isn't cooperating…could you email? teachinyours@yahoo.com
thanks
The link is working, I'm unable to email it. Maybe you can get someone to help you figure it out.
Good luck!
Thank you, Jamie for the great pattern, I´ve linked your tutorial on my blog – spread the word in the german speaking countrys 😉
Catrin
Thank you!