Ladies Raglan Top Pattern
Disclosure: This post may contain affiliate links. As an Amazon Associate, I earn from qualifying purchases.
Be sure to grab your copy of this free sewing pattern! When paired with leggings and boots, this Ladies Raglan Top Pattern is perfect for a morning of school drop off, running errands and snuggling on the couch!
The length is tailor-made for me, but you can easily lengthen or shorten the pattern to whatever length is most flattering for you.

💌 Save this article
*Update!! Check out Cowl-neck top I made with this pattern!
Ladies Raglan Tunic Pattern
You’ve probably noticed; I have a thing for tunic-length tops. I like the length on both my daughter and me, especially now that leggings are so popular.
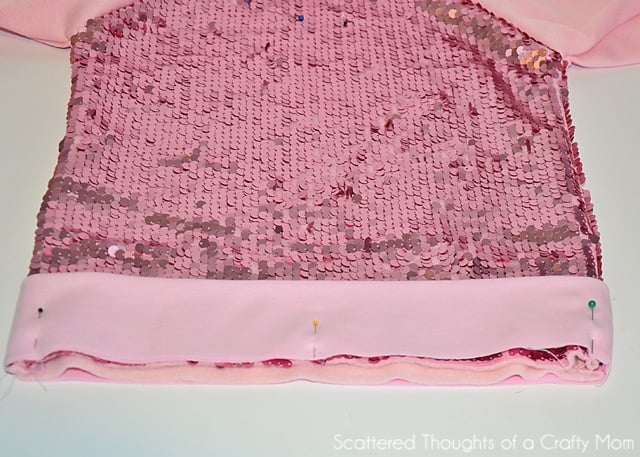
I made her a sequined raglan tunic top several weeks ago, and my plan was to make myself one too. (I bought the prettiest teal sequined fabric and sweatshirt fleece.) But, I spent too much time fiddling over the pattern and now March is practically over.
I’ve decided to shelve the sequined sweatshirt for me until next winter.
Since finishing my Raglan Tunic Pattern, I’ve made a couple different versions so far.
The first top is made with a nice quality French terry fabric (the version shown in coral fabric.)
I love that this particular french terry fabric had such great stretch and recovery. Paired with leggings and my shearling boots, this top is perfect for morning drop off and running around in!
I made no changes to the pattern for this version.
Raglan Tunic Top Sizing Notes
To make this pattern, I traced it off of a favorite top from my closet. One of the reasons I love the top so much is that it is really roomy, but still flattering.
The size of the original top is tagged as a medium, but it really fits more like a small large or a large medium. And when it comes to RTW tops, I wear either a med or a large depending on how roomy the top is. (Clear as mud, lol.)
Since the sizing a bit on the questionable side, I just called it a medium/large and graded the next size down to be more of a small/medium.
On my next pattern, I’ll be more careful to start out with a pattern that is closer to a true size…
Pattern Size Chart
Body Measurements:
- S/M: Bust: 35 – 37 Hip: 35.5 to 37.5
- M/L: Bust: 37.5 to 39 Hip: 38 to 40
Finished Raglan Tunic Measurements:
- S/M: Bust: 39.5 Hip: 39.75
- M/L: Bust: 41.75 Hip: 42
(As you can see, there’s plenty of ease in the top for a nice loose fit. )
Raglan Tunic – Boatneck Version
The next version I made was this denim-blue top, made the same as the first, but with a slightly wider neckline. (For a wider neckline, trim 1/2 inch off the top of the sleeves, front and back bodice pattern.)

I like the blue top in general, but it was a poor fabric choice.
The fabric is another french terry (if you can call it that) – lots of stretch but absolutely no recovery. After wearing it for a bit, it becomes very “shlumpy”. Fine for around the house, but not out and about…
The fabric was an online order failure – had I seen it in person, I wouldn’t have bought it.
Version 3- Tissue Knit Fabric and No Cuffs
This last top was made with a very stretchy tissue weight knit.
For this version, I lowered the neckline, made the sleeves 3/4 length, added an inch to the sleeve cuff and left of the bottom band. I left the bottom un-hemmed in the photo, only because I was out of time, but I do plan on hemming it with my double needle.

Products used and Recommended in this:
- My favorite fabric shop for knits: Funkalicious Fabrics and Girl Charlee. My favorite shop for cottons and other fabrics: Fabric.com.
- My Sewing Machine: SINGER 9960 Quantum Stylist, my coverstitch: Janome Cover Pro 1000cpx
- My Serger: Brother 1034D 3 or 4 Thread Serger or you can just use Pinking Shears
- Rotary Cutter
- I love my large ruler and large cutting mat, but you may prefer to start off with a smaller Cutting set
- Dritz Dual Purpose Marking Pen and Fray Check
- Wonder clips (I didn’t use these in the post, but they are just awesome!
- Ball point needles
- Ball Point double needle
- Walking foot
Save this pattern for later by pinning here ![]()
Let’s get started!
First, download the Ladies Raglan Tunic Pattern.
Materials needed:
- Pattern
- Fabric: stretch knit, about 2 yards. (With creative fabric wrangling, you can get a large out of 1 3/4 yard of 48 inch wide knit fabric.)
- Ribbed binding: use a ribbed knit or other knit with at least 75% stretch- any less than that, you will need to add a couple of inches to the binding and cuffs. (If you are worried, cut your binding a little long and stretch it with your fingers to make sure it will go all the way around.)
- Ball point/jersey needle
- spray starch/iron
- basic sewing supplies
Ladies Raglan Top Sewing Instructions
(I didn’t do a separate tutorial for this pattern since it is made the exact same way as my child size raglan tunic pattern/tutorial. Instead I just copy and pasted the instructions here so you no longer have to flip back and forth between the two.)
Fit Info:
Body Measurements:
- S/M: Bust: 35 – 37 Hip: 35.5 to 37.5
- M/L: Bust: 37.5 to 39 Hip: 38 to 40
Finished garment measurements:
- S/M: Bust: 39.5 Hip: 39.75
- M/L: Bust: 41.75 Hip: 42
(As you can see, there’s plenty of ease in the top for a nice loose fit. )
Step 1: Print pattern, tape together and cut out size needed.
Once you have downloaded the pattern to your desktop and opened it in the free adobe reader program, there’s a new printing option for you. You can now print only the size needed. (this pattern only, I’ll slowly go back and start updating the older patterns.) This function is super handy and makes it much less confusing when cutting the pattern, plus I love that it enables me to print in black and white. (that color ink can be pricey!)
To print a single size, open the pattern, click the “stack of papers” and toggle the size you want on and the other off. Be sure to leave the pattern markings on.

Step 2. Cut pattern and bindings:
Print the pattern and align the colored dots. Cut out the size needed from the pattern. (two sleeves, front and back bodice)

Cut binding pieces from measurements:
Neck binding: (cut on the fold)
- S/M: 10.5 inches by 2 inches
- M/L: 11 inches by 2 inches
Sleeve cuffs: (not on the fold)
- S/M: 8 inches by 4.5 inches
- M/L: 8.5 inches by 4.5 inches
Bottom binding: (not on the fold)
- S/M: 37.75 by 4.5
- M/L: 40 inches by 4.5
Step 3: Assembling the top:
Line up the sleeve edges and the front tunic piece, right sides together. Pin in place and sew along the edge.

Line up the back tunic piece with the back sleeve edges, right sides together, pin and sew.

Line up the front and back. Pin together and sew, from sleeve (cuff) edge to the bottom of the shirt.

Step 4: Adding the cuffs bottom band and neckband.
Fold all the fabric strips in half, right sides together, so the sort edges line up. Sew along the edges, using a 1/4 inch seam allowance. (You should have fabric circles.)

Starting with the bottom band, fold the fabric circle in half, right sides together and press.

Divide the fabric band into fourths, mark these points with pins or a fabric marker. Mark the center of the front and back side of the tunic. Match up the marks, lining the raw edges of the band and raw edges of the tunic up, pin in place. (A much better photo tutorial of this process can be found in my Tie Front Top tutorial.)

Sew along the edge with a 1/4 inch seam allowance. Gently stretching the band to fit the bottom of the tunic from quarter mark to quarter mark.

Repeat this process for the neckline and sleeve cuffs.


For a more finished look, you may want to gently press your seams flat and top stitch around the neckband. Since fleece and most knits don’t fray, it’s completely optional to finish the inside seams.
You’re done!
Let me know if you end up making one of these!
Like this project? Be sure to pin it! ![]()
Don't miss any more posts!


I’m new to pdf patterns. Is there a picture or instructions for how to cut it out and lay it out on the fabric? I’m having a hard time finding anything other than the pdf pattern pages.
I just updated the post a bit hopefully it helps.
This is my first knit shirt. I added 1/2 to the fold on front and back – so a total 2inches to the total bust and hips. How much should I add to the neck binding? It is 22inches length originally. Thank you so much for the help!
Are you using ribbed binding or the same shirt fabric? If using ribbed binding, measure your neckline and multiply that by .85 for amount of ribbing. If you are using less stretchy fabric, maybe .93? If using less stretchy fabric, I will often cut the binding long and then leave one shoulder open and cut off the extra and then sew the shoulder closed.
I am currently working on family Christmas pajamas and sadly I purchased a Simplicity pattern that had a pattern for every piece I needed. The second I opened the flimsy tissue paper pattern I instantly regretted it! I always forget how expensive, yet cheaply made and totally confusing store bought patterns are! After meticulously cutting out all of the tissue paper patterns, I attempted to make the Raglan night gown pattern for my daughter and the fit was horrible! I decided to scrap the store bought pattern and came back to your blog to download and adapt a trusty, true to size pattern! I am now using this ladies Raglan pattern and the girls Raglan pattern and adding a few inches to the length for our matching Christmas night shirts! Thanks for creating such simple and well fitting patterns to share!
Noelle, thank you so much for the kind comment. You made my day!
I just made this using a sweatshirt knit (I live where the wind hurts your face). It’s a little heavy, but fits perfectly! I would describe myself as a S/M and it is absolutely spot on. I 5’9″ and wanted this to be long, so I added about 5″ to the length and probably should have added 2″ to the sleeves. I am already planning to make another with short sleeves for spring!
So happy it worked for you!
Thanks for the great pattern. I made one and you can find it here:
http://misswobie.blogspot.be/2015/11/een-gezellige-herfsttrui.html
Is the seam allowance already included in the printed pattern? Thx
yes it is.
It was 10.5 cut on the fold. (So it was 21 inches.) I'll edit the post to make that instruction more clear.
Good luck!
~Jamie
Following about the neck band post. I just made this and it turned out perfect but the neck band is very fitted around my neck. I like the looseness that's shown in the picture of the pink one, but mine fits like a turtle neck. Was your neck band 10.5?? Not sure how to post a picture here either. Thank you.
What kind of material did you use on the pink/red shirt that is first pictured? Is it thick?
The fabric was not very thick, I would call it a medium weight french terry. Similar to this one: http://2.bp.blogspot.com/-3DeLs5U7YG0/VNftwH3L1LI/AAAAAAAAeL4/kwbRgGM-mnE/s1600/20150208_170806-(1)-copy.jpg
(the photo is of the wrong side of the fabric- I tried to poke my fingernails through it, so you could see the density and how it stretched.) Hope that helps.
Yes, cut the binding on the fold. I will add that additional instruction to the post when I get back to my computer. Two things to keep in mind about the binding: it needs to have about 75% stretch and If you are not sure about the strerch, you can always cut it a little bit longer, then use your fingers to hold it/stretch it around the neckline and make sure it's going to fit and trim it later.
Just checking but is the neck binding supposed be on the fold lengthwise? I don't think 10.5" is big enough to go over my head.
Hello and thank you for sharing this!!! I'm about to share in on Pinterest and to put it in my to do list.
thank you! My girl loves her top and now I get my own!
Thank you so much for posting this. I've been looking for a good raglan top to try my hand at. 🙂
I love this – it turned out great! Thanks for sharing your pattern. You look great in the photos, by the way. I used to hate putting myself in my photos too but have gotten used to it. I don't have any girls to model for me only teenage boys and I don't think they are going to wear my creations!
Great pattern! I love this kind of top – perfect for looking pulled together but still comfy:)
This is a great top! Practical but also cute!! I totally understand the awkwardness of photos of yourself in garments. My husband takes the world's most unflattering pictures of me, so now I'm trying to train my 10-year-old to take fashion photos. It's not going so well. 🙂 Anyway, just wanted to let you know I've got a Craft Gossip post scheduled for later today that links to your pattern.
Thank you for sharing Jamie!
I really like this top and I think I like the lighter knit the best. Thank you so much for the pattern. There are so many different styles of knitted tops, but this is one of my favorites and may I just say you do rock it. I have followed your blog for quite a while now, and really love and appreciate all your tutorials and teachings and patterns. Happy Sewing!!
Thank you VernaGrace! These tops were just my test versions… I have some really pretty knits that would be great to use on this top.
I love the tops you have made! My mother-in-law is donating her old serger (called an overlocker here in the UK) to me soon and I can't wait to try sewing some knits. I have stock piled a knit stash in anticipation of its arrival, but I am so tempted to have a go at this top with my regular machine. Do you think a normal sewing machine would cope with stretchy fabric and not make it hideously out of shape?
I forgot to mention it, but you can totally make this top without a serger. I did use my serger on the side seams, not because it is necessary, but because it is faster. I used my regular machine for the cuffs and binding. I used a regular straight stitch, with a ball point needle and I lengthened the stitch length by one setting and had no problems… If you have the lightning bolt stitch, that is always a good one to use on stretch knits.
The only place you might run in to trouble is if you leave off the sleeve or bottom cuff and want to hem the ends. In that case I recommend using a double needle or zig zag or the lightning stitch and a walking foot if you have one. (You can't really use a serger for hemming anyway.)
I have some good tips for sewing with knits on this post: https://www.scatteredthoughtsofacraftymom.com/2012/09/freetunictoptutorial.html
Good luck,
Jamie
You can do a blind hem with a serger. It takes concentration & some adjustments to your serger, but it can work very well.
Yes, I actually have a serger/blind hem tutorial on my blog now. See it here: https://www.scatteredthoughtsofacraftymom.com/free-short-legging-pattern-serger-blind-hem/