No Sew Fabric Flowers
Disclosure: This post may contain affiliate links. As an Amazon Associate, I earn from qualifying purchases.
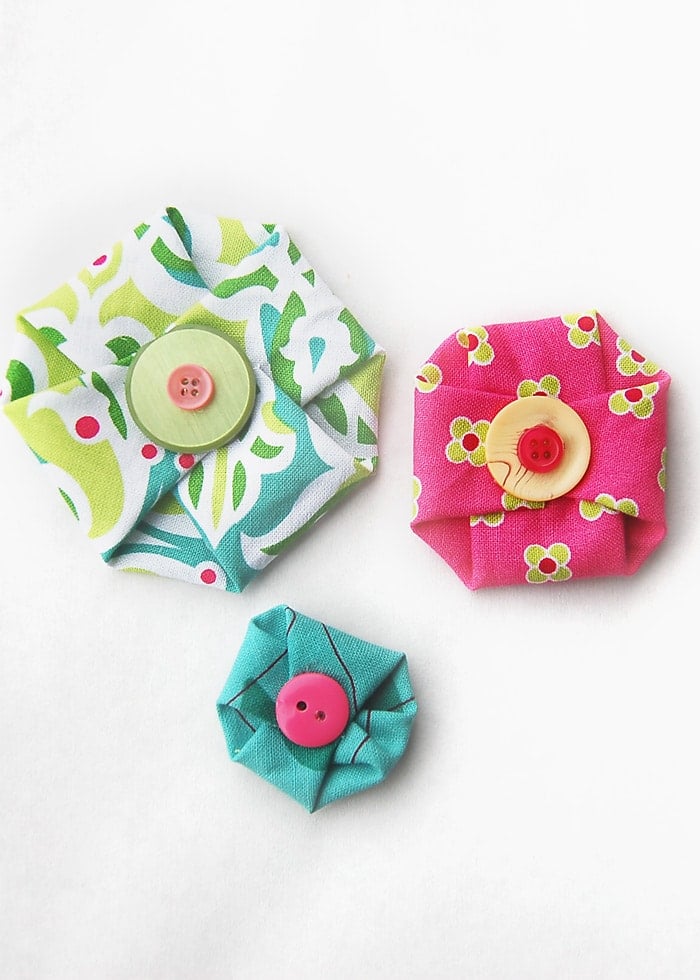
How to make No-Sew Fabric Flowers! You’ll love how easy it is to make how to make these darling fabric flowers without any sewing! All you need to make these easy fabric flowers is fabric, a bit of glue and a button.
No-Sew Fabric Flower Tutorial
I’ve been using these little no-sew fabric flowers in all sorts of projects lately. They are perfect for embellishing small projects and make an excellent gift topper. I used my fabric flowers as magnets for my DIY Magnet Board.
The first time I tried making a similar fabric flower, I sewed it. I thought the sewed version looked messier, so I played around with the design and came up with a new (easier) way to make a simple fabric flower embellishments that doesn’t require any sewing! (It was yo-yo flower I tried – I guess I just need more practice, lol.)
The best part about these easy flowers, other than the no sewing, is you can whip them out by the dozen, in just a few minutes.
All you need is fabric, a bit of glue (I used hot glue) and a few coordinating buttons. You create a circle template, make a few folds, and secure with glue. Top with a button and that’s it!
Different circles make different sized flowers and if you have a cutting machine, you could use that to cut out your circles and save even more time.
Want More Fabric Flower Tutorials?
You might also enjoy these DIY fabric flower tutorials:
- Easy Fabric Flower From old Flowers
- Simple 5-Inch Fabric Flower Tutorial
- Scrap Busting Fabric Flower (No Sew)
Are you ready to see how to make a few flowers for yourself?
Materials Needed to Make a No-Sew Fabric Flower:
- Fabric scraps
- Buttons
- Marker
- Scissors
- Round object to trace
- Hot glue/glue gun (I use this cordless hot glue gun.) (Or other craft glue)
Instructions for a No-Sew Fabric Flower
1. Trace a circle on to the back of the fabric and cut the circle out.
2. Fold the circle into fourths and draw a little mark like what is shown below on all sides of the folded circle. This will make a little circle in the middle.
3. Add a little dab of glue on the line of the little circle you drew with the glue gun. Fold one of the edges over as shown.
4. Add glue and fold the other three sides up.
5. Add glue and fold over the four pointy corners, one at a time.
6. Add a little more glue, a pretty button and you’re done!
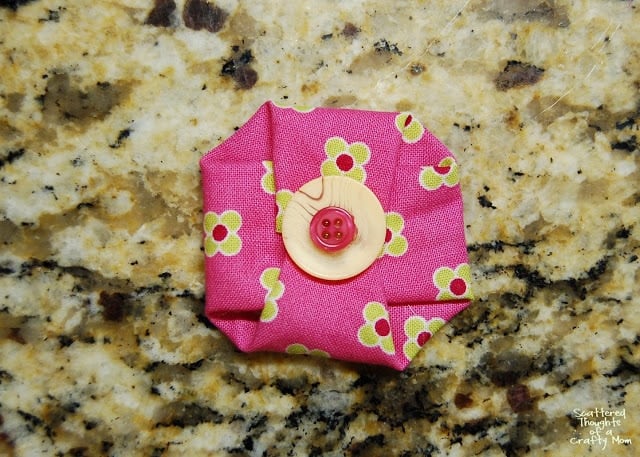
Try different size circles and bunch together for a cute look, or try stacking a small and large flower for a big impact.
More scrap busting Projects
Don't miss any more posts!
Follow along on:
Feedly, Bloglovin', your favorite feed reader, or signing up via email and have new posts delivered to your email box each week!
I love your ideas on the buttons for I have a lot so you have given me some ideas. Thank you!
Are there supposed to be pictures? I only see the first 2 pictures (part of the intro) and ads. 😞 I’ve tried looking on my phone and laptop.
Yes, there are photos for every step. They seem to be working fine now, possibly the website was glitching at the time.
Too cute! I would have these everywhere!
This looks so easy! My daughter will love to do this! Thanks for sharing!
Missy from Dot-to-Dot Connections
tonight i made one of these just to try the technique and use some scrap fabric i have… then i made 2 more! they were just so easy and darned cute! now i've completely changed some pillow cases i'm making just so i can use these flowers on them! they'll look great in my daughter's hair, too (when she grows some) 🙂 thanks!
trying to make these for my daughters but mine keep coming out pretty crooked looking…any tips? thanks!
If you look at the title photo, you'll see I had one that was pretty crooked too and the rest were "almost" round. They come out best if you cut a perfect circle and then find the exact middle and create a smaller circle around the middle spot and fold up to that. (See the pics above…)
Good luck!
~Jamie
thanks for sharing.
These look great!
Love these! I just made a few to complete my little girl's Jubilee outfit. So easy and cute!
Forgot to mention that I added pictures of them to the Flickr group. Thanks again for sharing such a great tutorial!
These are really cute, I made them into magnets for teacher gifts. I used a CD as a template and it worked perfectly, even used the center of the CD to mark the middle!
These are so cute, I put a magnet inside and used them to decorate my fridge. I am thinking I can do that for all the holidays.
Flowers are beautiful and easy to make. I have lots of scraps and buttons to use. I can add to scarves and hats. Thanks for the idea.
Just found your blog tonight and love those flowers. Alot quicker and easier than others I've seen. Those I can make. My hands don't work too well anymore so making the flowers you have to twist and sew and all that hasn't worked too well for me. Your flowers would be a good change also to so many others I've seen. Fabric flowers are sure the "thing" now aren't they? Love it as I have lots of fabric and old buttons.
Thanks for great tutorial.
Wow! They are easy to do and really nice!
Thank you for the tutorial, it is beautiful :o)
How I love these bows. I don't own a sewing machine but I just love fabric. I am always excited when I find out how to use fabric without sewing :).
http://www.scobellexpressions.blogspot.com
perfect..love the idea & tutorial..
Thanks for sharing..
Thank you as I love to do flowers & these are so quick to do.I'll do a few xtra for the churches Easter fundraiser.
Dziękuję- Fantastyczny kurs!
Pozdrawiam cieplutko =}
Oh my gosh these are so cute and seem easy. Im going to go make some right now. I make custom dolls and these would be PERFECT added to the doll clothes or dolls hair. Thanks for posting 🙂 cutestdollsever.blogspot.com
Thank you for tutorial ^_^ I will try to make this gorgeous flower at home.
Oh these are adorable, and so easy. I could NOT sew anything to save my life, so these are perfect. I see a whole bunch of these on my fridge in the near future…ha! Thanks for the great idea, I pinned it as well. Have a great day!
Thank you for the beautiful idea and tutorial!!!
These are so cute! I don't think I've seen this flower before! Love that it's no-sew 🙂
Fabulous post,
Thank you for linking your post up! , hope you will stop by today and link up another great post!!
http://polkadot-pretties.blogspot.com/
See you there
Claire x
GORGEOUS!!!! Oh I love this! It would be great if you would share this with our readers for Fun Stuff Fridays. http://www.toysinthedryer.com/2012/02/fun-stuff-fridays-11.html
Oh my goodness! These are so cute! My daughter and I make all of her hair accessories…I guess we can add these next! I am hosting my first link party today, and would love for you to link this up, along with anything else you like!
http://www.mom4realky.blogspot.com/2012/02/4-real-friday-link-party-1.html
Jessica @ Mom 4 Real
so so cute!
So darn cute, and easy. I will definitely be making a few hundred of these! Thanks for sharing your creative inspiration at Sunday's Best Par.tay!
So cute! I love them!
Oh I love it, you had me a no sew 🙂 Do you mind telling me what font you used in your title photo? I just checked out a book that uses that font too and I'd love to use it on some scrapbook pages, thanks!
Wow, so cute and so easy!
These are really cute. Can think of a bunch of projects to use them on. Thanks for the tutorial.
Blythe
http://www.thedesperatecraftwives.blogspot.com
Cute and easy! I love it! Thanks for sharing.