

Easy Quilted Halloween Table Runner Pattern
Disclosure: This post may contain affiliate links. As an Amazon Associate, I earn from qualifying purchases.
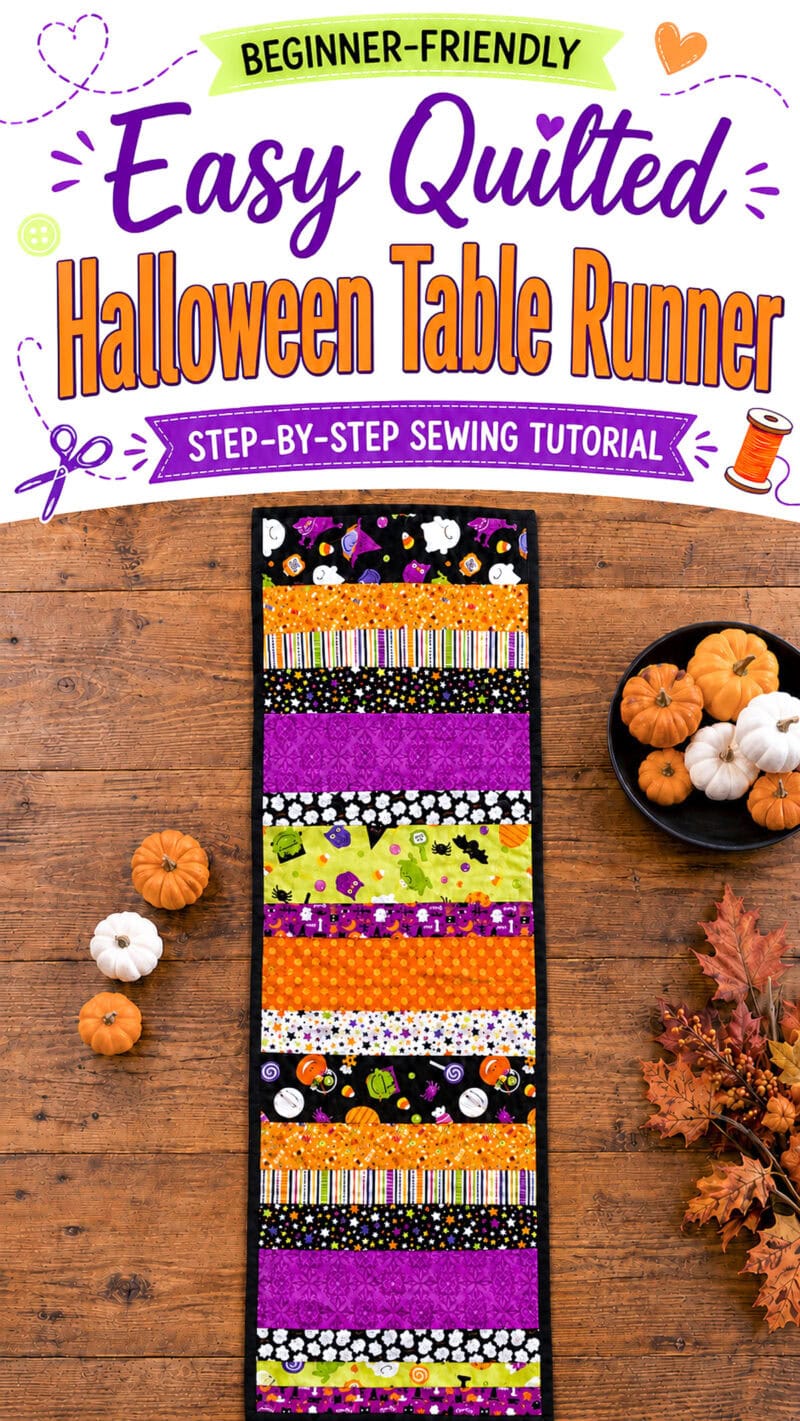
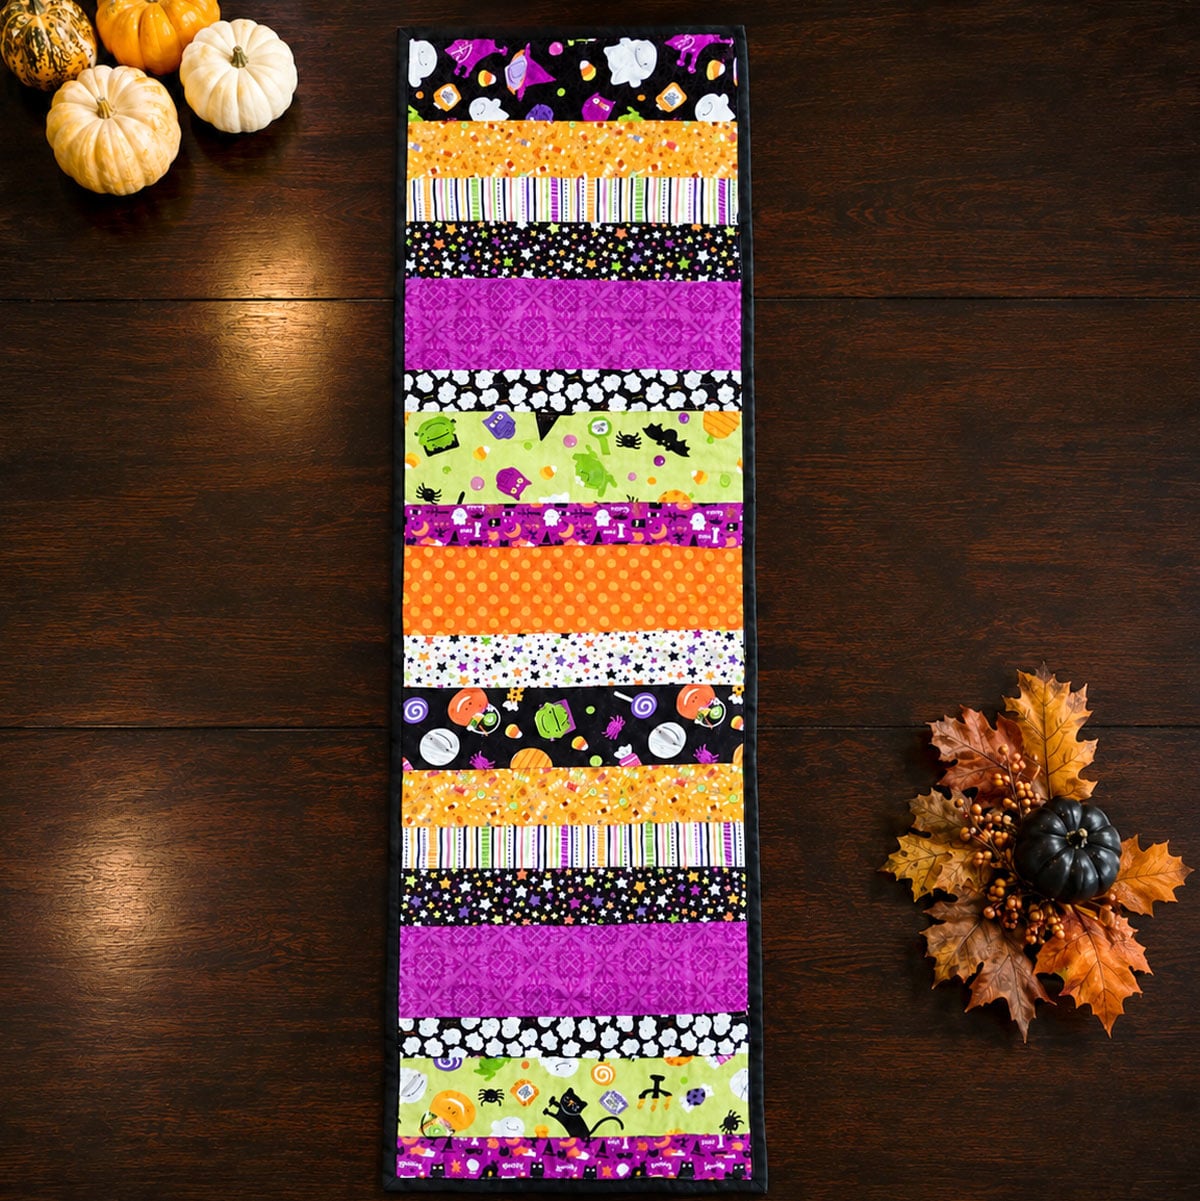
This easy quilted Halloween table runner pattern is a fun, beginner-friendly strip-pieced quilting project made with coordinating Halloween fabrics.
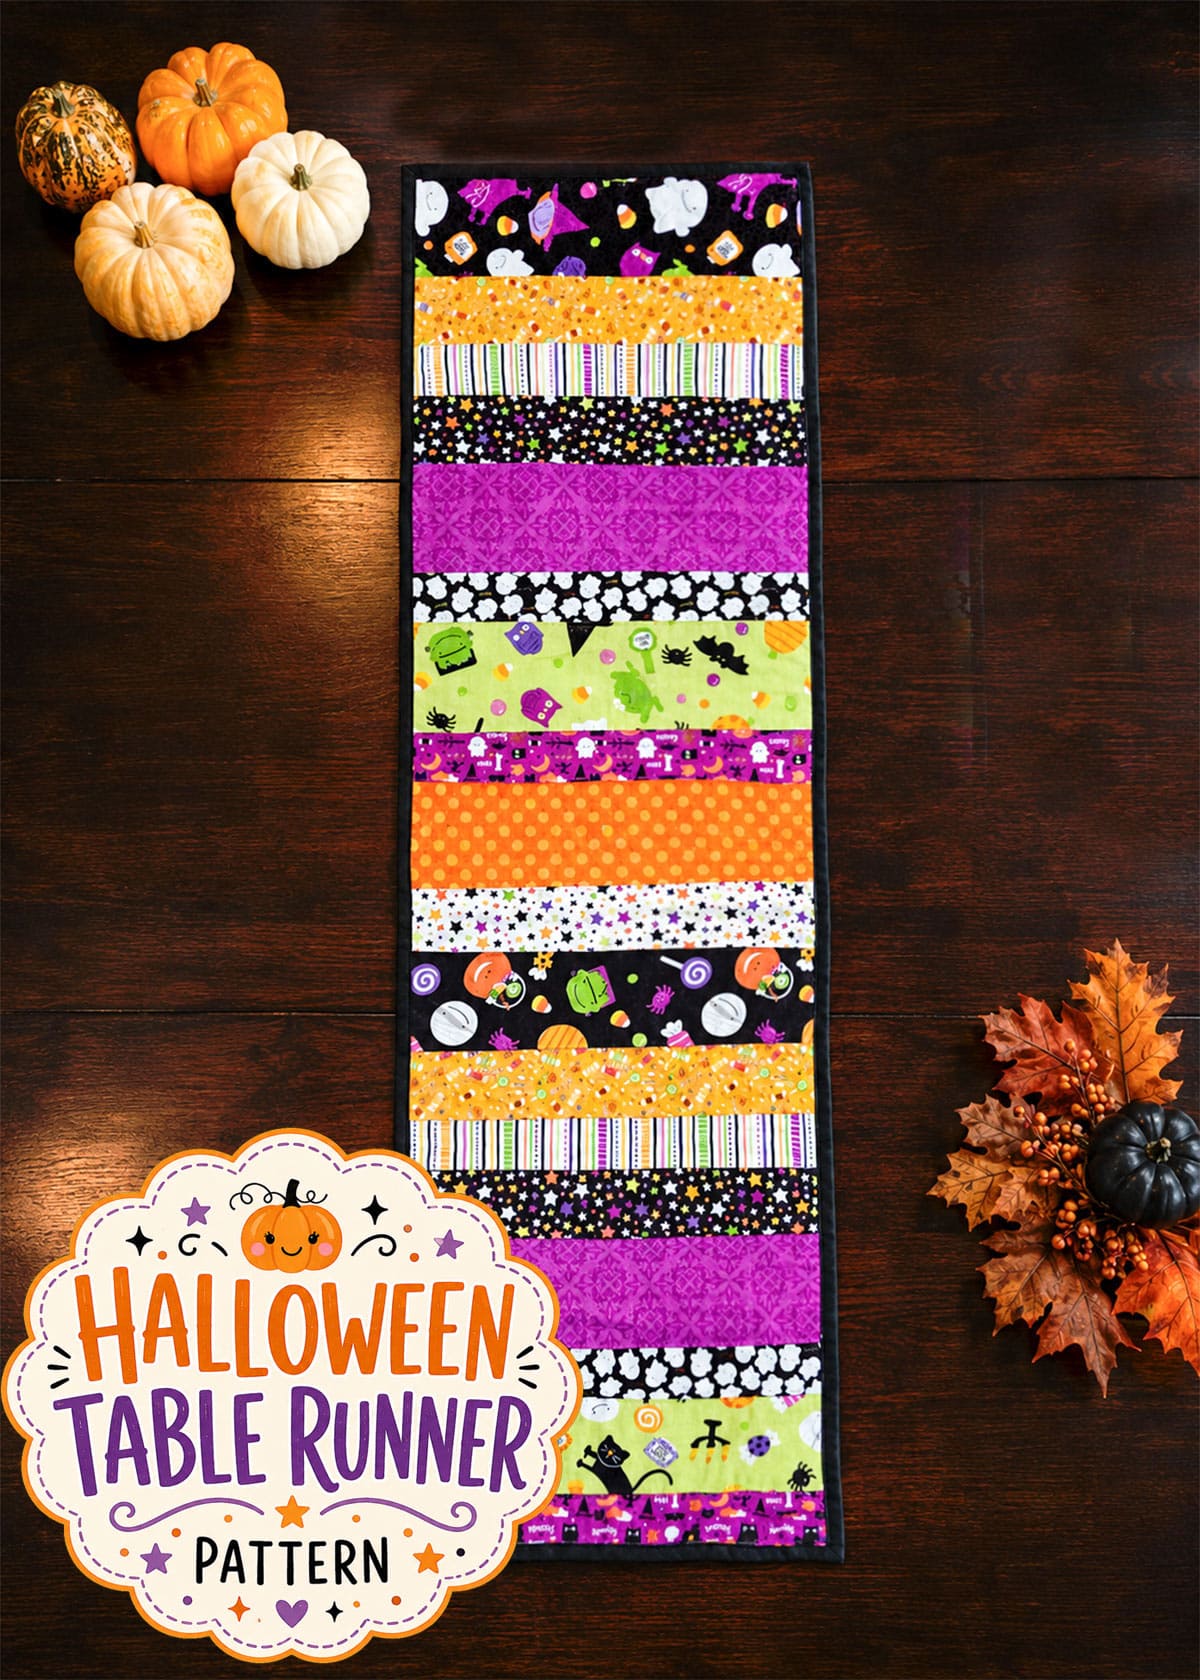
💌 Save this article
Free Table Runner Pattern
I originally made this table runner years ago after finding the most adorable fat quarter set, Trick or Treat by Doodlebug Designs for Riley Blake Designs (from way back in 2011!). I loved the fabric so much I bought the Christmas version too!
That fat quarter set really lasted a long time, lol, and I have made several projects using bits and pieces of it: this table runner, this Halloween dress for my daughter; you will also find quite a bit of the orange and black pieces in my Jack-o’-lantern quilt pattern, the pillows in this post, and also in this diy halloween candy tote bag.
At the time I made this table runner, I was planning to make my daughter a quilt, so I wanted to practice my quilting skills on something small and easy first. This little table runner turned out to be the perfect beginner quilting project.

I had already been doing a few fabric-piecing projects to work on my sewing skills, including these upcycled patchwork shorts, this patchwork tunic top, and my bandana tablecloths, so piecing the strips together wasn’t difficult.
And honestly, I didn’t make this project complicated at all. This is basically a simple strip-pieced table runner: I played around with the fabrics until I found a combination I liked, cut them into strips of varying widths, and started sewing them together.
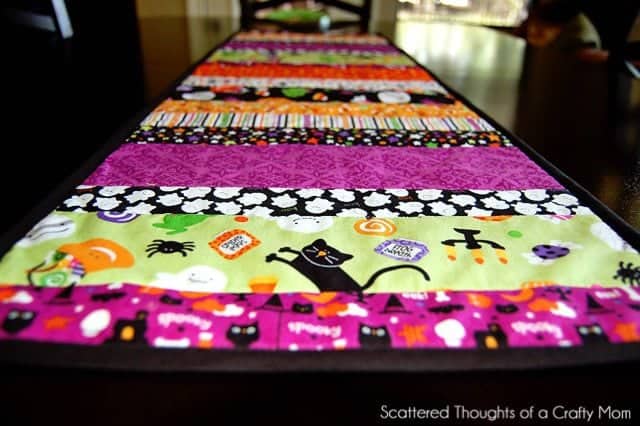
No quilt blocks. No points to match. No complicated pattern.
If you can sew a straight seam, you can make this table runner!
The finished runner measures approximately 12 1/2 inches wide by 40 inches long, making it a great small project for practicing basic quilting techniques without committing to a full-size quilt.
Why You’ll Love This Halloween Table Runner
- Beginner-friendly and very forgiving
- Great for scraps, fat quarters, or coordinating fabric bundles
- No complicated quilt blocks or points to match
- Strip widths don’t have to be exact
- Small enough to finish fairly quickly
- A great way to practice piecing, quilting, and binding
- Easy to customize for any holiday just by changing the fabrics
Variations & Ideas
This pattern is super flexible, so have fun with it!
- Use up your scraps: Your strips don’t have to start out 13 1/2 inches long. Piece smaller scraps together end-to-end, then trim them to size. The extra seams only add to the scrappy look.
- Use fat quarters: This is a great way to use up leftover fat quarters or coordinating fabric bundles.
- Try jelly roll strips: Use 2 1/2-inch jelly roll strips as-is, or trim a few narrower to add more variety.
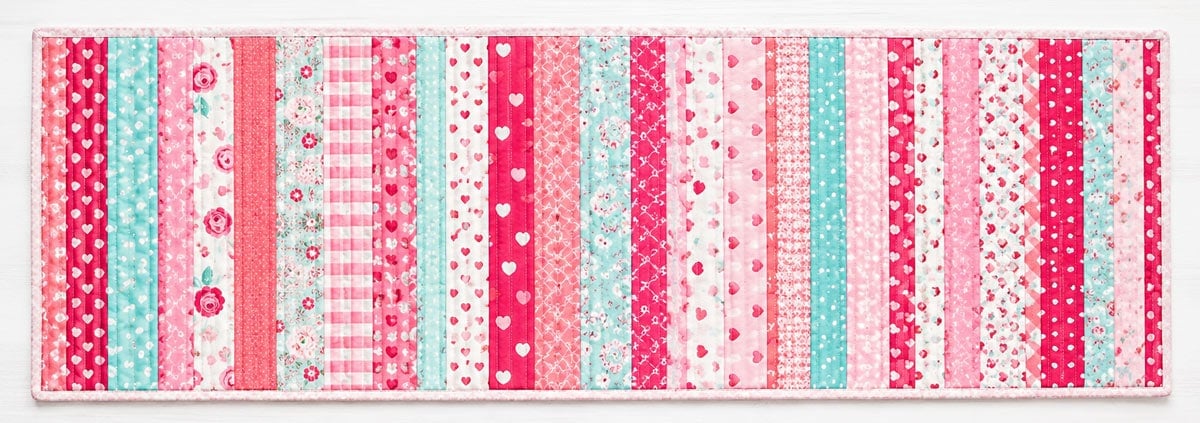
- Make it reversible: Piece a second runner top instead of using a plain backing. How cute would Halloween on one side and Christmas or Valentine’s Day on the other be?
- Make it your own size: Cut longer strips for a wider runner or add more strips to make it longer.
- Change up the holiday: Swap the Halloween prints for Christmas, Easter, patriotic, or fall fabrics. How cute would a Valentine’s Day version be?
Free Halloween Table Runner Pattern
Not that you really need a pattern because the basic construction of this table runner is so super simple, but I put together a free printable version you can keep handy while you sew. You’ll find the link to the free table runner guide in the Supplies section below.
I do recommend reading through the entire tutorial below before starting, especially if you are a beginner. Lots of handy tips and tricks in the written tutorial.
Supplies
To make a finished table runner approximately 12 1/2 by 40 inches, you will need:
- Pattern Template
- About 10 coordinating Halloween quilting cottons
- Thin quilt batting, at least 14 by 42 inches
- About 1/2 yard of backing fabric
- Approximately 3 yards of packaged double-fold bias tape
- Coordinating thread
- Rotary cutter and cutting mat
- Acrylic quilting ruler
- Iron
- Quilting safety pins or basting spray
- Walking foot or stitch-in-the-ditch foot, optional
Products used and recommended in this post
- My Sewing Machine: SINGER 9960 Quantum Stylist, my coverstitch: Janome Cover Pro 1000cpx. My Serger: Brother 1034D 3 or 4 Thread Serger (or you can just use Pinking Shears)
- Rotary Cutter
- I love my large ruler and large cutting mat, but you may prefer to start off with a smaller Cutting set
- Walking foot or stitch-in-the-ditch foot
- Wonder clips (I didn’t use these in the post, but they are just awesome!)
Seam allowance: 1/4 inch
Strip-Pieced Halloween Table Runner Cutting Guide
There really isn’t an exact cutting pattern for this table runner—and that’s part of what makes it so easy.
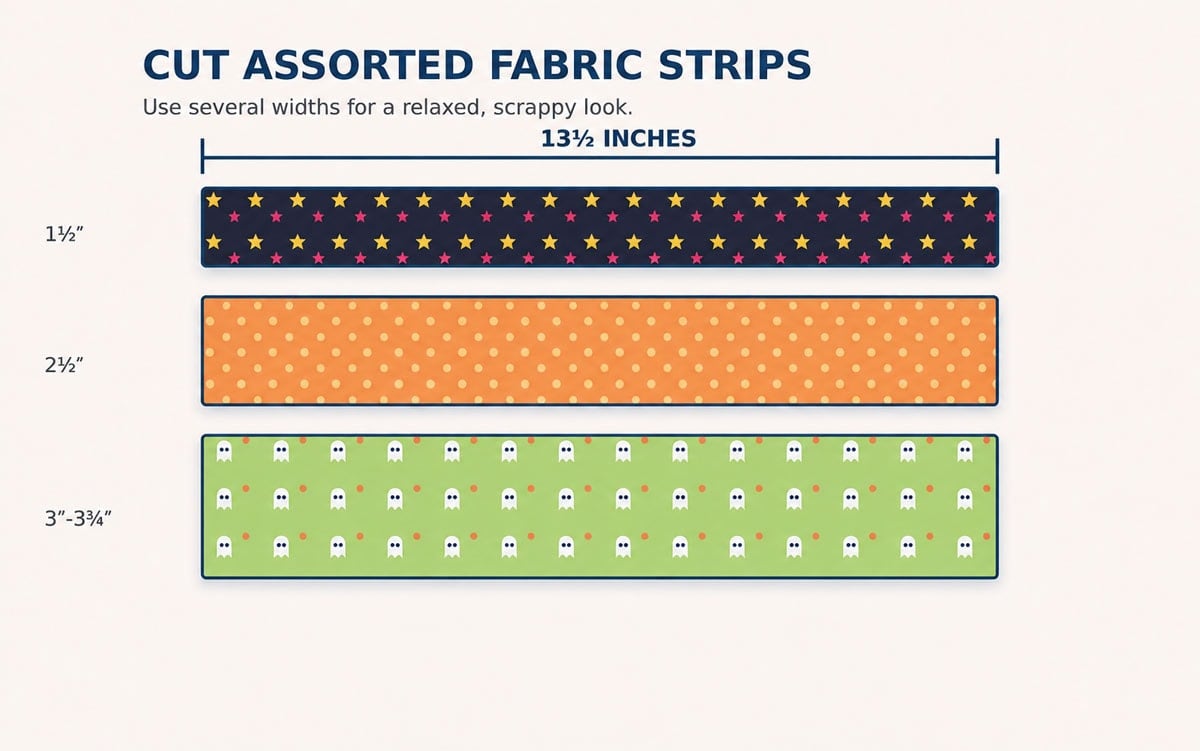
My runner uses about 20 strips made from 10 different Halloween fabrics. I stacked several fabrics together, cut two strips from each, and varied the widths.
Some of the strips on my original runner, including the seam allowance, measure approximately:
- 2 1/2 inches
- 3 inches
- 3 3/4 inches
You can throw in a few narrower strips too. The goal is simply to have a nice mix of narrow, medium, and wider pieces.
For a runner the same width as mine, cut your strips approximately 13 1/2 inches long. We’ll trim the runner to its finished 12 1/2-inch width after it has been quilted.
Don’t worry about making your strip widths match mine exactly. The variation is what gives the runner its cute, scrappy look. And if it turns out to be shorter or longer than 40 inches, that’s no big deal; in fact, you may want to customize it based on the size of your table.
How to Make a Quilted Halloween Table Runner
Step 1: Arrange the Fabric Strips
Lay all of your fabric strips out on a table or the floor and start playing around with the arrangement.
Try to spread similar colors and prints throughout the runner, and alternate the narrower and wider strips until everything looks balanced.
There’s no right or wrong layout here. Just keep moving the fabrics around until you like what you see.
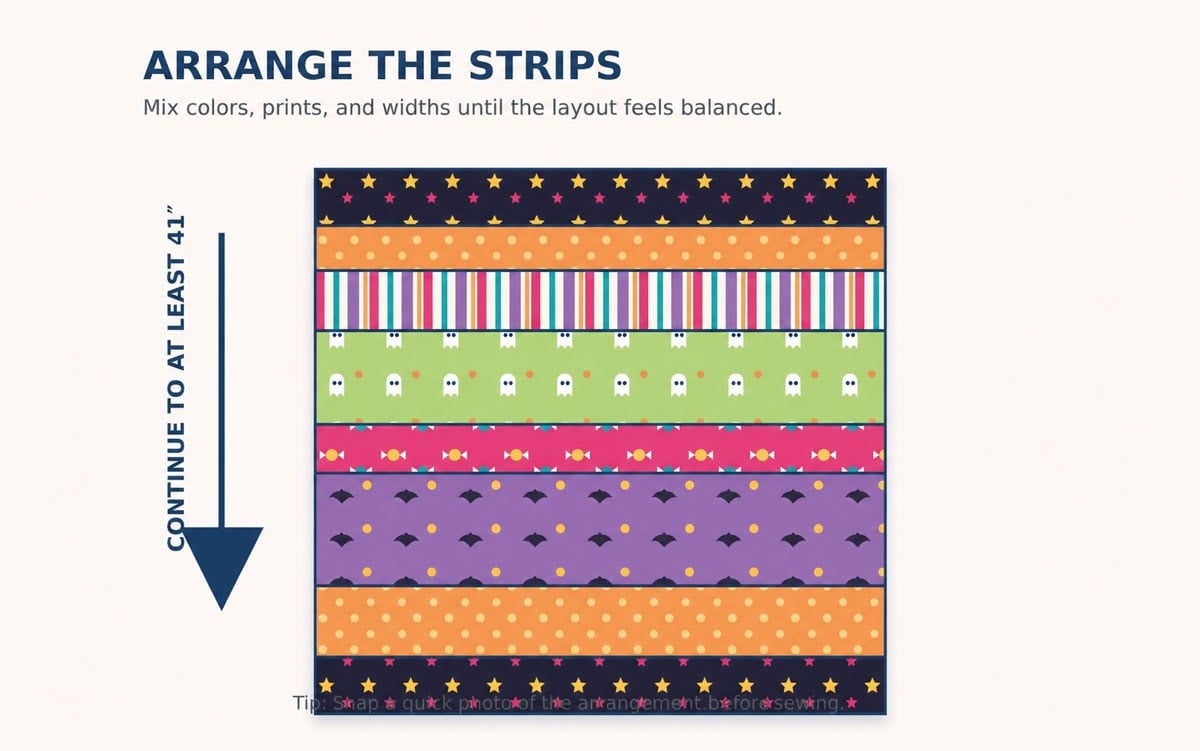
Once you’re happy with the arrangement, take a quick picture with your phone. Then you’ll have something to refer back to if your neatly arranged strips get mixed up while you’re sewing.
Step 2: Sew the Strips Together
Starting at one end, place the first two strips right sides together, matching the long edges.
Sew the strips together using a 1/4-inch seam allowance.
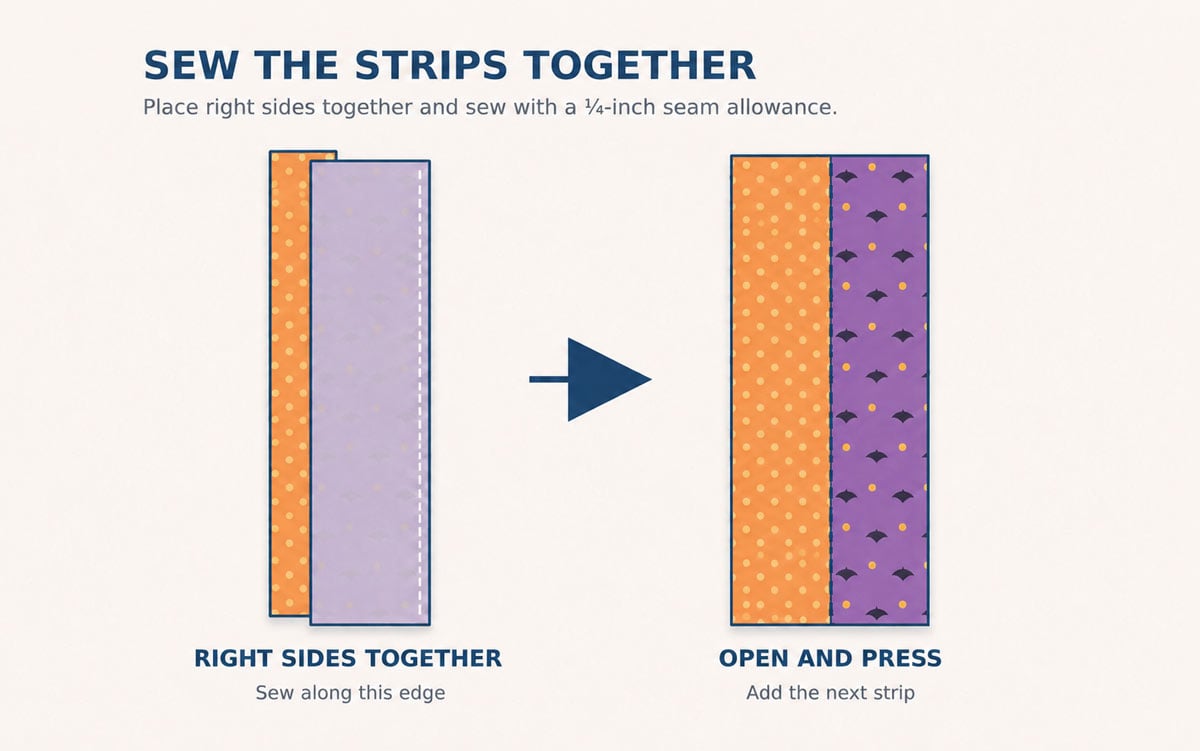
Open them up, add the next strip right sides together, and sew another 1/4-inch seam.
Continue adding strips in order until you have one long patchwork panel.
Aim for an unfinished panel a little longer than 40 inches so you have room to square everything up later.
💡Pro Tip:
As you sew on each new strip, alternate which end you start sewing from. For example, sew the first seam from top to bottom. For the next seam, turn your fabric around and sew from bottom to top. Keep alternating directions as you add the strips. This helps keep the fabric from gradually shifting in one direction, which can cause your finished panel to bow or curve.
Step 3: Press the Seams
Press your seams to one side as you work.
Once all of the fabric strips are sewn together, give the entire table runner top a good press.
Try not to pull or stretch the fabric as you press. Taking a little extra time here will help your runner stay nice and straight and will make the quilting easier.
Good to Know: When I first made this runner, I learned the hard way that well-pressed seams make stitching in the ditch much easier. So learn from me, lol, and give those seams a good press before you start quilting!
Step 4: Make the Quilt Sandwich
Cut the quilt batting and backing fabric slightly larger than your pieced table runner top. About 14 by 42 inches will give you some extra room to work with.
Layer the pieces in this order:
- Backing fabric, wrong side facing up
- Thin quilt batting
- Pieced table runner top, right side facing up
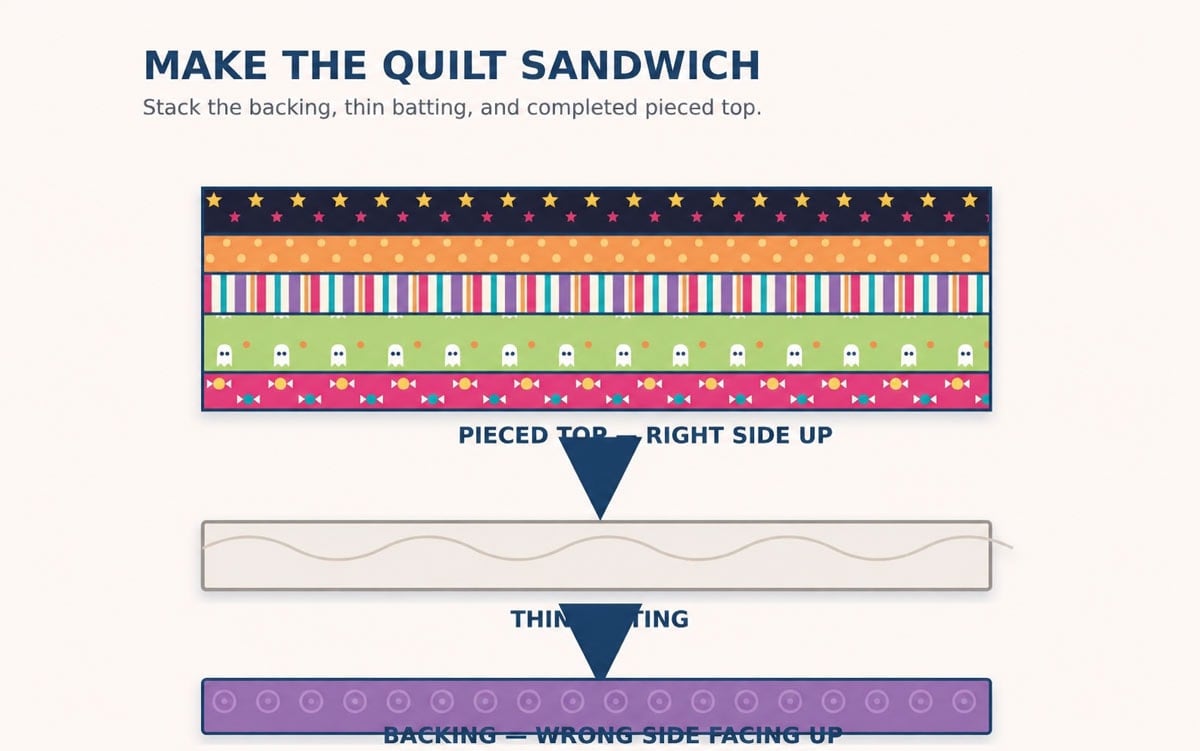
Smooth out all three layers, making sure there are no wrinkles in the backing fabric.
Baste the layers together with quilting safety pins or your favorite temporary basting spray.
Step 5: Quilt the Table Runner
Rather than doing any fancy quilting, I kept this project simple and stitched in the ditch between the fabric strips.
Stitching in the ditch means sewing in the tiny groove right beside the seam where two pieces of fabric meet. The stitches tuck right up against the seam, making them much less noticeable.
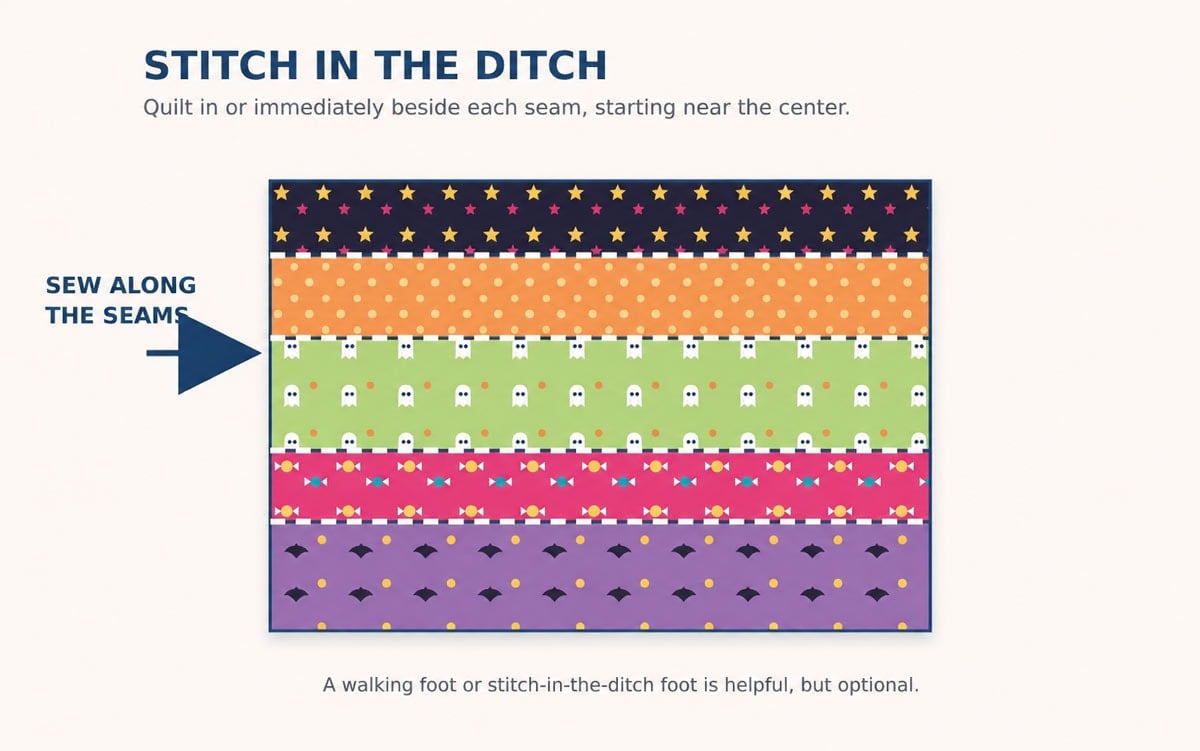
Start near the center of the runner and stitch along the seams between the fabric strips, working your way outward.
Sew slowly and occasionally check the back of your runner to make sure the backing is staying smooth and you aren’t getting any puckers.
💡Pro Tip:
Here’s something I didn’t know when I made my first quilt! If your seam allowances are pressed to one side, stitch just beside the seam on the opposite side—the side without the seam allowance underneath it. The side with the seam allowance underneath sits slightly higher, creating a tiny natural groove, or “ditch,” right beside it for your needle to follow.
And don’t stress if every line isn’t absolutely perfect. Between all those cute Halloween prints, no one is going to notice if your stitching wanders a tiny bit!
Good to Know: The secret to straighter stitch-in-the-ditch seams? A stitch-in-the-ditch foot! Yes, there is such a thing, lol. Just make sure you choose one that fits your sewing machine. A walking foot can also be helpful because it helps feed all three quilt layers evenly through the machine.
Step 6: Square Up and Trim the Runner
Once your quilting is finished, use an acrylic quilting ruler and rotary cutter to trim away the excess batting and backing fabric.
Square up all four sides and trim the finished quilted rectangle to approximately 12 1/2 by 40 inches.
But don’t get hung up on that exact measurement. If your runner ends up 39 inches long or 41 inches long, that’s perfectly fine.
Step 7: Add the Binding
For this table runner, I used store-bought double-fold bias tape for the binding.
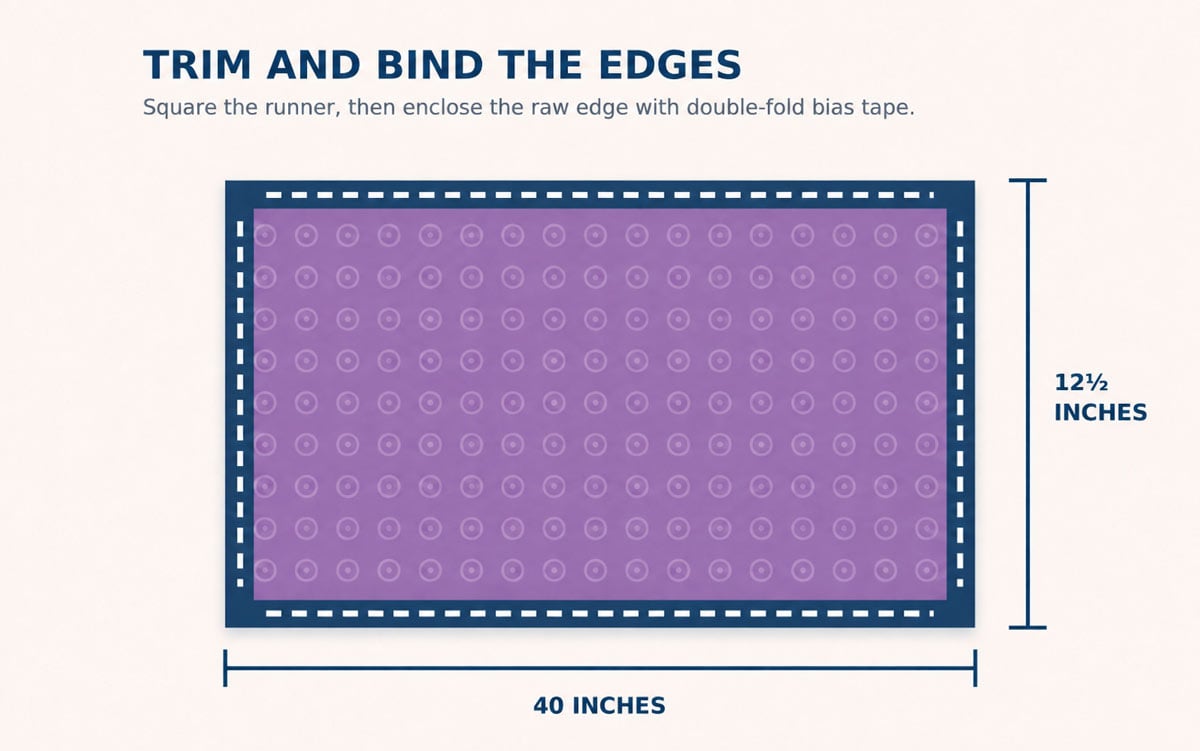
Sandwich the raw edge of the quilt inside the bias tape and stitch close to the inner folded edge, making sure your stitching catches both the front and back of the binding.
When you reach a corner, neatly fold the bias tape around the corner and continue sewing along the next side.
Once you get back to your starting point, overlap the ends and finish stitching the binding in place.
If you plan to make your own binding, I do have a YouTube video on making and attaching the binding here.

Tips for Making Your Halloween Table Runner
- Use quilting cottons that are roughly the same weight.
- Mix large and small Halloween prints for more visual interest.
- Don’t overthink your strip widths—the randomness is part of the design.
- Cut your batting and backing slightly oversized and trim them after quilting.
- Press your seams well before making the quilt sandwich.
- Quilt from the center outward to help prevent shifting.
- If the backing starts to pucker, stop and smooth the layers before continuing.
- Most importantly, don’t worry about perfection. This is a very forgiving project!
How to Make a Different Size Table Runner
One of the nice things about this Halloween table runner pattern is how easy it is to customize.
- To make the runner wider, simply cut your fabric strips longer.
- To make it longer, add more fabric strips.
For example, if you want a finished runner about 15 inches wide, cut your strips around 16 inches long. If you want a 48-inch-long runner, just keep adding strips until your pieced top is a little longer than 48 inches.
Then quilt and trim the runner to your desired finished size.

Frequently Asked Questions
Is this a good project for a beginning quilter?
Absolutely! In fact, this was one of my own first quilting projects. You get to practice several basic quilting skills—piecing, making a quilt sandwich, straight-line quilting, and binding—but on a small, manageable project.
Can I use a jelly roll to make this table runner?
Yes! Standard jelly roll strips are 2 1/2 inches wide. You can use them exactly as they are, or trim some of the strips to different widths to recreate the more varied, scrappy look of my runner.
Do the fabric strips need to be cut on the bias?
No. The Halloween fabric strips are regular straight-grain cuts. The bias tape is only used around the outside edge of the runner as binding.
What kind of batting should I use?
I recommend a thin cotton or cotton-blend quilt batting for a table runner.
You want enough batting to give the quilting some definition without making the runner so thick that dishes and decorations won’t sit flat on the table.
Do I need a walking foot?
No. A walking foot can definitely be helpful because it feeds all three layers of the quilt through the machine more evenly, but it isn’t required.
What is a stitch-in-the-ditch foot?
A stitch-in-the-ditch foot has a guide that follows along the seam between two pieces of fabric, helping you keep your stitching right in the “ditch.”
It isn’t required for this project, but after discovering one existed, I found it made stitching in the ditch much easier!
Can I use traditional quilt binding instead of bias tape?
Definitely. I used packaged double-fold bias tape because it was quick and easy, but if you prefer traditional quilt binding, you can absolutely use that instead.
A Fun Beginner Halloween Quilting Project
All these years later, I still pull this little runner out for Halloween—which makes me especially glad I started with something simple rather than talking myself out of trying quilting because it seemed too complicated.

There was no elaborate pattern involved. I grabbed a bunch of Halloween fabrics I loved, cut them into strips, arranged them until they looked cute, and started sewing.
If you’ve been wanting to try quilting but aren’t quite ready to tackle a full quilt, this Halloween table runner is such a fun place to start. You’ll get to practice the basic quilting techniques and end up with a colorful handmade Halloween decoration you can use year after year.
Don't miss any more posts!

Stay connected by following along on Pinterest, Facebook, Instagram, and TikTok for more fun content, easy recipes, free sewing patterns, and creative inspiration.
How to sew the strip pieced quilted table runner
Make this easy Halloween table runner pattern with fabric scraps or fat quarters. A fun beginner quilting project with a free printable!
Materials
- Pattern Template
- About 10 coordinating Halloween quilting cottons
- Thin quilt batting, at least 14 by 42 inches
- About 1/2 yard of backing fabric
- Approximately 3 yards of packaged double-fold bias tape
- Coordinating thread
- Rotary cutter and cutting mat
- Acrylic quilting ruler
- Iron
- Quilting safety pins or basting spray
- Walking foot or stitch-in-the-ditch foot, optional
Instructions
Step 1: Arrange the Fabric Strips
- Lay all of your fabric strips out on a table or the floor and start playing around with the arrangement.
- Try to spread similar colors and prints throughout the runner, and alternate the narrower and wider strips until everything looks balanced.
- There’s no right or wrong layout here. Just keep moving the fabrics around until you like what you see.
- Once you’re happy with the arrangement, take a quick picture with your phone. Then you’ll have something to refer back to if your neatly arranged strips get mixed up while you’re sewing.
Step 2: Sew the Strips Together
- Starting at one end, place the first two strips right sides together, matching the long edges.
- Sew the strips together using a 1/4-inch seam allowance.
- Open them up, add the next strip right sides together, and sew another 1/4-inch seam.
- Continue adding strips in order until you have one long patchwork panel.
- Aim for an unfinished panel a little longer than 40 inches so you have room to square everything up later.
Step 3: Press the Seams
- Press your seams to one side as you work.
- Once all of the fabric strips are sewn together, give the entire table runner top a good press.
- Try not to pull or stretch the fabric as you press. Taking a little extra time here will help your runner stay nice and straight and will make the quilting easier.
Step 4: Make the Quilt Sandwich
- Cut the quilt batting and backing fabric slightly larger than your pieced table runner top. About 14 by 42 inches will give you some extra room to work with.
- Layer the pieces in this order:
- Backing fabric, wrong side facing up
- Thin quilt batting
- Pieced table runner top, right side facing up
- Smooth out all three layers, making sure there are no wrinkles in the backing fabric.
- Baste the layers together with quilting safety pins or your favorite temporary basting spray.
Step 5: Quilt the Table Runner
- Rather than doing any fancy quilting, I kept this project simple and stitched in the ditch between the fabric strips.
- Stitching in the ditch means sewing in the tiny groove right beside the seam where two pieces of fabric meet. The stitches tuck right up against the seam, making them much less noticeable.
- Start near the center of the runner and stitch along the seams between the fabric strips, working your way outward.
- Sew slowly and occasionally check the back of your runner to make sure the backing is staying smooth and you aren’t getting any puckers.
Step 6: Square Up and Trim the Runner
- Once your quilting is finished, use an acrylic quilting ruler and rotary cutter to trim away the excess batting and backing fabric.
- Square up all four sides and trim the finished quilted rectangle to approximately 12 1/2 by 40 inches.
- But don’t get hung up on that exact measurement. If your runner ends up 39 inches long or 41 inches long, that’s perfectly fine.
Step 7: Add the Binding
- For this table runner, I used store-bought double-fold bias tape for the binding.
- Sandwich the raw edge of the quilt inside the bias tape and stitch close to the inner folded edge, making sure your stitching catches both the front and back of the binding.
- When you reach a corner, neatly fold the bias tape around the corner and continue sewing along the next side.
- Once you get back to your starting point, overlap the ends and finish stitching the binding in place.

Cuteness overload! Love this!!!
Thanks for the great idea of the table runner. Was wondering what to do with all the little strips of Halloween material I had around. Keep up the good work.
Thanks!
I'm crazy about all the colorful & whimsical fabrics you chose for this project. Great job! Thanks so much for linking up to Fabulous Friday. Please do come back next week!
Warmly, Michelle
Really fun and festive! Happy Halloween
this is adorable. Thanks for sharing your tips because I have plans to try a few things that would require the lovely "stitch in the ditch" and I am NOT good at remembering the *iron seams open* step so maybe now after your post I'll remember!
~Jenn
http://housewivesofriverton.blogspot.com
Thanks for linking to Take-A-Look Tuesday – you were featured today!
–Mandy, http://www.SugarBeeCrafts.com
Super cute! Thanks for sharing it at Weekend Craft Soiree! 🙂
I love the colors! This is great. I'm coming over from Tuesday's link party. I'm your newest follower from http://www.createdbycori.blogspot.com Would you follow me back?
That runner is so cute! Love the fabric choices.