Wine Bottle Tote Bag Pattern and Tutorial
Disclosure: This post may contain affiliate links. As an Amazon Associate, I earn from qualifying purchases.
I have the cutest Wine Bottle Tote Bag pattern and tutorial to share with you today. It’s so easy to make and adds the perfect touch to any bottle you plan to gift! Plus it’s another great craft to make and sell!

Wine Bottle Tote Bag Pattern and Tutorial
I’ve been busy this week with Summer/Memorial Day-type food posts. I have my ribs recipe, my Strawberry Trifle and now the perfect tote/gift bag for my wine bottle.
Summer pool party here I come!
I have another wine bottle gift bag tutorial that I did about 8 years ago. (wow, time flies.) That bag is quick, easy and cute, but we can all agree there are times when a fancier gift bag is more appropriate, lol?
And this bag is definitely adorable. I made this wine bottle tote with fabric from my stash, (you might recognize the fabric from this cross body tote bag project) but for the holidays I plan to use a solid fabric and bust out my embroidery skills with a few of these amazing wine bottle themed embroidery patterns.

This is also a great craft to make and sell!
Products used and recommended in this Easy Tote Bag Project:
- Duck or Canvas Fabric (I used a print from this line at Fabric.com, but my print is no longer available.) Just a tip about the fabric I linked to. Hobby Lobby sells a specialty made line of this fabric too. They have some of the same prints for what seems like a less expensive price, but Hobby Lobby’s fabric is only 42 inches wide and Fabric.com’s line is 54″ wide. 42 inches wide is fine for this type of project, but I would not want the HL one for curtains or other applications a where more fabric is needed.
- Rotary cutter
- Ruler and mat
- Cordless iron
- heavy duty needle
- Fray Check

Other crafts to make and sell:
- Eyeglass Case
- Pillowcase Dress
- Catnip Toy
- Small Pet Kerchief
- Stretchy Headbands
- Apron Pattern (child and adult sizes)
Ready to see how the tote bag is made? Read on!
How to make a Wine Bottle Tote Bag:
Materials needed
- 1/2 yard heavy duty fabric (canvas, cotton duck)
- Iron, ruler
- Basic Sewing supplies
Instructions:
Step 1: Cut pattern pieces.
Cut the following:
Strap: 15 inches long by 3.75 wide
Side: 13.5 wide by 12.5 high
Bottom: 4.5 inch circle (print one here or trace something. I traced a roll of masking tape.)

Step 2: Sew the strap.
Fold strap in half, press.

Open fabric, fold one edge in toward center, press.

Fold other edge in toward middle, press.

Fold edges together, press gain.

Sew a straight stitch, right along the edge of the strap.

Step 3: Sew the side piece and enclose seam.
Fold top of side piece over .25 inch, press. Fold edge over another inch and press again. Use 3 of 4 pins to hold folded edge in place.

Fold side edges WRONG SIDES TOGETHER. Sew along the edge with a .25 inch seam allowance.

Flip fabric wrong side out and press seam flat.
Sew along the edge with a .375 seam allowance. (this will enclose the seam and prevent fraying.)
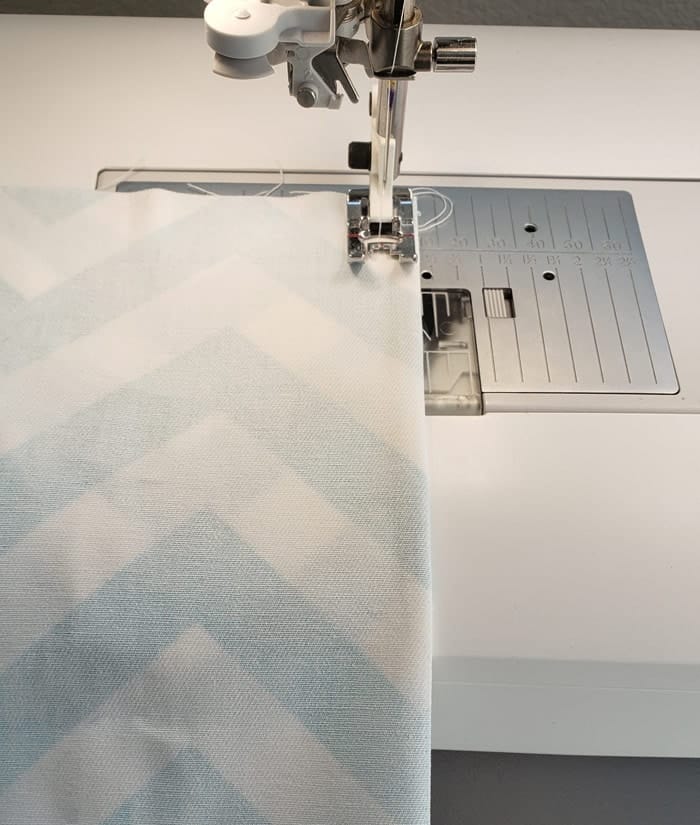
Enclosed seam:

Step 4: Add the strap for the wine bottle tote bag.
Use a ruler and mark the center point of the tote with a pin.

Slip the strap into the top seam and pin into place. (Line up the edge of the strap with the top edge of the tote,)

Flip the tote around and repeat the above stp for the other side. Take care to ensure the strap is not twisted. (You’ll need to roll up the bottom and send the strap around the bottom, that way when we flip it right side out the strap will be on the other side.)

Sew along the lower edge of the top seam. You will have to work the fabric around the machine. Be very careful to not sew over a pin or through the other side of the tote.

Next, fold the strap to the top and top stitch around the top edge.

Take care not to stitch through the other side.

Step 5: Attach the bottom to the tote bag.
Line up the bottom piece with the side piece, right sides together and start pinning. Because you are fitting a circle to a straight line, you will need to use lots of pins (smaller ones worked better, fyi) and ease the pieces together. (Kind of like doing a set in sleeve.)

Sew the bottom with a .25 inch seam allowance.

If you would like, you can finish the bottom seam with your serger or zig zag stitch. Since it is at the very bottom, I opted to leave it unfinished.
Tim your strings, add a little Fray Check and the wine bottle tote bag is done!

This Wine Bottle Tote Bag Pattern is a Free Pattern and comes with step by step instructions. Easy to make and turns and bottle of wine into the perfect gift! (It's a great craft to make and sell too.)Wine Bottle Tote Bag Tutorial Instructions
Materials
Tools
Instructions
Step 1: Cut pattern pieces.
Step 2: Sew the strap.
Step 3: Sew the side piece and enclose seam.
Step 4: Add the strap.
Step 5: Attach the bottom.

Don't miss any more posts!


Hi, i dont know if i am missing something, but i cant see the free pattern of the wine bottle tote bag? WHere do i print it out?
The pattern is just a set of cutting instructions. (Look under step one – cut pattern pieces.) You can cut your own circle or print the circle template I provided. The link is there under step 1.
This worked Fantastic! Made 1 change – I boxed the bottom instead of fussing with circles (1″). Wine bottle still fits in great. I have a ton of duck canvas leftover from a donation and I might make a bunch of these.
I absolutely loved your instructions!! Thank You! ?. If I could give this blog stars ⭐️…..it would definitely be 5 stars ⭐️. Clear, and precise and your pictures were up close. I am signing up for your emails! I used to sew 35 years ago in my teenager years.
Thank you Noelle! I needed that today, lol.