

Free T-Shirt Pattern for Girls, Sizes 3–14
Disclosure: This post may contain affiliate links. As an Amazon Associate, I earn from qualifying purchases.
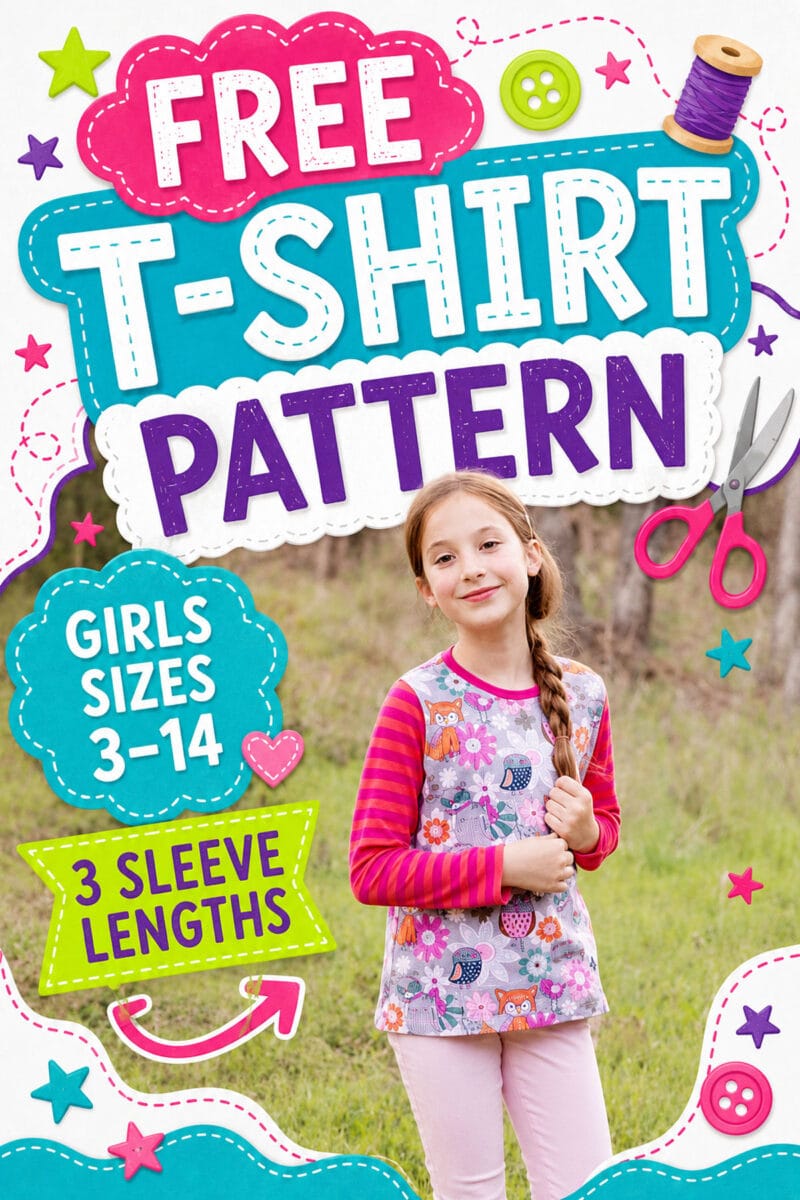
Sew a comfortable, everyday top with this free T-shirt pattern for girls in sizes 3–14. The printable PDF pattern includes short, three-quarter, and long sleeves, plus step-by-step instructions for sewing the shirt with knit fabric.

💌 Save this article
Free Girls’ T-Shirt Pattern, Sizes 3–14
When I originally designed this pattern, I tested multiple versions of the shirt width, length, sleeve style, and armhole depth before settling on the final fit. The result is an easy-to-wear girls’ T-shirt that isn’t too slim or too boxy, with a slightly longer length to help keep little bellies covered during everyday play.
It’s also a great basic pattern to customize. Use contrasting sleeves, add an appliqué or vinyl design, turn it into a dress, or swap in one of the sleeve variations I’ve shared below.

Why You’ll Love This Free T-Shirt Pattern
-
Sizes 3–14 – One downloadable pattern covers a wide range of girls’ sizes.
-
Three sleeve lengths – Choose short, three-quarter, or long sleeves.
-
Comfortable everyday fit – The shirt is not overly slim or boxy and has a slightly longer length for better coverage.
-
Easy to customize – Mix fabrics, add an appliqué or vinyl design, or use the pattern as the starting point for a dress.
-
No serger required – Sew the entire T-shirt with a regular sewing machine using a stretch stitch or narrow zigzag.
About the Girls’ T-Shirt Pattern
This basic T-shirt pattern is a great blank slate for creative customization. Use contrasting fabric for the sleeves, add an appliqué or heat-transfer vinyl design, or start with the basic bodice and turn it into an entirely different top or dress.
Looking for another style? Try the flutter-sleeve T-shirt pattern or use the free T-shirt dress pattern to make a comfortable knit dress.

Where to Get the Free T-Shirt Pattern
- Visit the free T-shirt pattern page in my pattern shop.
- Enter your name and email address, then complete the free checkout.
- After checkout, you’ll be redirected to a page where you can access and save the PDF pattern. A link to the pattern will also be sent to the email address you entered.
Important: Save the PDF to your computer and open it in Adobe Acrobat Reader before printing. Do not print directly from your browser or an online PDF viewer, since this can cause the pattern to print at the wrong size.


Supplies for the Free T-Shirt Pattern
- Free T-shirt pattern
- Up to 3/4 yard of lightweight or medium-weight stretch knit fabric with good recovery
- Rib knit or another stretchy knit fabric for the neckline binding
- Ballpoint or jersey sewing-machine needle
- Coordinating thread
- Sewing machine
- Iron and spray starch
- Basic sewing supplies, including fabric scissors or a rotary cutter, pins or clips, a ruler, and a cutting mat
Important fabric note: The neckline binding must stretch enough to fit comfortably over the child’s head. Rib knit with 50% to 70% stretch and good recovery works best. If your binding fabric has less stretch, use the adjusted binding instructions later in the tutorial.
Helpful Sewing Tools
You only need a regular sewing machine to make this T-shirt. However, these are some of the sewing and cutting tools I use and recommend:
- Sewing machines: I use the SINGER 9960 Quantum Stylist for regular sewing and the Janome CoverPro 1000CPX for professional-looking knit hems.
- Seam finishing: A Brother 1034D serger makes quick work of knit seams, but it is completely optional. You can also finish or trim seams with pinking shears.
- Cutting tools: A rotary cutter, large acrylic ruler, and large cutting mat make cutting knit fabric easier. If you are just getting started, a smaller rotary cutting set is another option.
- Marking and finishing: I like the Dritz Dual Purpose Marking Pen for transferring pattern marks and Fray Check for small areas that need extra reinforcement.
- For sewing knits: Use ballpoint needles to help prevent skipped stitches and fabric damage. A Singer walking foot or universal walking foot can also help feed stretchy fabric evenly.
Girls’ T-Shirt Pattern Size Chart
The pattern includes girls’ sizes 3 through 14. Use the child’s height and weight as a starting point, then compare the finished chest and length measurements with a T-shirt that currently fits her well.
The finished chest measurement is the circumference of the completed shirt, not the child’s body measurement. All chart measurements are in inches and pounds and are based on a standard children’s size chart.
| Size | Height | Weight | Finished Length | Finished Chest |
|---|---|---|---|---|
| 3 | 38.5 | 32 | 16 | 23.125 |
| 4 | 41.5 | 36 | 16.85 | 23.75 |
| 5 | 44.5 | 42 | 17.75 | 24.375 |
| 6 | 46.5 | 48 | 18.25 | 25.75 |
| 7 | 51 | 60 | 19 | 27.25 |
| 8 | 53 | 66 | 19.75 | 28.5 |
| 10 | 55 | 74 | 20.75 | 29.5 |
| 12 | 57.5 | 84 | 21.125 | 30.75 |
| 14 | 60 | 96 | 23.75 | 32.375 |
Fit tip: If the child falls between sizes, compare the pattern’s finished measurements with a well-fitting shirt before choosing a size. You can also blend between sizes if needed.
Tips for Sewing Knit Fabric
- Use the right needle: A ballpoint or jersey needle passes between the knit fibers instead of piercing them, helping prevent skipped stitches and fabric damage.
- Choose a stitch that can stretch: Use a narrow zigzag, stretch stitch, lightning-bolt stitch, or serger for the seams. Test your stitch on a scrap of fabric before sewing the shirt.
- Do not stretch the fabric as you sew: Let the machine feed the fabric naturally. Pulling it through can create rippled or wavy seams.
- Stabilize hems before sewing: Spray starch can make curled knit edges easier to press and handle. Wash-away Wonder Tape is also helpful for holding hems in place while you sew.
- Use a stretch-friendly hem: Finish the sleeves and bottom edge with a narrow zigzag, twin ballpoint needle, coverstitch, or another stitch that will stretch with the fabric.
- Prevent the fabric from being pulled into the needle plate: Place a small piece of tissue paper underneath the fabric at the beginning of the seam. Tear it away when you are finished sewing.
- Try a walking foot if the layers shift: A walking foot helps feed the top and bottom layers evenly and can reduce stretched or wavy seams.
Before You Sew: Neck Binding and Seam Allowances
The neck binding included with the pattern is designed for rib knit with 50% to 75% stretch and good recovery. The Fabric Fairy carries several rib-knit options.
If your binding fabric has less stretch, use one of these two methods:
- In-the-round method: Measure the shirt’s neckline and cut a binding strip 15% shorter than that measurement. To calculate the length, multiply the neckline measurement by 0.85. Before attaching it, use this finger stretch test to make sure the binding will stretch comfortably over the child’s head.
- Flat method: Sew only one shoulder seam. Fold the binding in half lengthwise and attach it from one end of the neckline to the other. Trim away any excess binding, then sew the second shoulder seam closed. This method is easier with less-stretchy fabric, although it creates a slightly bulkier seam at the shoulder. You can see a similar method in my girls’ knit tank top tutorial.
Seam allowance: A 3/8-inch seam allowance is included in the pattern. The sleeve and bottom hems are 1/2 inch.
How to Sew the Girls’ T-Shirt
Step 1: Print and Assemble the Pattern
- Save the PDF pattern to your computer and open it in Adobe Acrobat Reader.
- Select Actual Size or 100% in the print settings. Do not select “Fit” or “Scale to Fit.”
- Cut around the outer gray edge of each printed page.
- Arrange the pages by matching the colored circles. Align the gray boxes edge to edge without overlapping them, then tape the pages together.
- Cut out the size you need. Print the bodice pages twice if you want separate front and back pattern pieces, or print them once and trace a second copy using tracing paper and a tracing wheel.
Step 2: Cut the Pattern Pieces
1. Fold the knit fabric with the greatest amount of stretch running from side to side. Place the front and back pattern pieces on the fold as marked.
2. Cut one front bodice on the fold, one back bodice on the fold, two sleeves, and one neck-binding piece.

3. If your rib knit or binding fabric has 50% to 75% stretch, use the neck-binding pattern piece. If it has less stretch, use one of the adjusted binding methods explained in the section above.
Step 3: Sew the Shoulder Seams
1. Place the front and back bodice pieces right sides together and align the shoulder edges. If you are attaching the neck binding in the round, sew both shoulder seams using a 3/8-inch seam allowance. If you are using the flat binding method, sew only one shoulder seam for now.

Step 4: Attach the Neck Binding
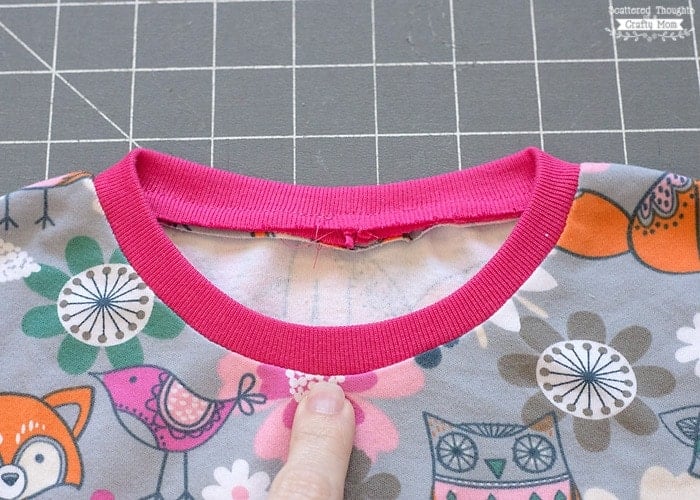
The directions and photos below show the in-the-round binding method. If you are using the flat method, attach the binding across the open neckline, trim away the excess, and then sew the remaining shoulder seam before continuing to Step 5.
1. Fold the neck binding in half lengthwise with the wrong sides together and press.

2. Unfold the binding and place the short ends right sides together. Sew the ends with a 3/8-inch seam allowance, then trim the seam allowance to reduce bulk.

3. Refold the binding along the pressed crease. Divide both the binding and the shirt neckline into four equal sections and mark each section with a pin or fabric clip. Because the back neckline is shallower than the front, the side marks may sit slightly closer to the shoulder seams.

4. Match the quarter marks on the binding with the quarter marks on the neckline. Align the raw edges and pin or clip the binding evenly around the neckline.

5. Sew the binding to the neckline with a 3/8-inch seam allowance. Gently stretch the binding between the quarter marks as you sew, but do not stretch the shirt neckline. Take your time and keep the raw edges aligned.

6. Press the binding and seam allowance away from the neckline. For a more finished look, topstitch close to the binding seam to help the seam allowance lie flat.
Step 5: Hem and Attach the Sleeves
1. With the sleeve still flat, fold the bottom edge 1/2 inch toward the wrong side and press. Spray starch or wash-away Wonder Tape can help keep a curling knit edge in place.
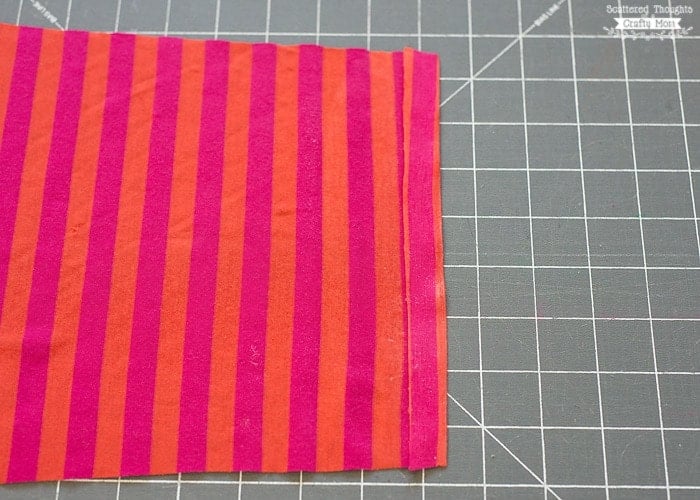
2. Sew the sleeve hem with a narrow zigzag, twin ballpoint needle, coverstitch, or another stretch-friendly stitch. Repeat with the second sleeve.
3. Keep the shirt open and place one sleeve against the armhole with the right sides together. Match the center of the sleeve cap with the shoulder seam, then align and pin or clip the remaining edges.
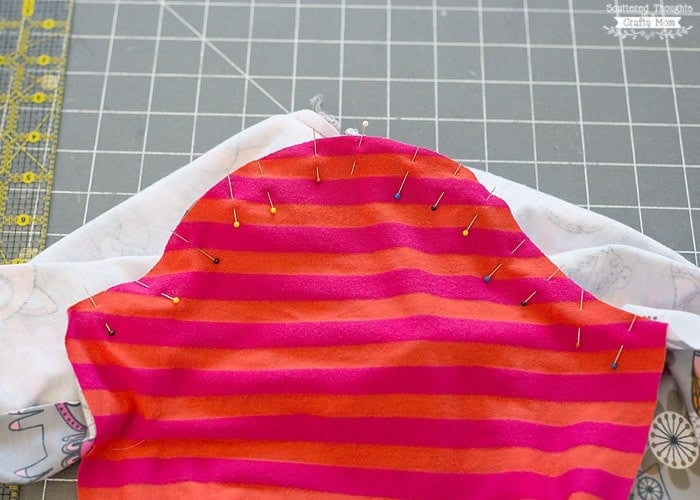
4. Sew the sleeve to the armhole using a 3/8-inch seam allowance. Repeat with the second sleeve.
Step 6: Sew the Side Seams and Hem
1. Fold the shirt with the right sides together. Match the underarm seams, sleeve edges, and bodice edges. Starting at the sleeve hem, sew one continuous seam down the sleeve and along the side of the shirt using a 3/8-inch seam allowance. Repeat on the other side.

2. Fold the bottom edge of the shirt 1/2 inch toward the wrong side and press. Use spray starch or wash-away Wonder Tape if needed to control curling edges.
3. Sew the hem with a narrow zigzag, twin ballpoint needle, coverstitch, or another stretch-friendly stitch. Give the shirt a final press, and you’re finished!
Give the shirt a final press, and you’re finished!
Did You Make This T-Shirt Pattern?
I’d love to hear how your T-shirt turned out! Please leave a five-star rating and a review in the comments below.
If you share a photo on Instagram, tag me and use #scatteredmompatterns so I can see your project. You can also share your finished shirt in my private Scattered Mom Patterns Facebook group.
Can I sew this T-shirt without a serger?
Yes. Use a regular sewing machine with a ballpoint or jersey needle and a narrow zigzag, stretch stitch, or lightning-bolt stitch. Test the stitch on a scrap of fabric first to make sure the seam stretches without popping.
Why won’t the neckline fit over my child’s head?
The most common cause is binding fabric that does not have enough stretch. The included neck-binding piece is designed for rib knit with 50% to 75% stretch and good recovery. Test the binding before attaching it, and use the adjusted in-the-round or flat binding method if your fabric has less stretch.
What type of knit fabric works best for this pattern?
Choose a lightweight or medium-weight stretch knit with good recovery. Cotton jersey with spandex is a good option for the shirt. For the neckline, rib knit usually provides the stretch and recovery needed for a comfortable fit.
How do I print the pattern at the correct size?
Save the PDF to your computer and open it in Adobe Acrobat Reader. Select Actual Size or 100% in the print settings. Do not select Fit or Scale to Fit, and do not print directly from a browser or online PDF viewer.
What size should I choose if my child is between sizes?
Compare the pattern’s finished chest and length measurements with a T-shirt that currently fits your child well. You can choose the closest size or blend gradually between sizes if her measurements fall into different size ranges.
Looking for More Free Patterns to Sew?

Don't miss any more posts!

Stay connected by following along on Pinterest, Facebook, Instagram, and TikTok for more fun content, easy recipes, free sewing patterns, and creative inspiration.
Free T-shirt Pattern for Girls

Learn how to sew a girl’s T-shirt with this free T-shirt pattern. The PDF pattern is available in sizes 3–14.
Materials
- Pattern
- Up to 3/4 yard stretch knit fabric
- Rib knit with 50% to 75% stretch and good recovery, or another stretchy knit fabric for the neckline. If your fabric has less stretch, follow one of the adjusted binding methods explained in the tutorial.
- Coordinating thread
- Ballpoint/jersey needle
- spray starch/iron
- Wash-away Wonder Tape, optional
Tools
- Sewing Machine
- Basic sewing supplies
Instructions
- Print and assemble the pattern: Save the PDF to your computer and open it in Adobe Acrobat Reader. Print at Actual Size or 100%. Cut around the outer gray edges, match the colored circles, align the pages edge to edge without overlapping, and tape them together. Cut out the size needed.
- Cut the fabric: Fold the knit fabric with the greatest stretch running from side to side. Cut one front bodice on the fold, one back bodice on the fold, two sleeves, and one neck-binding piece. The included binding piece is designed for rib knit with 50% to 75% stretch.
- Sew the shoulder seams: Place the front and back bodice pieces right sides together. For the in-the-round binding method, sew both shoulder seams with a 3/8-inch seam allowance. For the flat binding method, sew only one shoulder seam.
- Attach the neck binding: Fold the binding in half lengthwise and press. For the in-the-round method, sew the short ends together, refold the binding, and divide both the binding and neckline into quarters. Match the marks and sew the binding to the neckline with a 3/8-inch seam allowance, stretching only the binding as you sew. Press and topstitch if desired.
- Hem and attach the sleeves: Fold each sleeve edge 1/2 inch toward the wrong side and sew with a stretch-friendly stitch. With the shirt open, place each sleeve against the armhole with right sides together. Match the center of the sleeve cap to the shoulder seam and sew using a 3/8-inch seam allowance.
- Sew the sides and finish the hem: Fold the shirt right sides together. Starting at the sleeve hem, sew continuously down the sleeve and side of the shirt with a 3/8-inch seam allowance. Repeat on the other side. Fold the bottom edge up 1/2 inch, press, and sew with a stretch-friendly stitch.


I love this pattern and your instructions! I was a little hesitant about how to do the neck binding, but your instructions were excellent and it turned out really nice. My daughter loves her shirt! Thank you for your patterns and instructions.
Do you have a teen size for this shirt?
Just up to size 14
This doesn’t even come close to fitting over my daughter’s head and I’m so frustrated I spent so much time making it.
the recommended fabric for this pattern is a knit fabric with 50 to 70% stretch. Any less than that, I could see you might have an issue.
Thank you so much! I used it today for my daughter’s Book Week costume! Worked perfectly – even upcycled a woman’s shirt to make it! Double win! 🙂
I LOVE,LOVE, LOVE the flutter sleeve. Thank you so much!!!!!
If you are going to do the arms a different pattern what are the length needs in that case?
Can’t wait to try the pattern.